Missions screen
The Missions screen allows you to view and manage your missions. The purpose of a mission is to assign specific people to a task which lasts for a maximum of 24 hours. When a mission is created, typically a case is selected so that all the target phones in the case are available to view on the Sentinel mission map. OSS-ESPA users must be assigned to the mission, even if they are already assigned to the case in OSS-ESPA. They can then monitor the target phones on the Sentinel mission map using all the normal features. Guests, who are not on the OSS-ESPA account, can also be added to a mission allowing them to view the most recent location of the target phones and the most recent location of other units on the mission, however guests only have limited Sentinel mission map features available to them.
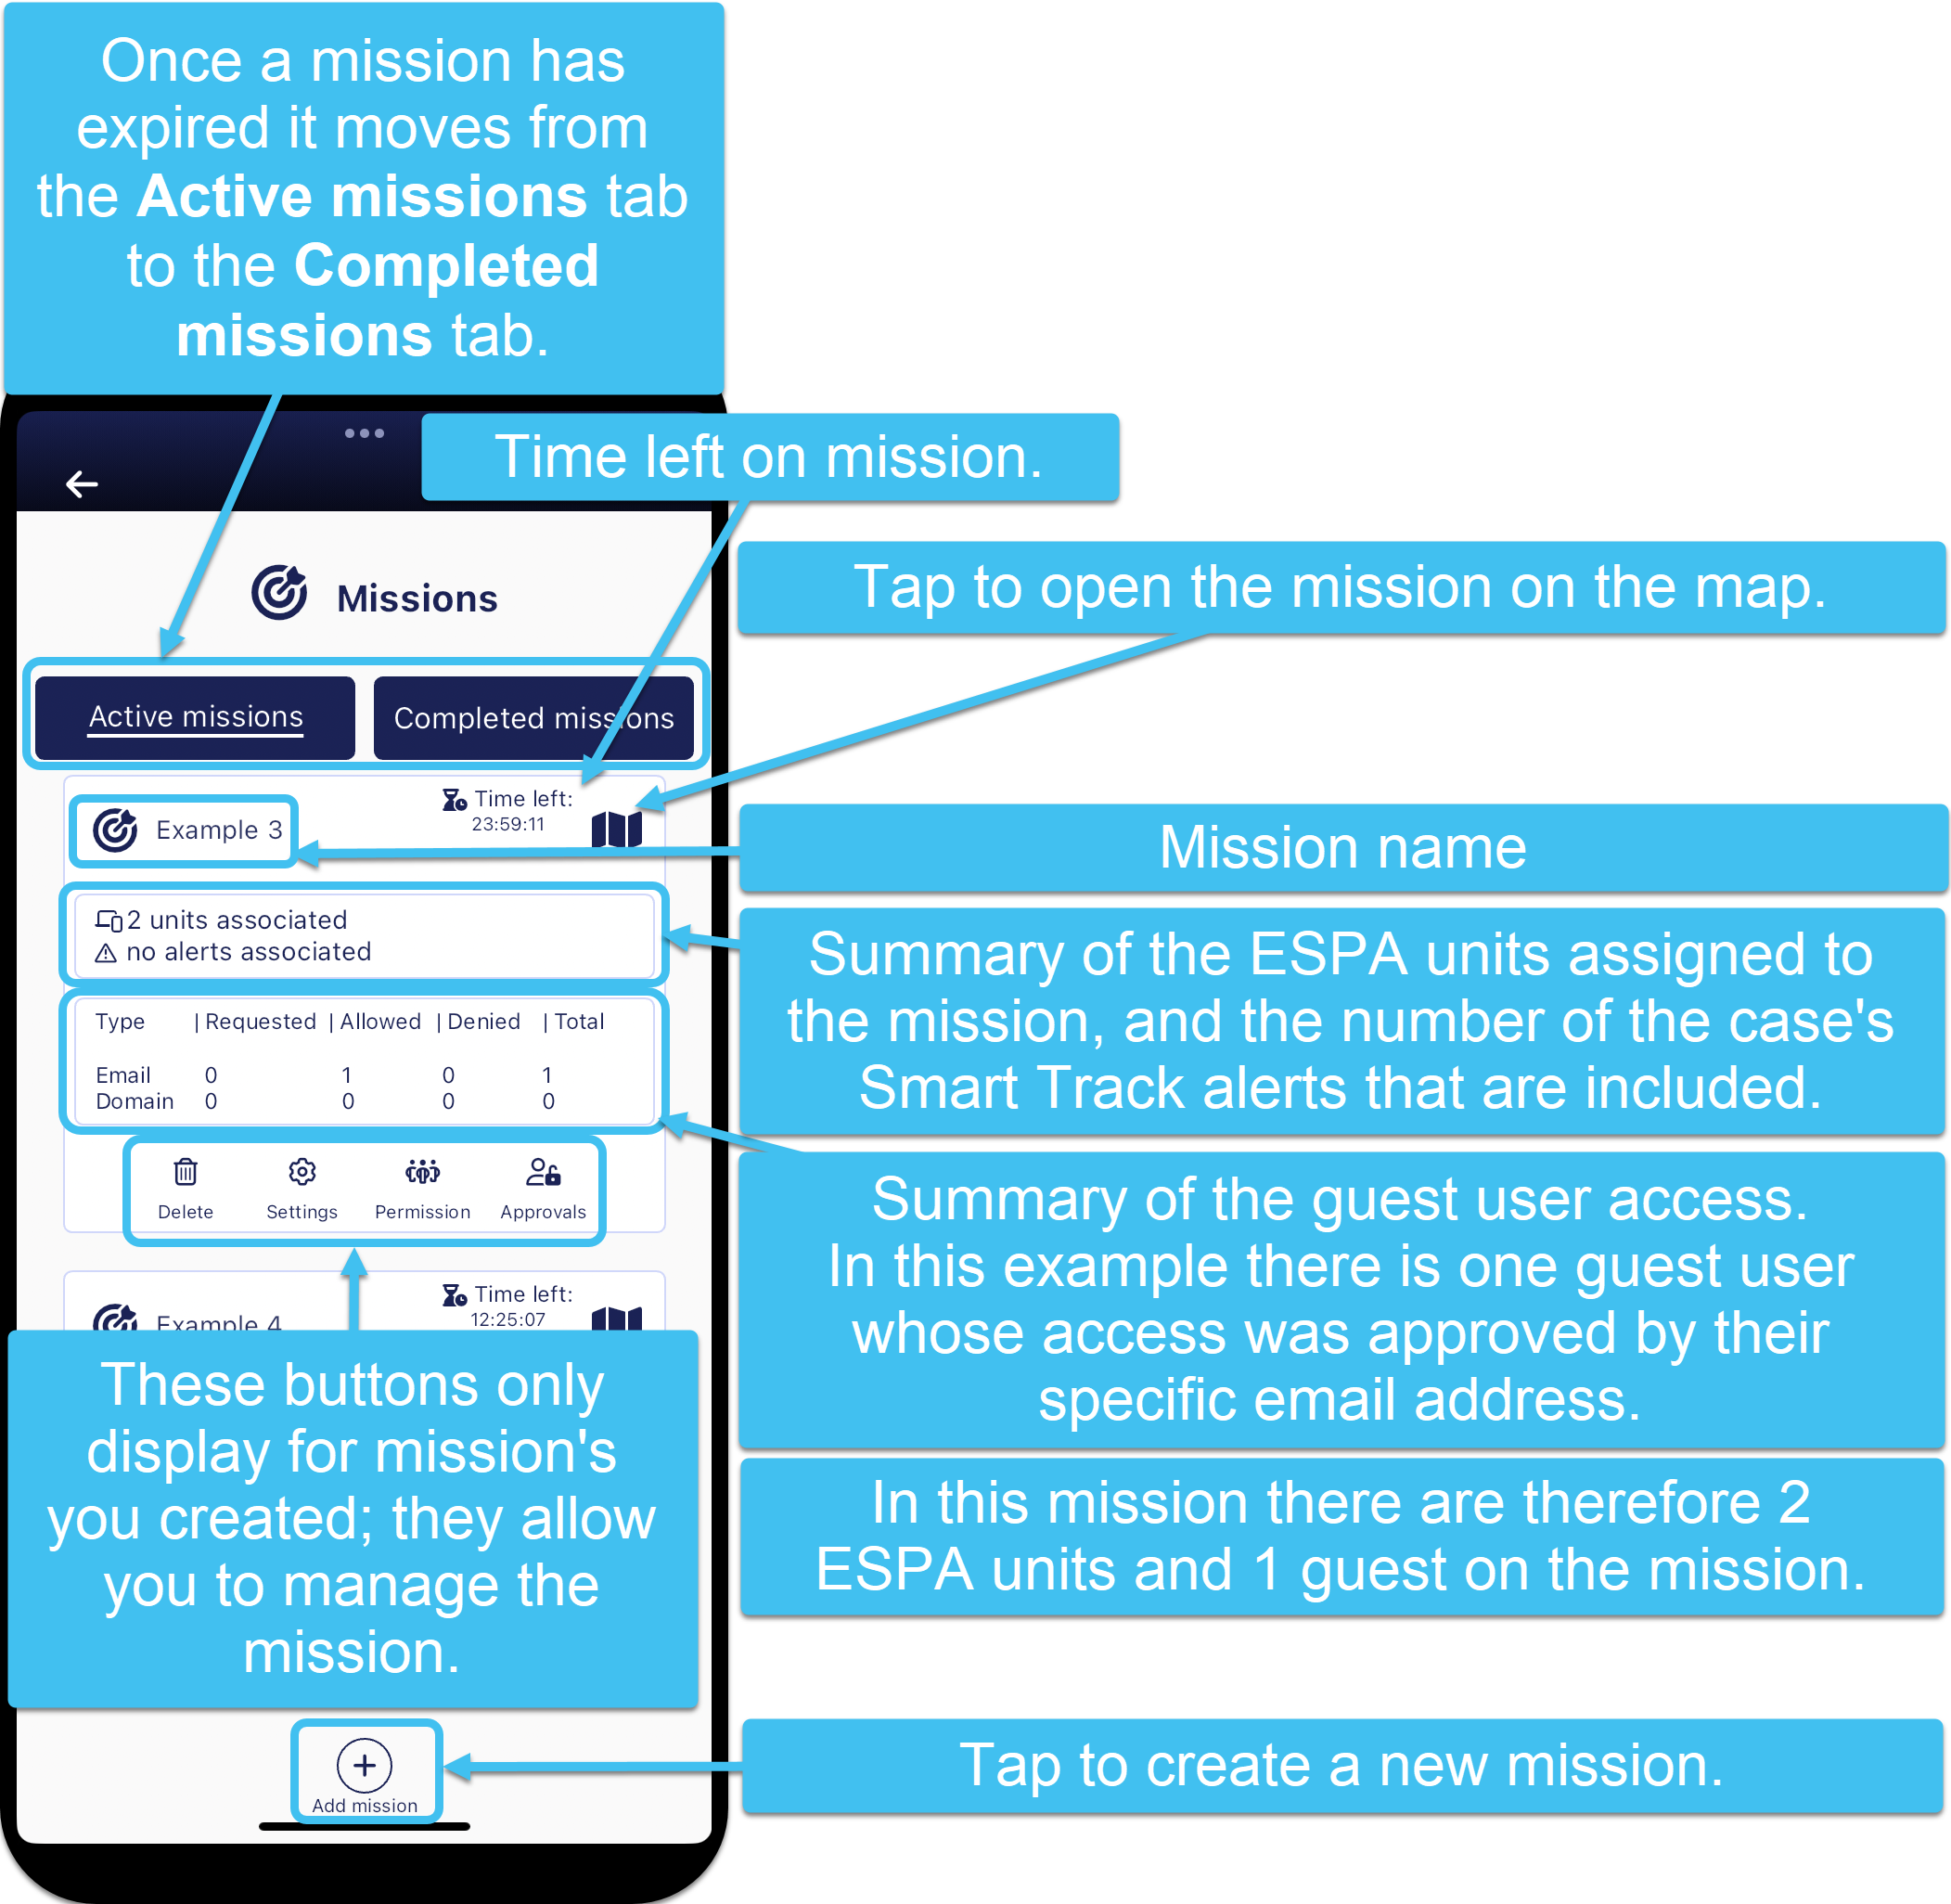
The Missions screen has two tabs listing your active missions and completed missions. When a mission is first created it is displayed on the Active missions tab and then it moves to your Completed missions tab once the time period that the mission's creator selected in Expires is reached. If required, the mission creator can reactivate a completed mission by saving more time to Expires.
As shown in the following graphic, each mission listed displays:
-
the mission name.
-
a countdown timer at the top-right of each mission details how much time a mission has left before it expires.
-
a link
 to open the mission on the Sentinel mission map. This link is not active for completed missions or for guests who have not been approved access to the mission.
 -
the number of units involved in the mission.
-
the number of alerts selected in the mission.
-
the number of guests who have requested to be part of the mission and whether or not their request is approved. This also details if the request was from an individual email address or a domain.
In addition, if you are the person that created the mission then you also have additional buttons that allow you to: delete the mission, manage the mission, allow guest requests to join the mission from selected domains and emails, and approve and deny guest requests.
If you require a step-by-step procedure on managing missions refer to Add and manage missions.
For further information on how guests log in and request access to a mission refer to If you are a guest on a mission.
Tap to open the mission on the Sentinel mission map. Refer to Map screens for further information.

This button is only displayed if you are the mission's creator.
Tap to permanently delete the mission.

This button is only displayed if you are the mission's creator.
Tap to open the Add/Edit mission panel which allows you to edit all the details you originally set for the mission, for example resetting the mission's expiry time and the units included in the mission.

This button is only displayed if you are the mission's creator.
Tap to open the Mission permission panel which allows you to select which guest users can request access to the mission.

This button is only displayed if you are the mission's creator.
Tap to open the Approvals panel which allows you to approve or deny a guest's request to join a mission.