Validation results screen
This topic provides an overview of the Validation results screen and all the settings and buttons on it. However if you require a step-by-step procedure on viewing validation results, refer to How to view ELSUR validation results for a case.
This feature requires option E14 Sentinel. If you do not have this option this feature is not available.
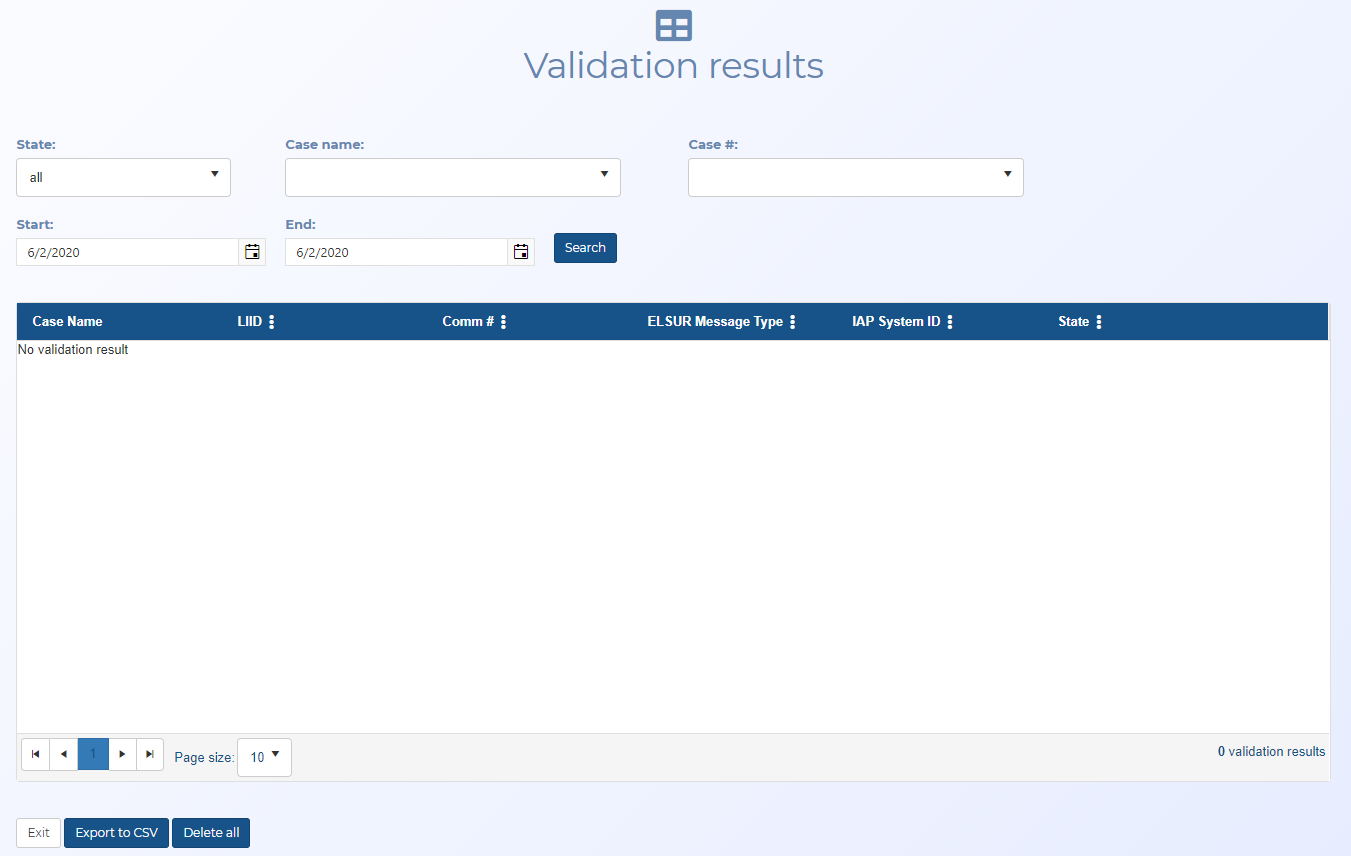
The Validation results screen displays the validation results for the selected case. You can use the filters to select the case, date range and the various result states. When you first open the screen nothing is displayed in the table, you must first select a case, apply any additional filters you require, then click Search.
This screen also allows you to:
- open the Manage case screen for the case. To do this select the name in the result's Case name column. This is useful if you want to add or edit an CASEID (LIID).
- open the validation result on the Message validation tab, where you can then analyze the message in detail.
- export the validation results to a CSV file.
- delete either individually or all at once, the validation results that you no longer require.
Use this filter to search for a specific state. For example you may want to view all the failed results. You can define the pass, fail and warning conditions for the validation results in Result on the Create validation references screen. The "no reference" state indicates that you have not applied any rules to the message type.
Use this filter to display the validation results for the case of interest. You must select either a Case name or a Case #. These settings are coupled, therefore when you set one the other automatically displays the correct case. Only cases that are selected as validation cases, using Validation case, are displayed in this list. Cases can be set as validation cases on the following screens:
Use this filter to display the validation results for the case of interest. You must select either a Case name or a Case #. These settings are coupled, therefore when you set one the other automatically displays the correct case. Only cases that are selected as validation cases, using Validation case, are displayed in this list. Cases can be set as validation cases on the following screens:
Use the calendar to set the start date for the validation results you want to view.
Use the calendar to set the end date for the validation results you want to view.
Click to display the validation results for the case and additional filter conditions you have selected.
When you first open the screen nothing is displayed in the table, you must first select a case, apply any additional filters you require, then click Search. The table then displays the validation results for the filters you applied. From the table you can quickly open the case and open the validation result on the Sentinel screen. The table also allows you to delete individual validation results that are no longer of interest, or all the cases validation results at once.
Use  in the column header to filter or sort your validation results, for example you may want to set the ELSUR Message Type column to filter the displayed validation results by their message type, for further information refer to the Column header menu.
Column header menu
Right-click on any column header in the table to display this menu.

This menu allows you to perform the following:
- Sort ascending: click to sort the column text from A to Z or to sort numbers from smallest to largest.
- Sort descending: click to sort the column text from Z to A or to sort numbers from largest to smallest.
- Clear sorting: click to clear any sorting you have applied using Sort ascending or Sort descending.
-
Columns: select to display a list of which columns you can display on this table.
-
 : use to filter further the results that are displayed in the table. You can filter based on the settings in that column and/or values that occur across the row. When a filter is applied to a column the column header appears in colored italics.
 - Set up to two values that you can filter for using the drop-downs and the data entry field. For example, you could select "Contains" the value "42410" to search for communication number that contain the numbers "42410" in the settings displayed in the table.
- Click Filter when you have entered the required filter information.
- Click Clear filter to remove any filter from the column.
Click to open the Manage case screen for the case.
Click to open the validation result on the Message validation tab.
Click to return to the ELSUR Record Validation screen.
Click to export the validation results in csv format.
Click to delete all the validation results for the selected case.