Managing X-Cases
This topic describes how to create, edit and delete OSS-ESPA X-Cases.
If you require detailed descriptions of the settings in these procedures refer to the Advanced view cases screen.
-
On the main menu click View cases. The Advanced view cases screen opens.
Note, if the Advanced view cases screen does not open, change View cases on the User settings screen to Advanced view.
-
You must now add the data you want to include in your X-Case. You can add complete cases and you can also add specific people, phones, accounts and files.
-
In the FILTERS group, ensure Case filter is set to All cases. This ensures that your search is performed in all cases.
-
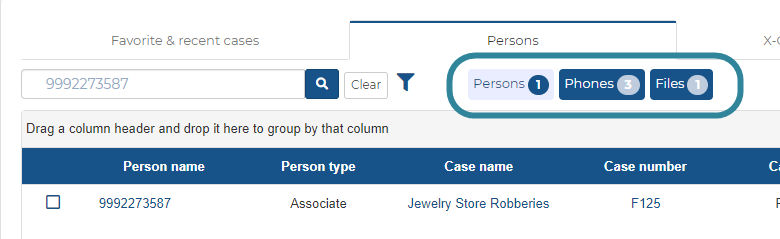
On the Cases tab, use the search filter to locate the data you want to add. The buttons on the top of the tab are then updated to display the amount of data that is found. For example, you may have searched on a phone number and it found one person, one phone and one file.
-
Click the buttons to see each data item and then, for the data you want to include, select the check-box to add the data to the X-Cases selected data tab.
-
On the Cases tab, if a case displays
 then it indicates a target phone number in the case is also in other cases. Click to open a dialog which lists the people in the case that also appear in other cases. Select the person name of interest, to display a list of all the cases they appear in. You can then select the check-box to immediately add the data to the X-cases selected data tab.
Note, if you only want to add case data, and the cases are available on your Favorite & recent cases tab, then you can also use this tab to add data to the X-Cases selected data tab.
-
-
Click the X-Cases selected data tab, ensure the data displayed is what you want to include. You can then either:
- Click
 to save the X-Case. The X-Case is displayed on the Saved X-Cases tab.
 - Click
 to open the ESPA analysis center to analyze the X-Case data.
 -
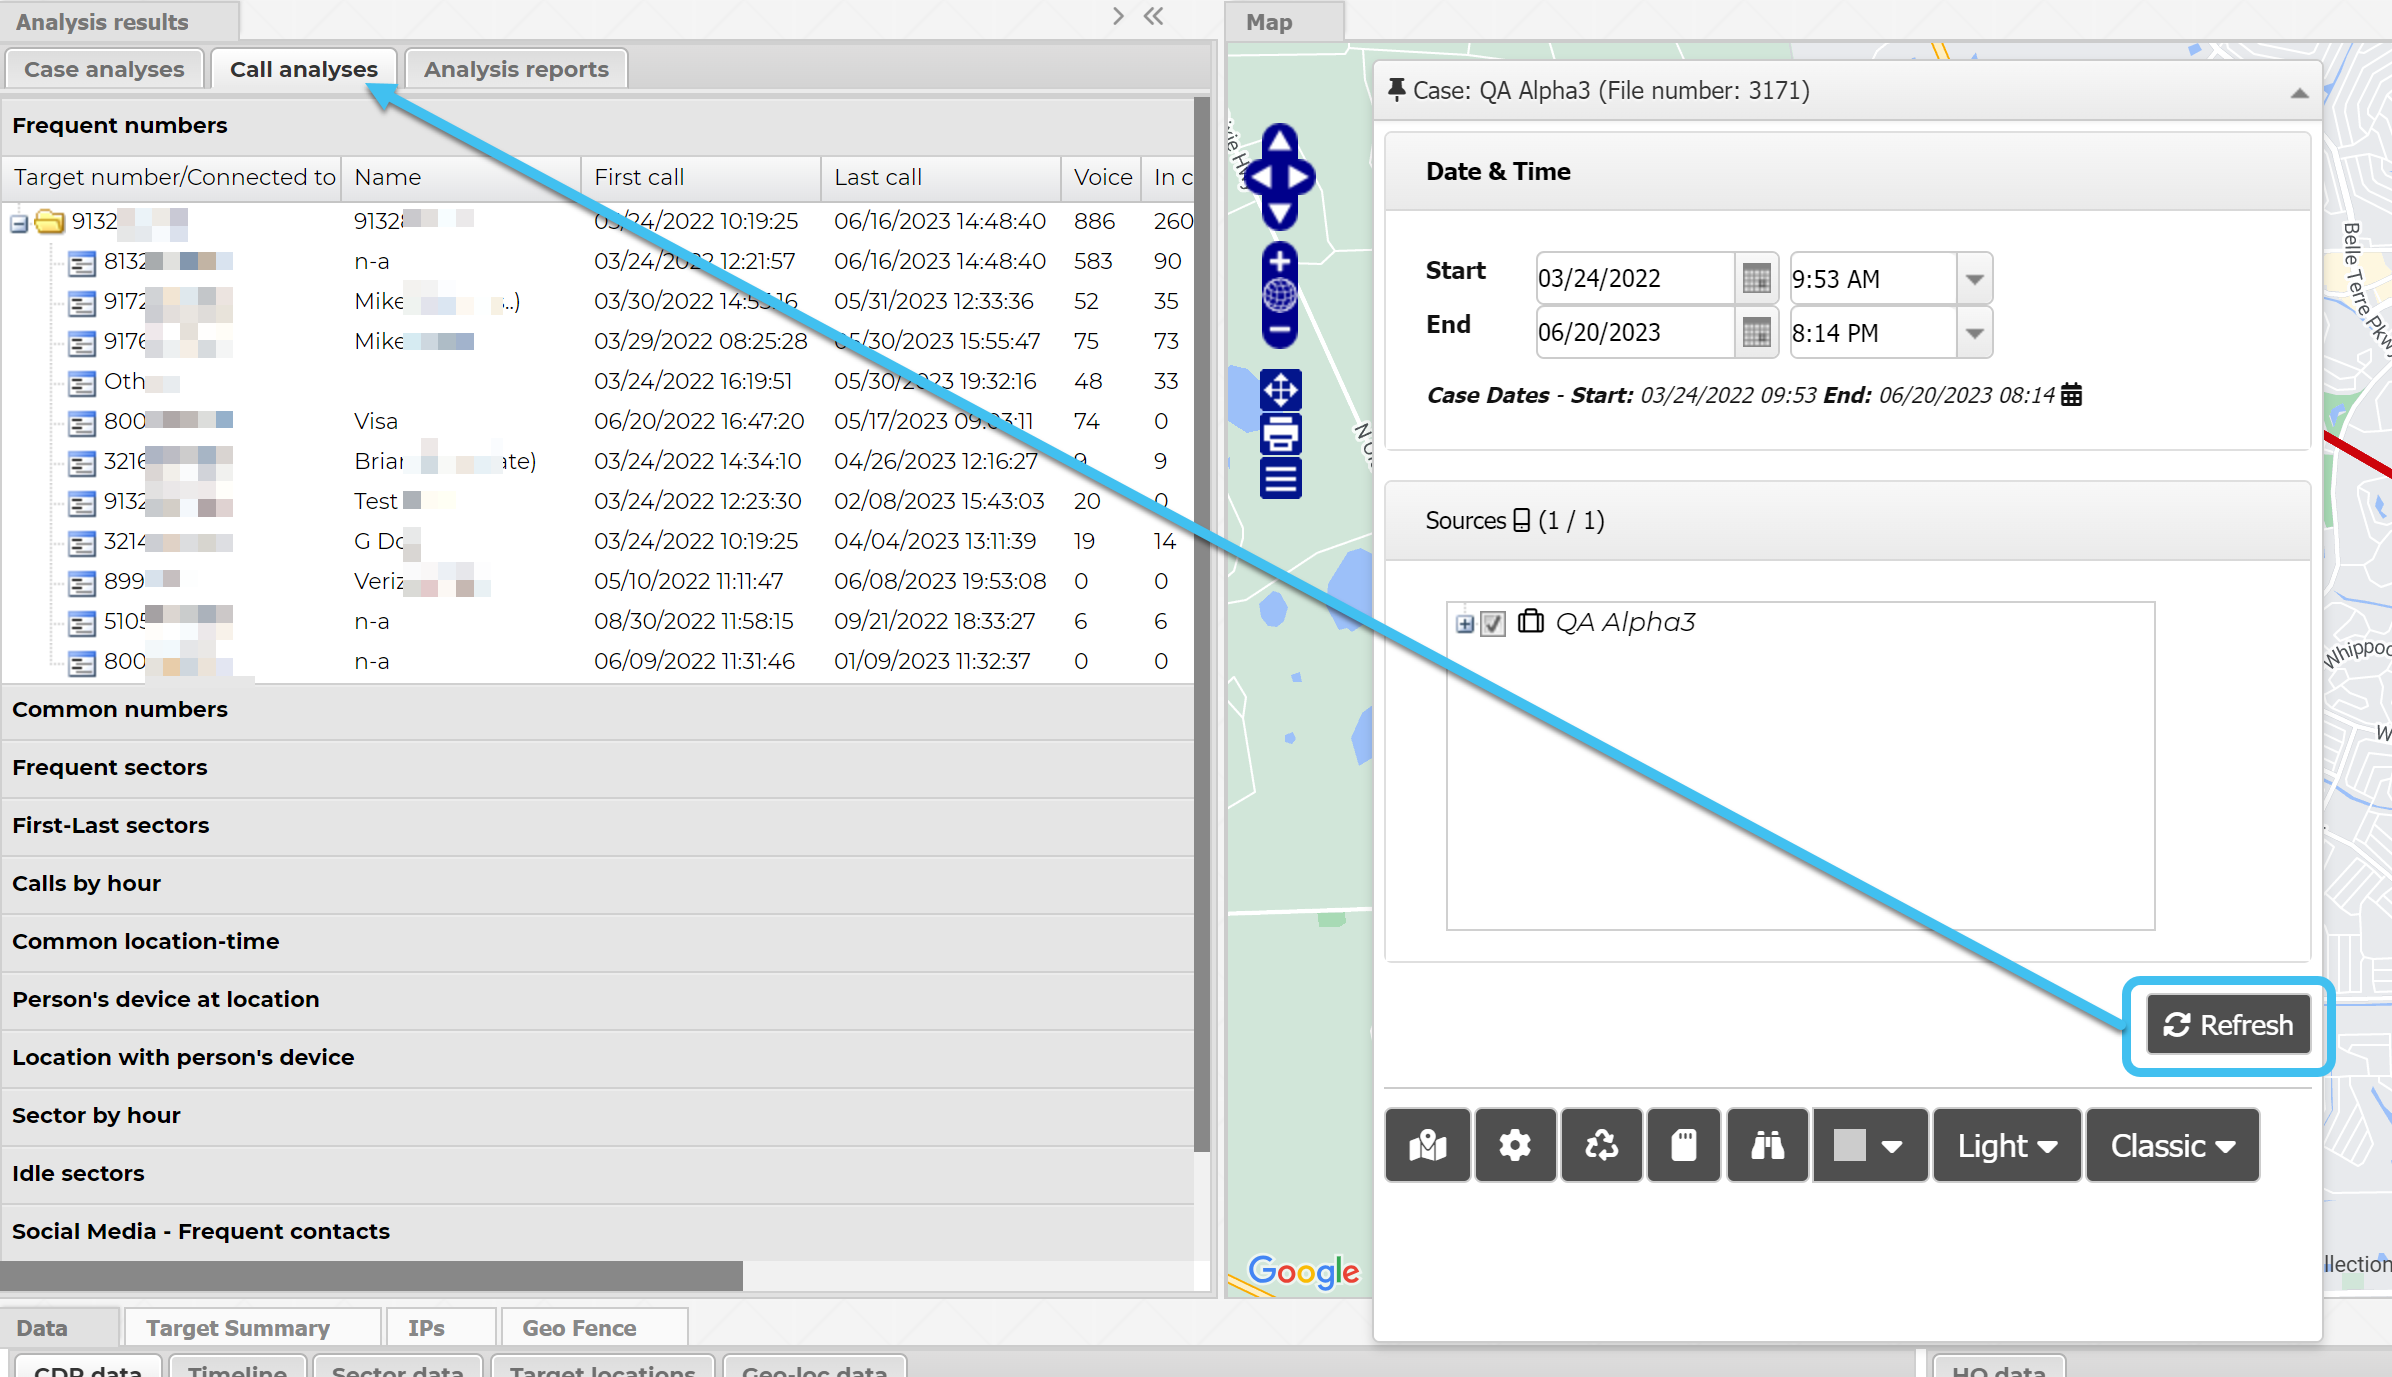
When the ESPA analysis center opens, click Refresh and the combined call analysis results are available on the Call analysis tab.
- Click
-
On the main menu click View cases. The Advanced view cases screen opens.
Note, if the Advanced view cases screen does not open, change View cases on the User settings screen to Advanced view.
- In the FILTERS group, ensure Case filter is set to All cases. This ensures that your search is performed in all cases.
-
On the Cases tab, select Include associates on searching then use the search filter to enter and search for the phone number of interest. The buttons on the top of the tab are then updated to display the amount of data that is found. For example, the phone number search may find 3 people, 3 phones, 6 files and 5 ICW (in contact with) as shown in the following example.

-
You can now create an X-Case summary report and select data to analyze on the ESPA analysis center.
-
To analyze on the ESPA analysis center:
- Click Persons, Phones, Files and ICW to see each data item and then, for the data you want to include, select the check-box to add the data to the X-Cases selected data tab.
-
Click the X-Cases selected data tab, ensure the data displayed is what you want to include. You can then either:
- Click to save the X-Case. The X-Case is displayed on the Saved X-Cases tab.
- Click to open the ESPA analysis center to analyze the X-Case data.
-
When the ESPA analysis center opens, click Refresh and the combined call analysis results are available on the Call analysis tab.
- Click
-
-
You may also want to refer to these other OSS-ESPA features that help you investigate who phone numbers are contact with:
-
Both the People and devices information tab on the People and devices screen, and the People and devices tab on the ESPA analysis center allow you to view all a target's associates. It also allows you to view which targets in other cases the associate has also been in contact with (ICW). For further information refer to Viewing associates and other targets they are in contact with on the People and devices and ESPA analysis center screens.
-
The People and devices analysis tab on the People and devices screen allows you to investigate: regular contacts (frequent contacts), contacts that two or more people have in common (common contacts), and allows you to visualize the links between the targets and their contacts in your current case, and their links to targets and contacts in other cases. For further information refer to Using the people and devices analyses.
-
The Global identifiers screen's Case identifiers tab lists all the cases a phone number is found in. Note, if you are searching on an associate phone number you must ensure you clear the Identifier type filter which is set by default to target phone numbers only. For further information refer to Searching and filtering global identifiers. Also, the Global identifiers screen's Imported DoC tab (Department of Corrections) provides links between offenders' associates and case associates. For further information refer to Managing DoC identifiers.
-
The Advanced view cases screen allows you to perform a search on a phone number and displays all the targets the phone number is in contact with. For further information refer to Searching which targets a number is in contact with.
-
To create a new X-Case from your Favorite & recent cases tab
Note, this procedure is only applicable if you only want to add case data, and the cases are available on your Favorite & recent cases tab.
-
On the main menu click View cases. The Advanced view cases screen opens.
Note, if the Advanced view cases screen does not open, change View cases on the User settings screen to Advanced view.
-
On your Favorite & recent cases tab, select the check-box for each case you want to create an x-case for.
-
Click the X-Cases selected data tab, ensure the data displayed is what you want to include. You can then either:
- Click to save the X-Case. The X-Case is displayed on the Saved X-Cases tab.
- Click to open the ESPA analysis center to analyze the X-Case data.
-
When the ESPA analysis center opens, click Refresh and the combined call analysis results are available on the Call analysis tab.
- Click
-
On the main menu click View cases. The Advanced view cases screen opens.
Note, if the Advanced view cases screen does not open, change View cases on the User settings screen to Advanced view.
-
Click the Saved X-Cases tab.
-
Click the X-Case name you want to edit.
The X-Case opens on the X-Cases selected data tab.
-
If you want to:
-
delete data then click
 .
. -
add data then either click the Favorite & recent cases tab or the Cases tab, and select the appropriate check-box to add the data to the X-Cases selected data tab.
-
-
Once you have finished editing the X-Case, click the X-Cases selected data tab, ensure the data displayed is what you want to include. You can then either:
- Click to save the edited X-Case.
- Click to open the ESPA analysis center to analyze the X-Case data.
- Click
-
On the main menu click View cases. The Advanced view cases screen opens.
Note, if the Advanced view cases screen does not open, change View cases on the User settings screen to Advanced view.
-
Click the Saved X-Cases tab.
-
Click
 for the X-Case name you want to rename.
The Rename X-Case dialog box opens.
-
Enter the new name then click OK.
-
On the main menu click View cases. The Advanced view cases screen opens.
Note, if the Advanced view cases screen does not open, change View cases on the User settings screen to Advanced view.
-
Click the Saved X-Cases tab.
-
For the X-Case you want to delete, click
.