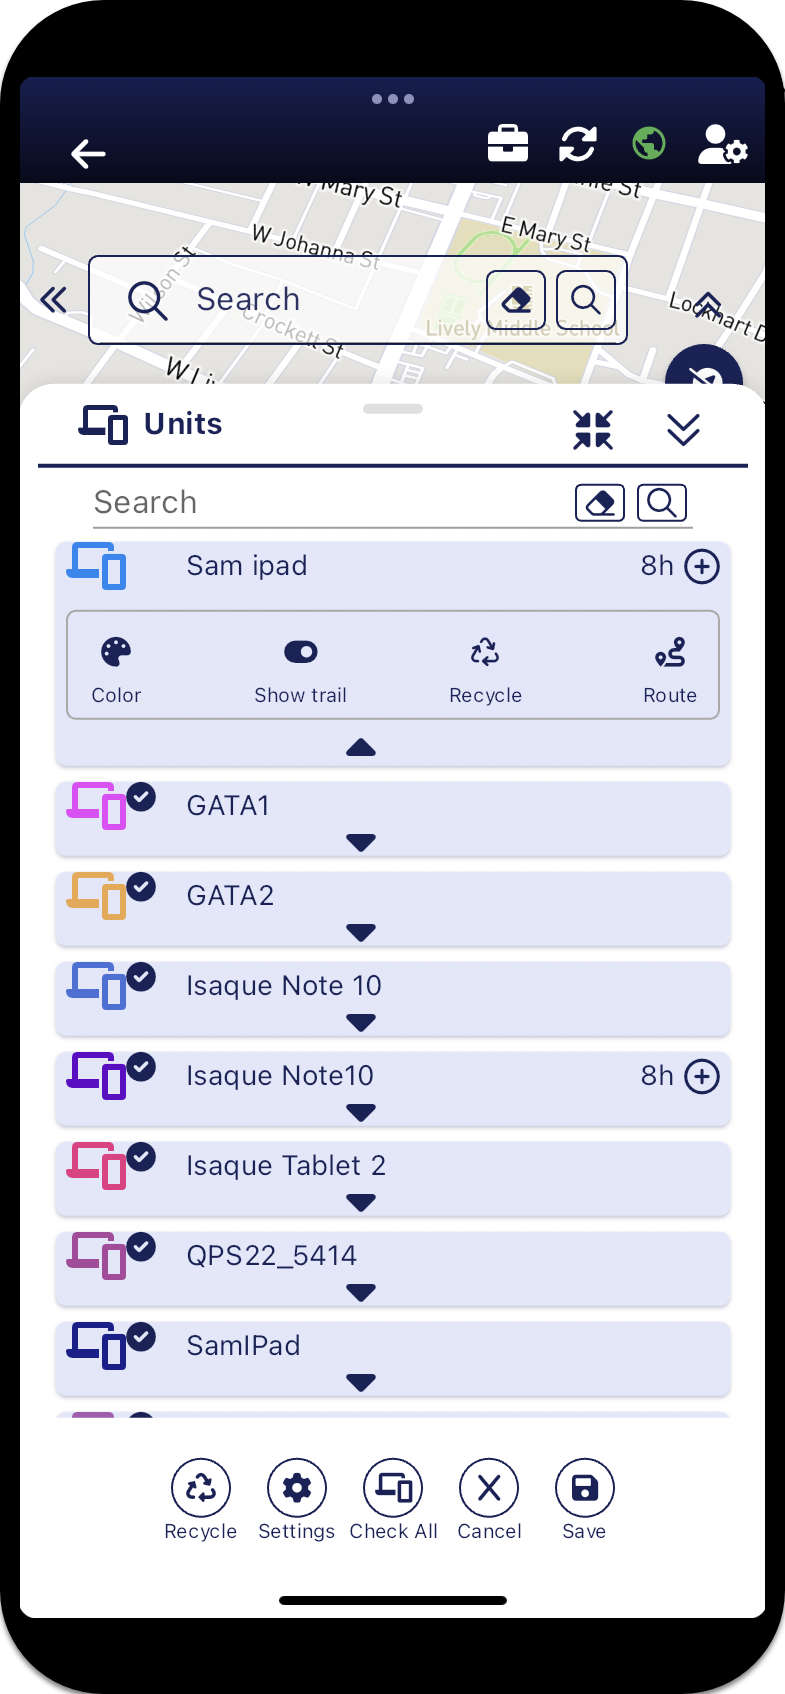
Units panel
Which units are displayed on the Units panel depends on how you opened the map screen. If you opened the screen:
-
from the Home screen by tapping Sentinel then the only unit displayed is your own. This is your device name, which you entered on the Login screen.
-
via Cases on the Home screen then: your unit, all units assigned to the case, and all units assigned to every case are displayed. The units are either GAR and GATA units, and G-Scout App devices configured to your OSS-ESPA account, Bluetooth GPS modems and Over-The-Air units.
-
The Units panel allows you to select which unit location data you want displayed on the map. For example, you can select to either only display current locations, or display current locations and a breadcrumb trails for a specified number of hours.
NOTE: When investigating a case, by default all the units trails are hidden, therefore if you want to view any you must select to show their trails. To maximize the map screens' performance it is recommended that you only view the trails of those units that you need to.
The settings on this screen only effect your device's map, they do not effect the breadcrumb trail displayed for your device on OSS-ESPA's Sentinel screen or any other team member's device. If required, you can stop your location from appearing on the Sentinel screen by tapping  on the map so that it displays with a line through it
  .
.
If you tap:
-
your device name it zooms the map to your current location if you have
Transmit your location enabled. If Transmit your location is disabled the map zooms to your last transmitted location. -
another personnel's unit name it zooms to their last transmitted location. If you tap their location
 , the Unit info pop-up displays the date and time of the data, and allows you to create a navigation route to their unit.
If you require a step-by-step procedures on using this panel refer to:
Tap to zoom the map to the last transmitted location of the unit.
 Color
Color
Set the color used to display the selected unit's location marker and breadcrumb trail on the map.

 Show trail
Tap to display or hide the selected unit's breadcrumb trail on the map.
-
This icon indicates the trail is not displayed, tap it to turn the trail on.
NOTE: When investigating a case, by default all the units trails are hidden, therefore if you want to view any you must select to show their trails. To maximize the map screens' performance it is recommended that you only view the trails of those units that you need to.
-
This icon indicates the trail is displayed, tap it to turn the trail off.
 Recycle
Tap to remove the selected unit's breadcrumb trail from the map. Only the unit's current location is now displayed on the map and the number of hours of data displayed is reset to 0h.
 Route
Route
Tap to create a navigation route to the selected unit's last transmitted location. For further information, refer to How to create a navigation route to another field unit.

Tap if you want to display more of the selected unit's historical breadcrumb trail on the map. If the number of hours displayed is 0h then only the current location is displayed on the map.
 Recycle
Tap to remove all the breadcrumb data from all units from the map.
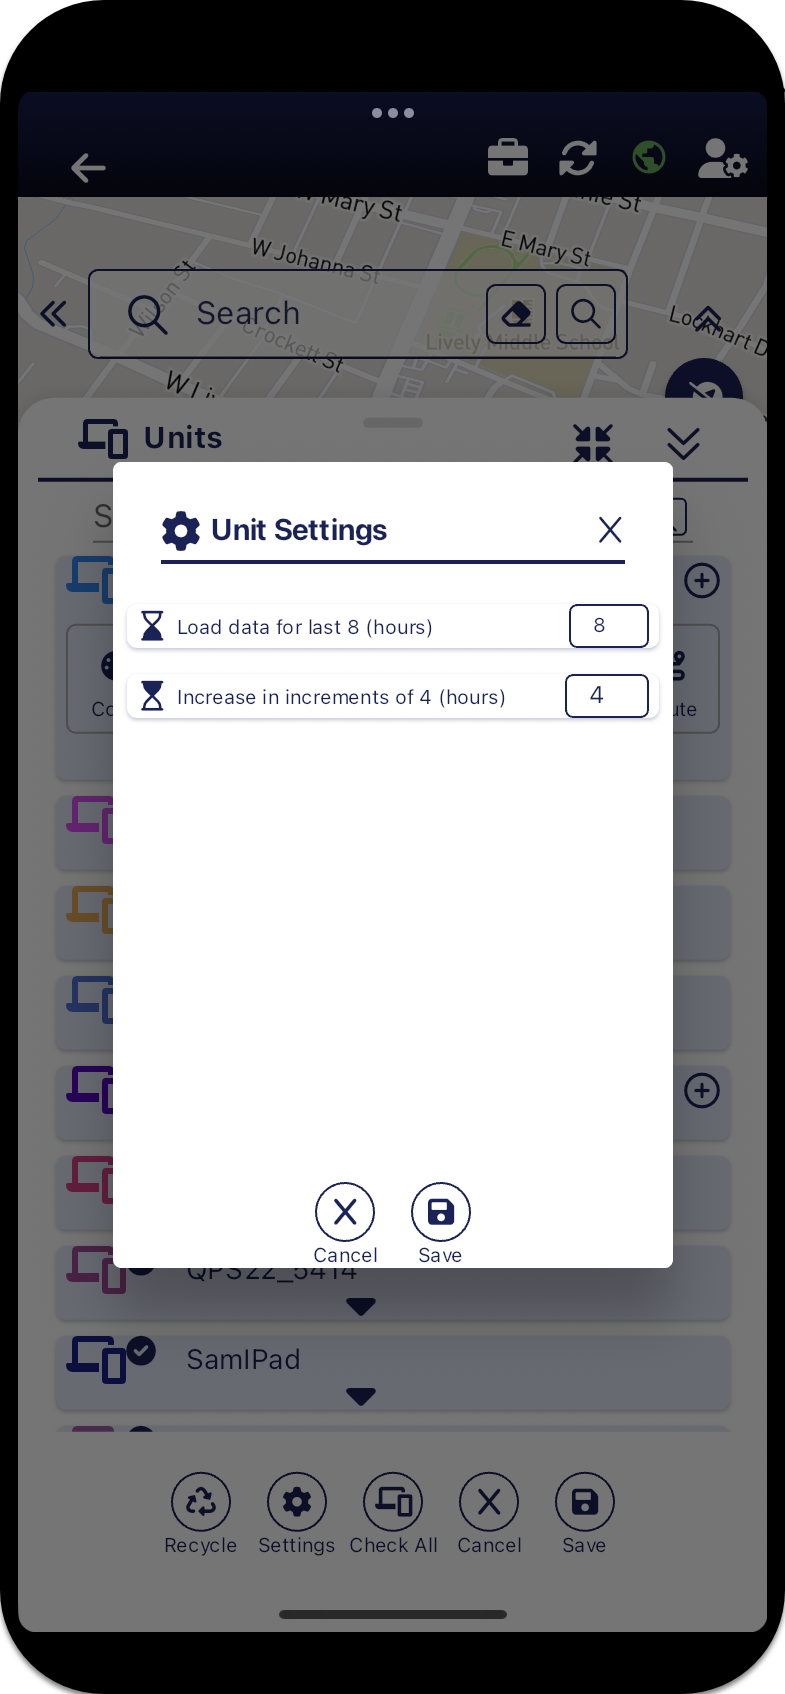
 Settings
Tap to display Unit Settings which allows you to set the amount of past breadcrumb trail data displayed on the map and the number of hours incremented when you tap .
 Check all
Tap to either select or clear all units last transmitted location from being displayed on the map. Only those units that are selected have their location marker displayed on the map. If you additionally want to display their breadcrumb trails then you must select to show the trail for each unit.
 Save
Save
Tap to save any changes you have made to the selection of which units you want displayed on the map. Note, closing the panel using  also saves any changes you made. To confirm that you have made and are about to save a change displays as
  .
.