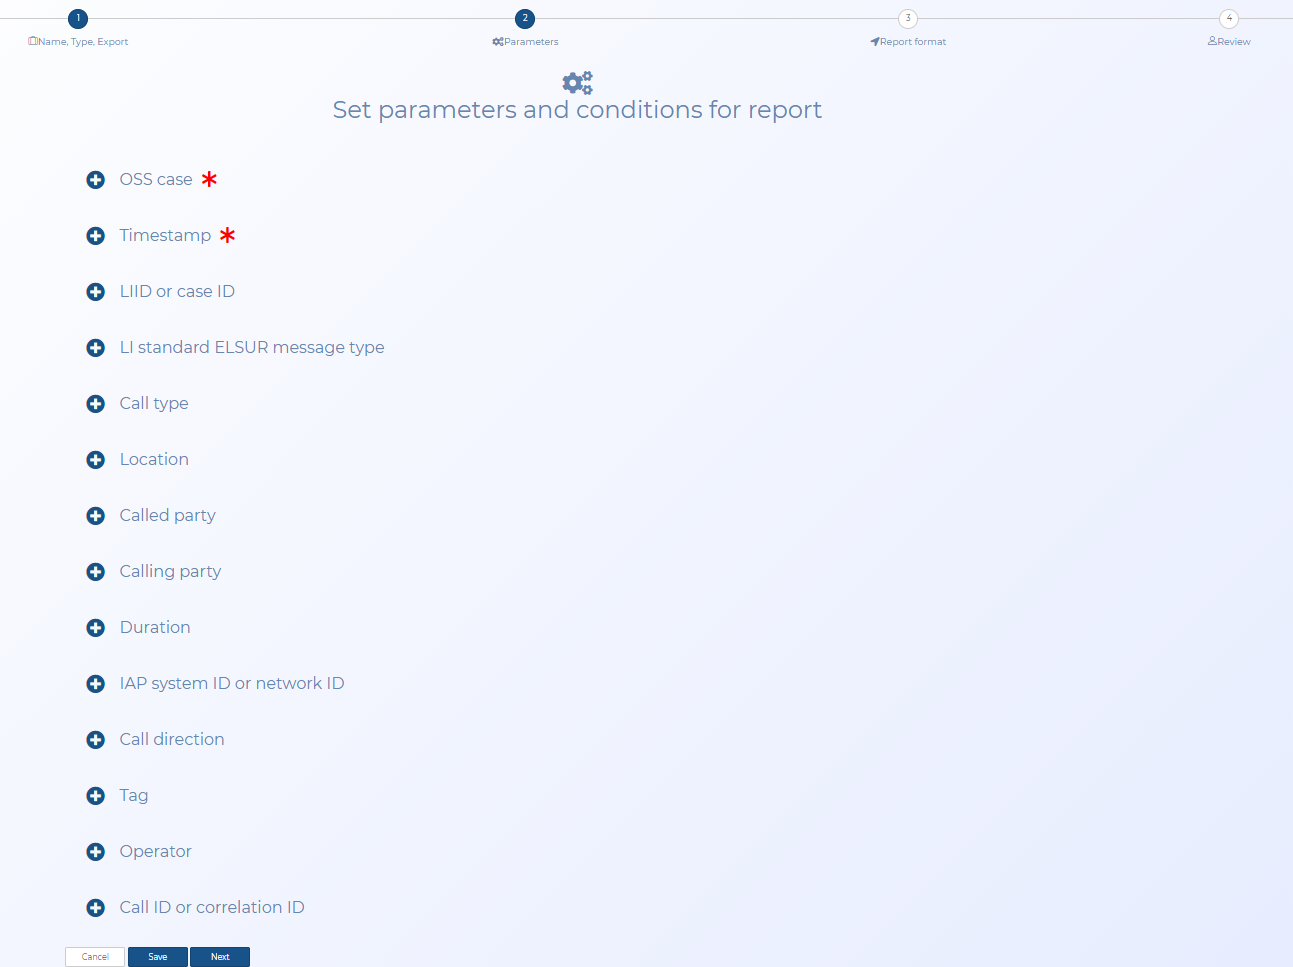
Set parameters and conditions for report screen
This topic provides an overview of the Set parameters and conditions for report screen and all the settings and buttons on it. However if you require step-by-step procedures on managing Sentinel reports refer to Managing Sentinel reports generated from the Sentinel Report Manager.
This feature requires option E14 Sentinel. If you do not have this option this feature is not available.
NOTE: This topic is not relevant to reports generated using the Evidence Management and Reporting screen.
The Set parameters and conditions for report screen allows you to configure what you include in your Sentinel report. The parameters and conditions that are displayed on this screen are dependent on which type of report you selected to create. For all types of reports you must select which intercept monitoring cases you want to include and define the date range using Timestamp. All the other settings are optional. A summary of what you selected is displayed at the bottom of the screen.
This setting is mandatory. This lists all the cases that you have permission for. Use the check-boxes to select the cases you want included in your Sentinel report. If you want to include them all then select the check-box in the top row.
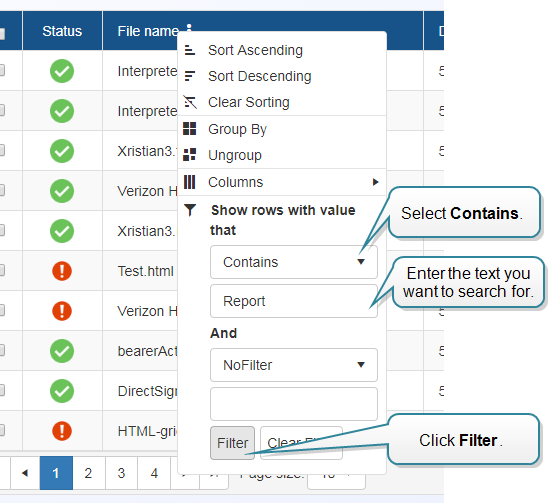
If required you can use  in the column header to sort or filter items to quickly locate the item you want to select. How to set the filter is shown in the following graphic.
This setting is mandatory. Select the start and end dates of the intercept messages you want included in your Sentinel report.
This lists all the lawful interception identifiers that you have permission for. Use the check-boxes to select the CASEID (LIID) you want included in your Sentinel report. If you want to include them all then select the check-box in the top row.
If required you can use in the column header to sort or filter items to quickly locate the item you want to select. How to set the filter is shown in the following graphic.
This lists all the electronic surveillance message types such as "origination" and "release". Use the check-boxes to select the message types you want included in your Sentinel report. If you want to include them all then select the check-box in the top row.
The items are listed by default by the standard name first, then by the ELSUR message types.
If required you can use in the column header to sort or filter items to quickly locate the item you want to select. How to set the filter is shown in the following graphic.
This lists all the call types such as "voice" and "sms". Use the check-boxes to select the call types you want included in your Sentinel report. If you want to include them all then select the check-box in the top row.
Enter the locations you want included in your Sentinel report. Each location should be separated using a comma.
Enter the phone numbers of the called parties you want included in your Sentinel report. Each number should be identical to that in the intercept message and each phone number must be separated by a comma. Spaces and dashes between numbers are not allowed.
Enter the phone numbers of the calling parties you want included in your Sentinel report. Each number should be separated by a comma. Each number should be identical to that in the intercept message and each phone number must be separated by a comma. Spaces and dashes between numbers are not allowed.
Enter a duration period for the length of the on call duration you want included in your Sentinel report. You can enter a value between 0 and 100000 seconds.
Enter the IAP System ID or Network ID values you want included in your Sentinel report. Each value should be separated by a comma. Any ASCII string is allowed.
Use the check-boxes to select which calls you want included in your Sentinel report based on the call direction, either incoming or outgoing. If you want to include both incoming and outgoing calls then select the check-box in the top row.
Enter the tag values you want included in your Sentinel report. Each tag should be separated by a comma. These tags have been entered on the Sentinel screen using the Add tag and note dialog box.
Select which operators' intercept messages you want included in your Sentinel report.
If required you can use in the column header to sort or filter items to quickly locate the item you want to select. How to set the filter is shown in the following graphic.
Enter the Call ID values you want included in your Sentinel report. Each value should be separated by a comma.
Click to cancel the creation of your Sentinel report and return to the Sentinel Report Manager screen.
Click to move to the next step of creating your Sentinel report, the Report format screen opens.