Unified cell tower screen
This topic describes the purpose of the Unified cell tower screen view and all the settings and buttons on it. However, if you require information on using this screen, refer to Searching and viewing the unified cell towers.
This feature requires option E19 Tower management. If you do not have this option this feature is not available.
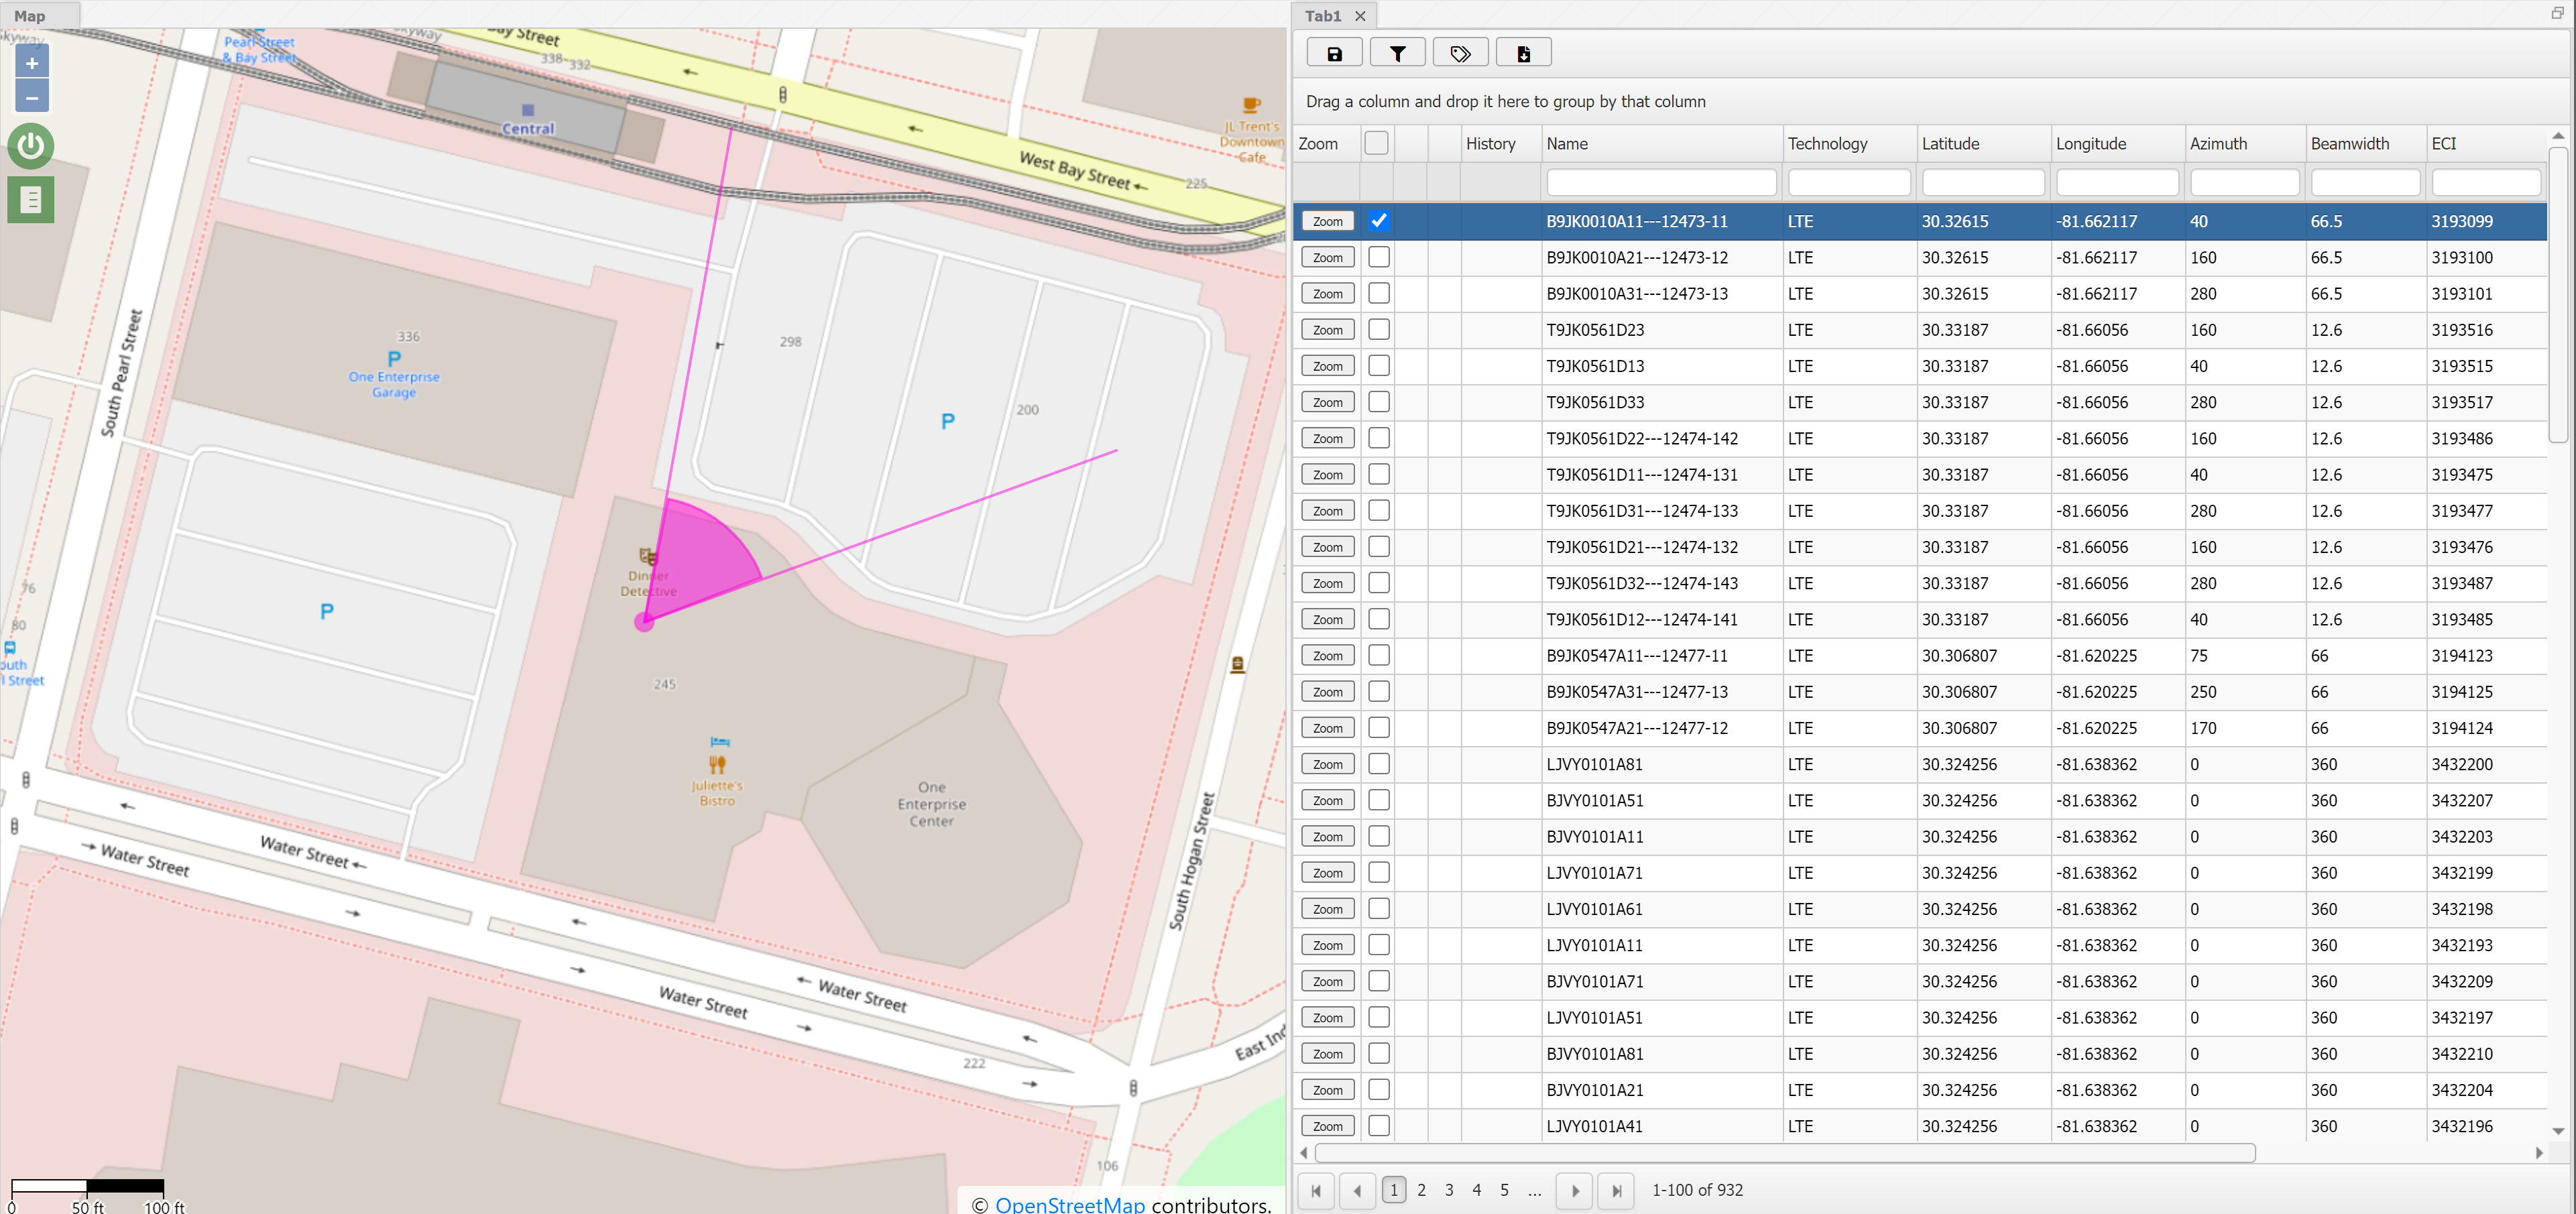
The Unified cell tower screen displays all the cell tower data that is available in your account. It allows you to view the cell tower properties.
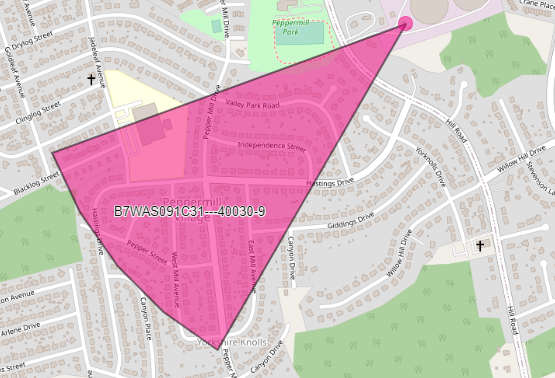
If you have GAR units that are automatically uploading drive data to OSS-ESPA and if your administrator has configured your account to run a cell tower coverage task then once the task is run, which is typically overnight, the cell footprint maps are also available for you to display on the Unified cell tower screen's map.
The screen consists of two types of view: the map view, and a tabular view listing all the sectors. If required you can display multiple tabular views, for example one for ATT across California and another for T-Mobile across California.
To view the cell towers you must first select which cell towers you want to display. You can use the Create view tab on the Unified Cell Tower dialog box to select the operator and the technology, then you select either a state, switch, the map area, or search for a specific identifier, then click  . OSS-ESPA then retrieves all the cell tower data that matches your selection. If your selection consists of a large number of cell towers, the results can take a few minutes to display.
The screen also allows you to save cell tower data that you frequently use, so that you can easily display it in the future using the Open view tab on the Global Cell Tower dialog box.
When the cell towers table view appears, you can float, move and dock it anywhere on the screen. Additionally, if your workspace is large, possibly you have multiple monitors then you may prefer to open the views in individual screens. To do this, click  at the top-right of each view.
There are a number of check box columns on the cell towers view: The check box:
- immediately beside the Zoom column allows you to select which sectors you want displayed on the map.
- the second column of check boxes allow you to display the cell footprint map of the cell tower. You can also display the cell footprint map by right-clicking the cell tower on the map.
- the third column of check boxes allow you to display all the sectors of the cell tower, that is all sectors with the same site code.

Click to open the Unified cell tower dialog box which allows you to select which cell towers you want to view.
If you right-click on any sector displayed on the map view a menu displays with the following options:
-
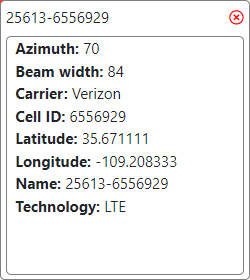
Sector properties
Click to open aSector information dialog box which displays the sector details.
-
Go to grid
Click to display only the sector listed above on the tabular view. All other sectors are removed from the tabular view but can be redisplayed by clicking
 .
.

Click to open the Unified cell tower settings dialog box that allows you to set how the sectors are displayed.

Click to save the current cell tower view so that it can be reused again in the future. The Save view dialog box opens allowing you to enter a name, for example ATT_LTE_NewYork. You can also select to make the view available to all users in your OSS-ESPA account by selecting Global view.
Click to clear any filter you have set at the top of each column of data.

Select to display on the map all the cell IDs that are included in the cell tower data file. The cell IDs display as shown:

Click to export the contents of the view to a csv file. The export is emailed to you once completed.