How to import crime data files and other file types into global locations
This topic describes how to import files containing locations, such as crime data files and hotels, which can help you identify potential suspects.
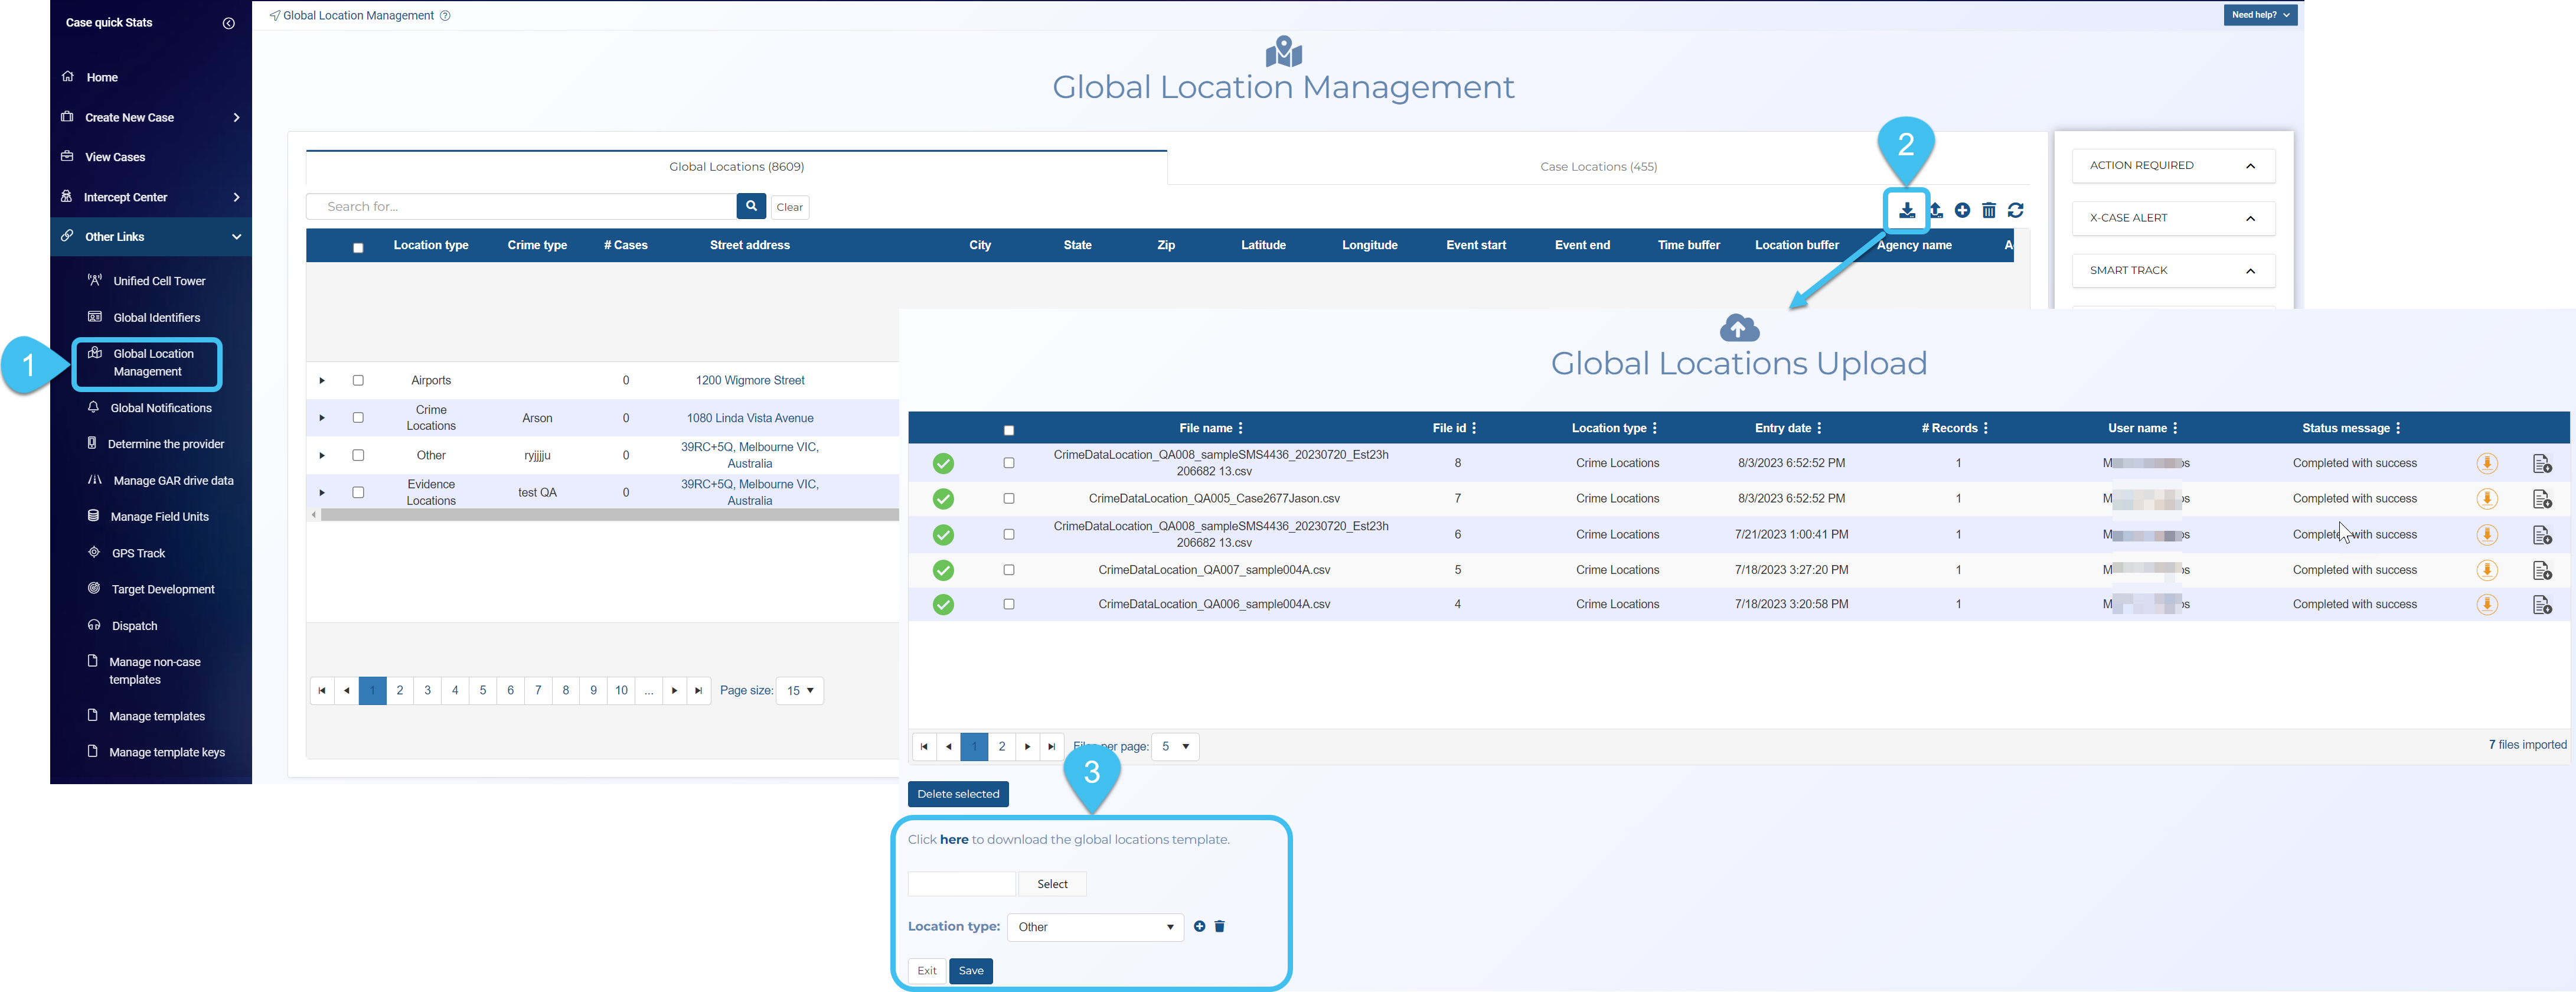
Use the following graphic for a quick reference or refer to the steps below for additional details.
-
On the main menu click Search, then click Global Location Management.
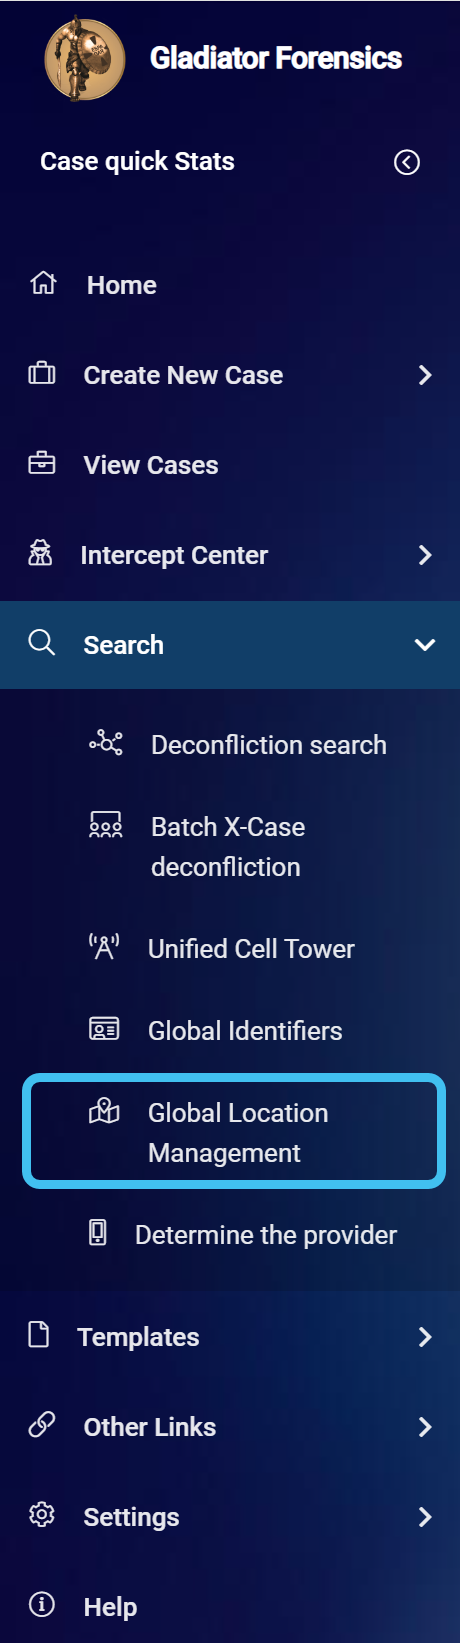
The Global Location Management screen opens.
-
On the Global Locations tab, click
 .
.
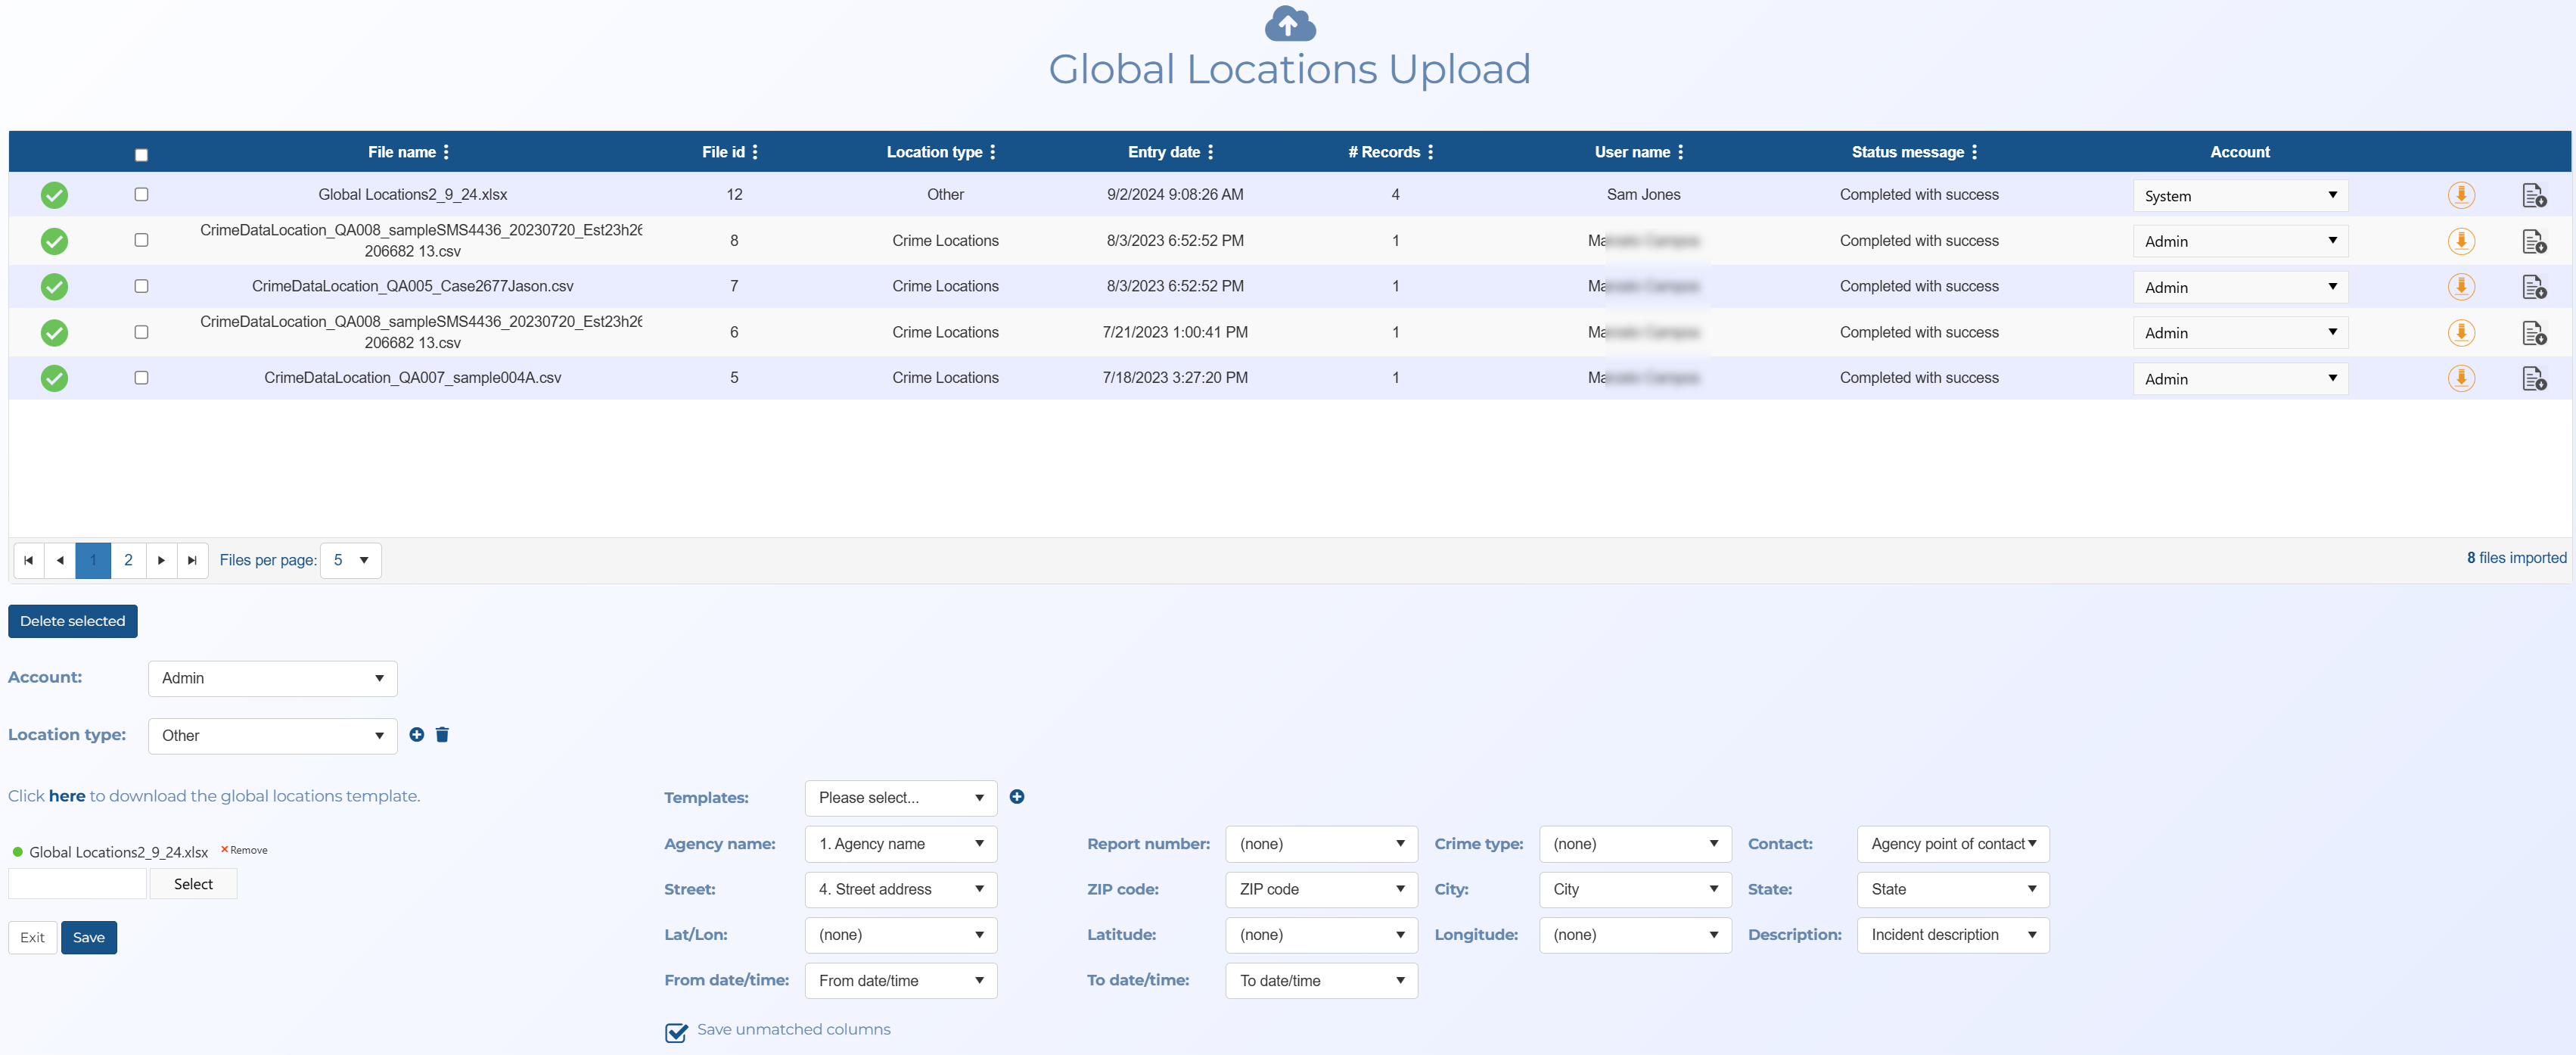
The Global Locations Upload screen opens.
-
In Account, either leave it set to the default of your account, or if you want to share the global location with other accounts you can change it to System.
-
In Location type, select the file type you are importing.
Note, if you want to add or delete file types you can use
 .
. -
Click Select. Windows Explorer opens. Navigate to the folder and select the required .xlsx or .csv file. The file uploads and a green circle alongside the file name indicates when the upload is complete.
-
If your file does not use the Gladiator Forensics supplied template then you must define which columns in your uploaded identifier file map to each of the OSS-ESPA settings (Location name, Agency name, Report number, Crime type, Contact, Street, Zip code, City, State, Lat/Lon, Latitude, Longitude, Description, From date/time, To date/time, Time buffer and Location buffer). Only Street is mandatory but the more you set the more useful the data is to you once imported. OSS-ESPA automatically suggests the best mapping but you can change that if required.
You can also save this mapping as a template for future use so that you do not need to define this mapping each time you import the same file type. To do this, beside Templates click
 , enter a new template name then click OK. Now each time you import that file type you only need to use Templates to select the mapping you saved. You can save changes to these templates in the future using
  and delete them using
  .
. -
Click Save.
- Click Exit to return to the Global Location Management screen where the new locations are now listed on the Global Locations tab.
-
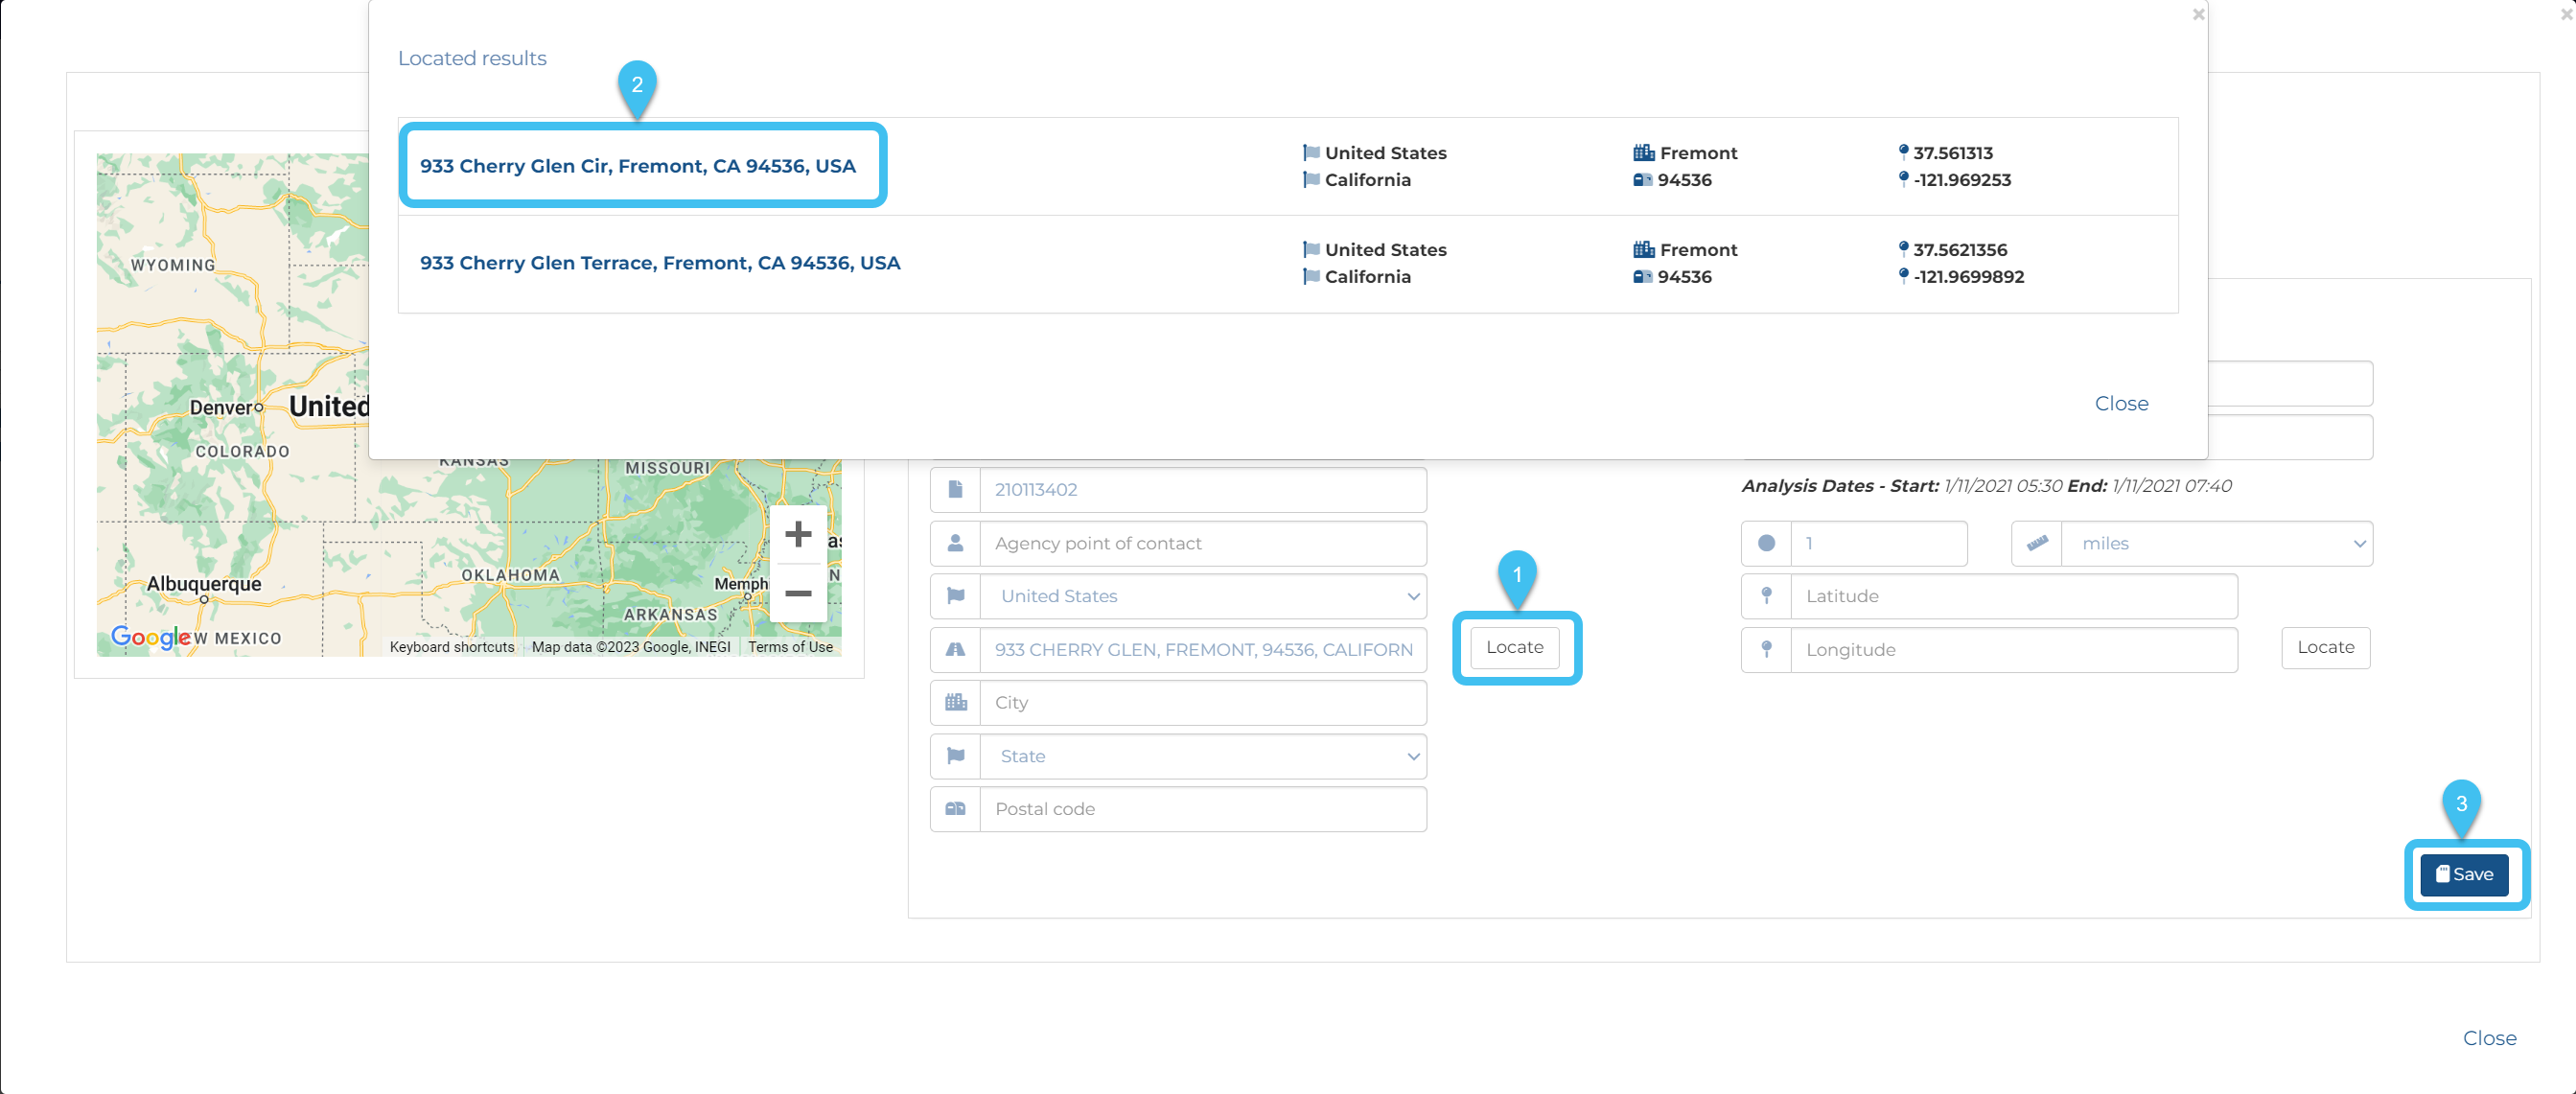
Using the filters on the right-side of the screen, select Yes in Action required. If any results are displayed it indicates that OSS-ESPA was unable to identify the address because there was more than one location with the specified address.

You must resolve the issue before the location can be analyzed. To resolve it:
-
Click
 or the location's street address.
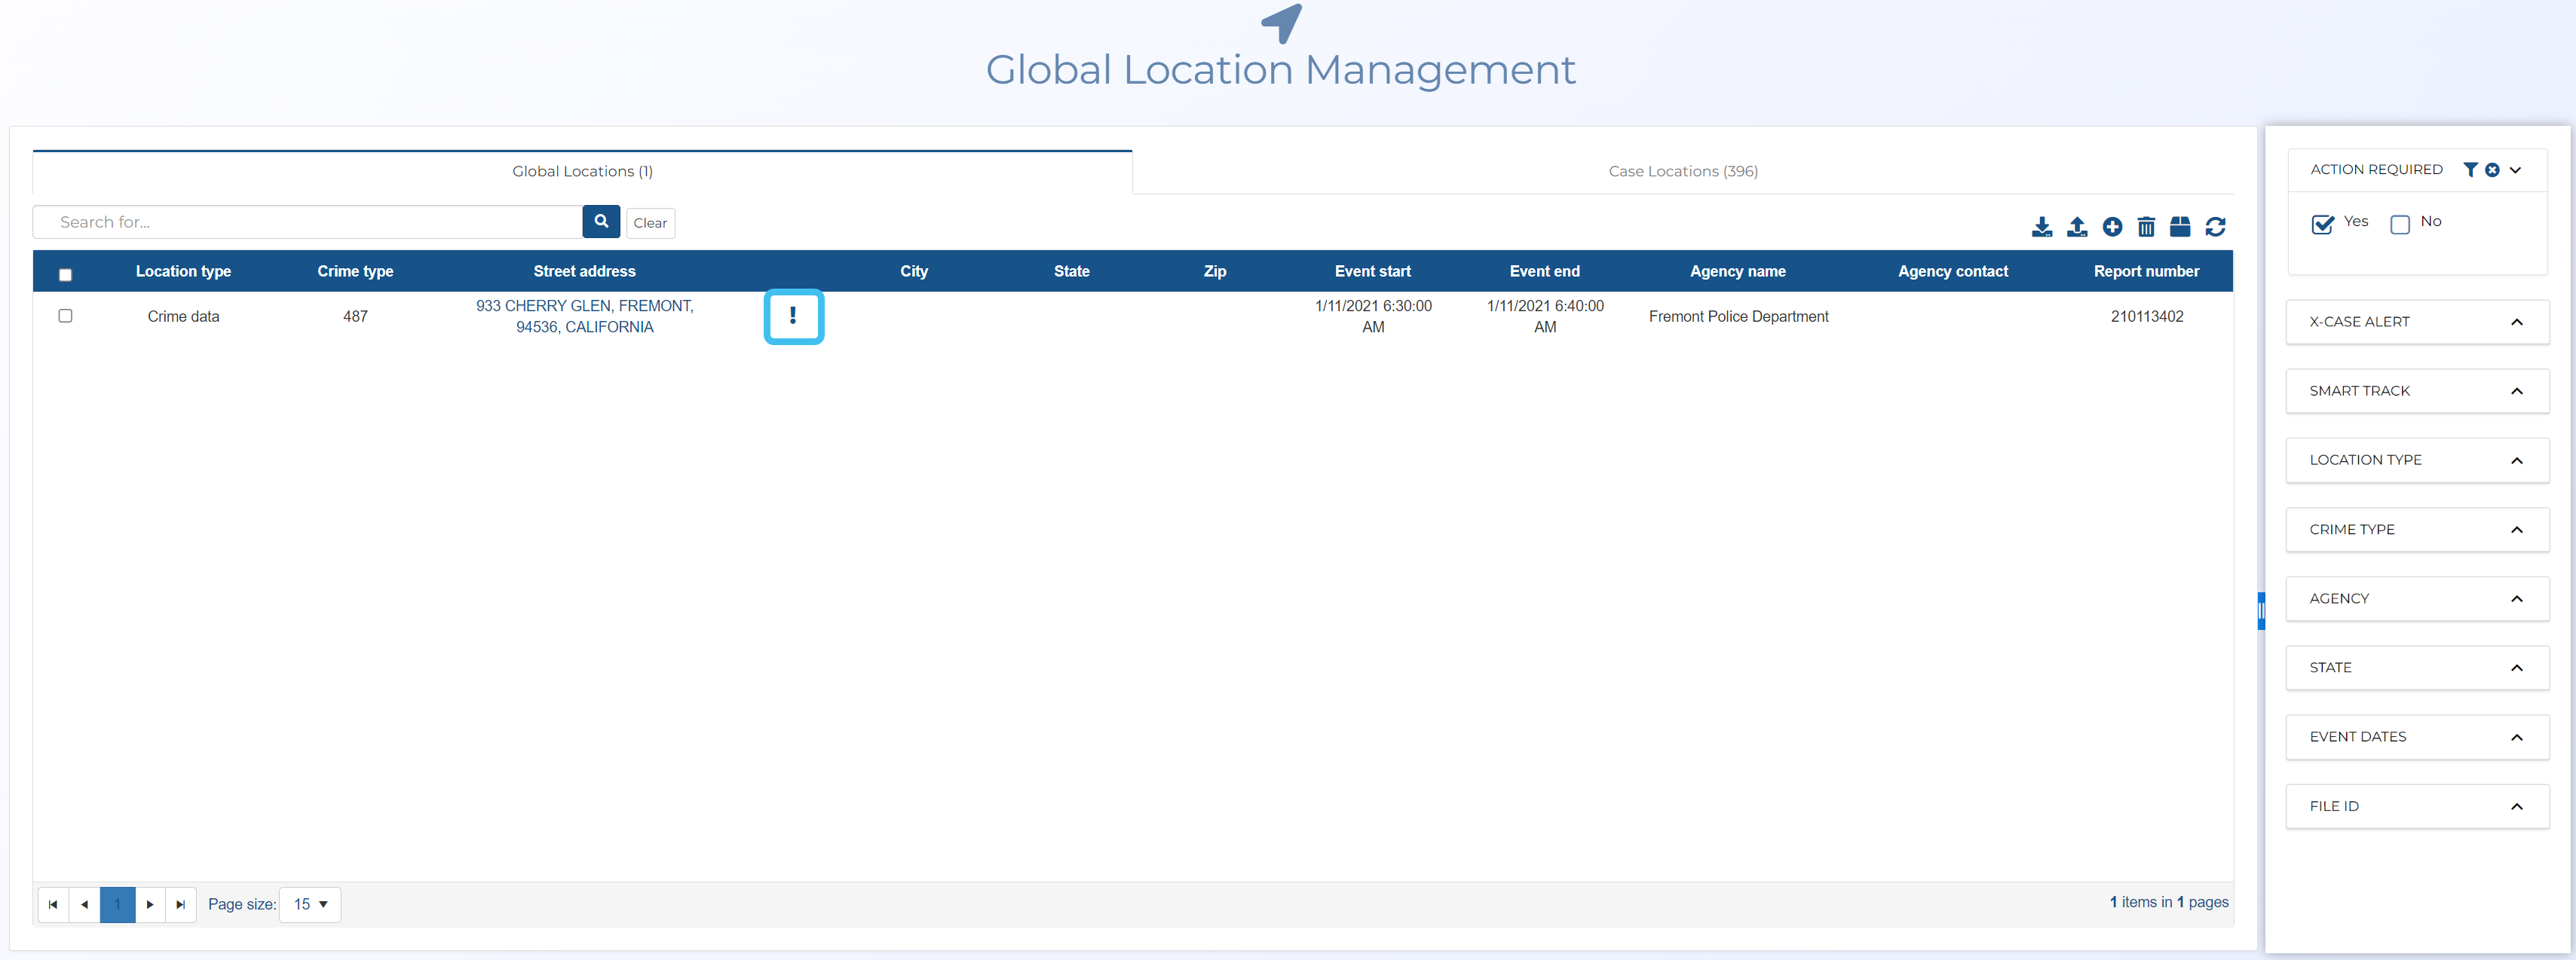
The Location information window opens.
-
Click Locate, select the correct address from the list shown, then click Save.
-
-
After importing your file you can:
-
use the x-case alert to identify potential suspects at the locations as described in How to use the global location x-case alert to identify potential suspects, or
NOTE: Any x-case alerts will not be available until the following day as the Global location analysis is always performed overnight due to the large amount of data being analyzed.
-
set a Smart Track alert as described in How to create a Smart Track alert on a global location.
-