Phone properties dialog box
This topic describes the purpose of the Phone properties dialog box and all the settings and buttons on it.
The Phone properties dialog box has two tabs which allow you to:
- select which of your data sources you want to use for the analysis.
-
specify time adjustments you want used on the selected: phone number's CDR files, phone data files and geo-location files; and on vehicle license plate's geo-location files. If you configure a time adjustment you must click Refresh or Refresh data to update the displayed data.
How the timezone adjustments are applied to each type of data depends on whether you have Entire file or Non matched records selected.
- For CDRs if Non matched records is selected then the CDR adjustments are only applied to CDR records where the ErrorCode column is set to indicate the “No TZ adjustment” condition. The CDR records are then adjusted according to the adjustment you have set. The CDR record is displayed on the CDR data tab with the adjusted time and if you select it the message “Local time of this record was manually adjusted” identifies it as having been adjusted. However if Entire file is selected then the adjustment is applied to all records in the file.
-
For phone data records if Non matched records is selected then the records are adjusted if the record has a UTC time, but no local time. This is done for both the start event and the end event times. The phone data record is displayed on the Timeline tab with the adjusted time being displayed in the Start date/time(Local) and the End date/time(Local) columns. Note, there is no indication the record has been adjusted. However if Entire file is selected then the adjustment is applied to all records in the file.
-
For geo-location data records if Non matched records is selected then the records generated from GPS pings and live location monitoring are always modified, but geo-location data from other sources is not. It is only the time displayed in the Geo-loc data tab's Adjusted time column that is modified and times in the other columns are not adjusted. However if Entire file is selected then the adjustment is applied to all records in the file and displayed in the Adjusted time column.
If you apply multiple adjustments to the same type of data then OSS-ESPA applies the adjustment that has the shortest date span. For example if you created three adjustments that applied to the phone number's CDRfile which were for the date ranges 01/01/2016 - 12/31/2016, 03/01/2016 - 10/31/2016, and 04/01/2016 - 04/31/2016 then for all CDR records within the month of April OSS-ESPA applies the adjustment you set for the 04/01/2016 - 04/31/2016 date range.
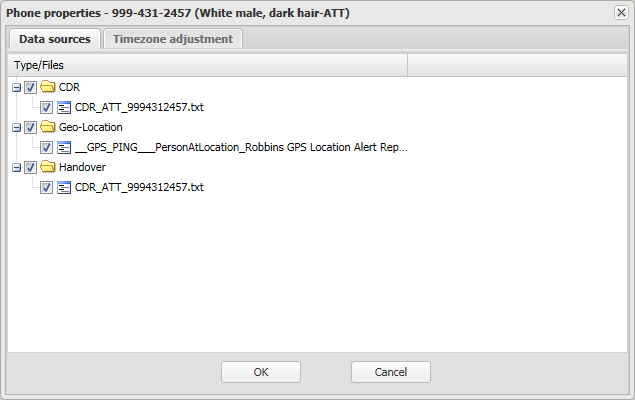
Use the check-boxes to select which of the available data you want to use for the selected phone number during the analysis. The data is separated into the following categories, but if no such data is available for the selected phone number then the category is not displayed:
- CDR
- Handover
- RTT
- Phone Data
- Geo-Location
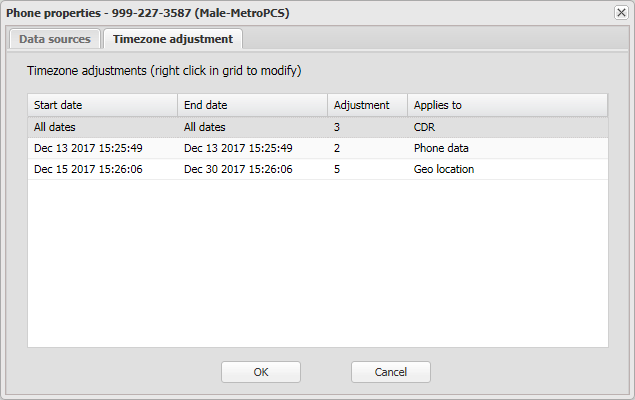
Right-click anywhere under the column titles to display and select Add new adjustment, the Add new timezone adjustment dialog box opens.
Right-click on an existing adjustment to display and select Edit new adjustment, the Edit new timezone adjustment dialog box opens.
Right-click on an existing adjustment to display and select Delete adjustment. After confirming you want to delete the item it is removed from the dialog box.
Click to apply any changes you have made. The dialog box closes automatically.
Click to close the dialog box without applying any changes you may have made.