Message summary view
This topic describes the Message summary view on the Sentinel screen.
This feature requires option E14 Sentinel. If you do not have this option this feature is not available.
The Message summary view is named using the Comm # which is Gladiator Forensics identifier for the call. It displays all the message details within the call.
This view opens when you either:
- click on the call's Comm # on the Event summary view.
- right-click on any row on the Event summary view, then select Open message summary.
- right-click on any row on the Location events view, then select Open message summary.
- click on the Comm # on the IP dialog box.
It allows you to view the call in a variety of formats. If you are an operator, then you can use this view primarily to verify the data that they are sending to law enforcement agencies is the correct data. If you are a law enforcement agent, then typically this view is not of interest to you unless you understand the technicalities of the signaling or if you want to copy the data to include as part of your case notes as it represents the data sent directly from the operator.
NOTE: To be able to view the HI3 data you require a legal wiretap.
-
In the Communication summary view, it displays the high level details about the call, such as the start and end times. You can click
 along side the comm # to open the HI2 traffic grid, HI3 traffic text and HI3 traffic grid views.
 -
In the IP traffic view, it displays the IP address with the location of the server used by the phone. Click on the IP address to display the physical location in the center of the map.
-
In the HI2 traffic grid and HI3 traffic grid views, you can expand each message within the call and either view the message detail or the raw message. The Message Detail tab breaks the message into three parts:
- the field name as defined in the raw message
- the raw message value
- OSS-ESPA interpreted value.
By default the messages are ordered on the view using the timestamp which is displayed in the Message time column. The most recent timestamp appears at the top of the view.
If required you can copy the complete call using
 . You can also right-click in a cell to automatically copy the complete contents of the cell.
 - In the HI2 traffic text and HI3 traffic text views, you can view each of the call's messages in their raw format. If required you can copy the complete call using or use your mouse to highlight and copy messages of interest.
- In the HI3 traffic view, you can view the details of the data communication, for example email, Web browsing and file downloads. If required you can copy the complete call using
 or use your mouse to highlight and copy messages of interest. You can click to open the HI3 traffic grid.

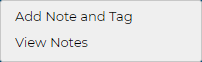
This menu is only available in the grid view. Right-click anywhere on a message number to open this menu.
- Add Note and Tag: click to add a tag or note to the selected message number. For further information refer to Add tag and note dialog box.
- View notes: click to open the View tags and notes dialog box which allows you to view, edit and delete any tags and notes that have been added to the message number.

This icon is available on the Communication summary view. Click to display a menu which allows you to download selected data in different formats.
This icon is available on the traffic grid and traffic text views. Click to copy the specified data to your clipboard where you can then paste them into another location. This is useful if you want to include the data in your case files.
This icon is available on a number of views. Click it to open additional views.
This icon is available on the HI3 traffic view. Click to export the H13 traffic table.

On the H13 traffic view, click to display a menu that allows you to select a different view, either:
- HI3 traffic in text format
- HI3 traffic in grid format

Click to have OSS-ESPA automatically resize the columns to best suit the width of the view.