Using public record information in advanced analysis reports
This topic describes how to use public records in advanced analysis reports on the ESPA analysis center screen.
This feature requires option E9 Analysis report. If you do not have this option this feature is not available.
This procedure assumes you have created a report as detailed in the first three steps of To create a new report.
If you currently have the <Report name> tab open then go directly to step 3.
-
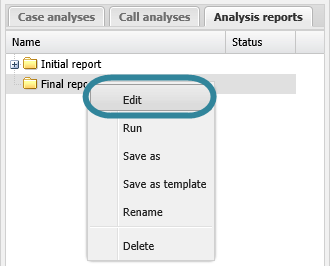
On the ESPA analysis center screen's Case management view select the Analysis reports tab.
-
Right-click the report folder then click Edit on the displayed menu.
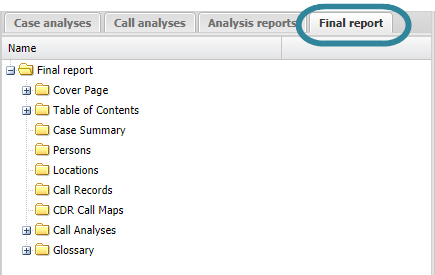
A new tab opens which is titled with the report's name.
-
On the Public records tab select the check boxes of the public records you want to include in the report.
-
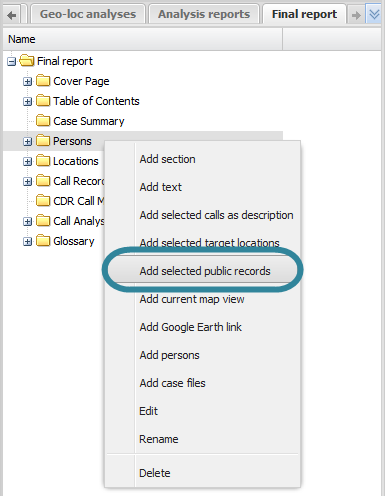
On the <Report name> tab, right-click the folder in the report to which you want to add the public record details, then click Add selected public records.
The new public records item is displayed in the report structure.
- If you want to move it's position then left-click it and drag it to a new position.
-
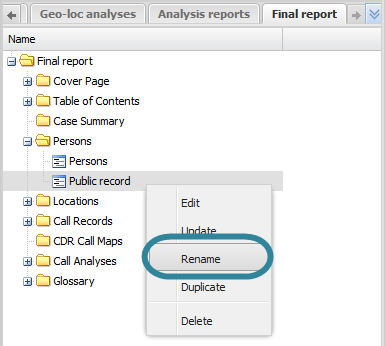
By default the item is named "Public record", you may want to rename it by right-clicking it and selecting Rename.
This procedure assumes you have created a report as detailed in the first three steps of To create a new report and that you have previously added a public record item as detailed in To add public record information to a report.
If you currently have the <Report name> tab open then go directly to step 3.
-
On the ESPA analysis center screen's Case management view select the Analysis reports tab.
-
Right-click the report folder then click Edit on the displayed menu.
A new tab opens which is titled with the report's name.
-
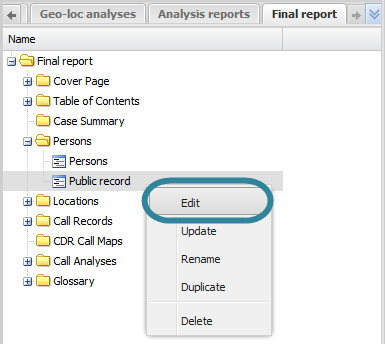
On the <Report name> tab, locate the position in your report of the public record item then right-click and select Edit. This causes the ESPA analysis center screen data to be refreshed.
- Click the Public record tab which now displays the public record data you previously had saved to your report.
-
Select the check boxes of the public records you want to now include in the report.
-
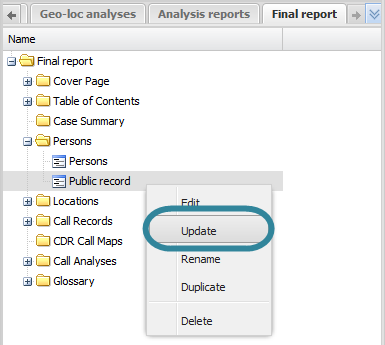
On the <Report name> tab, locate the position in your report of the public record item you are updating then right-click and select Update.
The public record information is updated.
This procedure renames the item as it is displayed on the <Reports name> tab, this name does not appear in your report.
This procedure assumes you have created a report as detailed in the first three steps of To create a new report and that you have previously added a public record item as detailed in To add public record information to a report.
If you currently have the <Report name> tab open then go directly to step 3.
-
On the ESPA analysis center screen's Case management view select the Analysis reports tab.
-
Right-click the report folder then click Edit on the displayed menu.
A new tab opens which is titled with the report's name.
-
On the <Report name> tab, locate the position in your report of the public record item then right-click and select Rename.
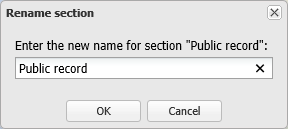
The Rename section dialog box opens.
- Enter the new name for your public record item then click OK. The name is updated on the <Reports name> tab.
This procedure assumes you have created a report as detailed in the first three steps of To create a new report and that you have previously added a public record item as detailed in To add public record information to a report.
If you currently have the <Report name> tab open then go directly to step 3.
-
On the ESPA analysis center screen's Case management view select the Analysis reports tab.
-
Right-click the report folder then click Edit on the displayed menu.
A new tab opens which is titled with the report's name.
-
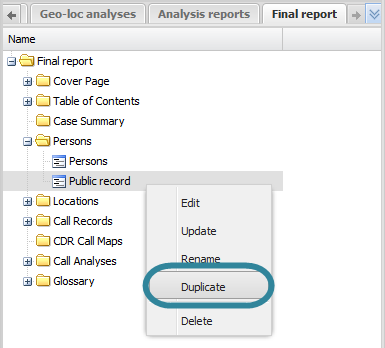
On the <Report name> tab, locate the position in your report of the public record item then right-click and select Duplicate.
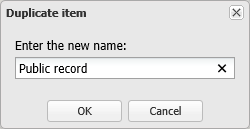
The Duplicate item dialog box opens.
-
Enter a name for your new public record item then click OK. The duplicated public record item is displayed in the report structure. If you want to move it's position then left-click it and drag it to a new position.
This procedure assumes you have created a report as detailed in the first three steps of To create a new report and that you have previously added a public record item as detailed in To add public record information to a report.
If you currently have the <Report name> tab open then go directly to step 3.
-
On the ESPA analysis center screen's Case management view select the Analysis reports tab.
-
Right-click the report folder then click Edit on the displayed menu.
A new tab opens which is titled with the report's name.
-
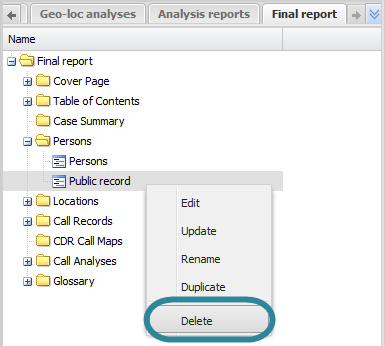
On the <Report name> tab, locate the position in your report for the public record item then right-click and select Delete. Click OK on the Delete section dialog box to remove the public record item from the <Reports name> tab and as content within your report when you run a new version of your report.

