Managing locations
This topic describes how to create, import, edit and delete locations in OSS-ESPA cases.
NOTE: Depending on how your administrator has configured your system, you may only be able to create, import, edit and delete target locations if you are the case creator, a case assignee or an administrator.
If you require an overview of what locations are, or a detailed description of the settings refer to Locations of interest screen (Case management).
You can also click here for a short video showing how to add and edit locations.
-
For the case you want to add a location to, open the Manage case screen.
 Need help finding your case?
On the main menu click View cases. The screen that opens depends on your setting of View cases. If it is set to:
- Advanced view, then the Advanced view cases screen opens.
- If your case is listed on the Favorite & recent cases tab, click the case name to open the Manage case screen.
- If it is not listed on the Favorite & recent cases tab, then click the Cases tab. Use the search filters to help locate your case. You can also click
 to open the FILTERS group which allows you to set your own default filter defining what is displayed on this tab, for example you may wish to set it to cases that you created which are currently open.
For further information refer to Searching for a case.
- Grid view, then the View cases screen opens.
- If your case is listed under My recent cases click it to open the Manage case screen.
- If it is not listed under My recent cases then select your case from the table, using the search filters to help locate it if required. Note, by default the search is set to only display cases that you created; if you are not the original creator but an assignee then ensure you set Case filter to Assigned cases before clicking Search.
- Tree view, then the View i-cases screen opens.
- Click
 at the top-right of the screen to open either the View Cases or Advanced view cases screen and follow the above description.
- Click
- Advanced view, then the Advanced view cases screen opens.
-
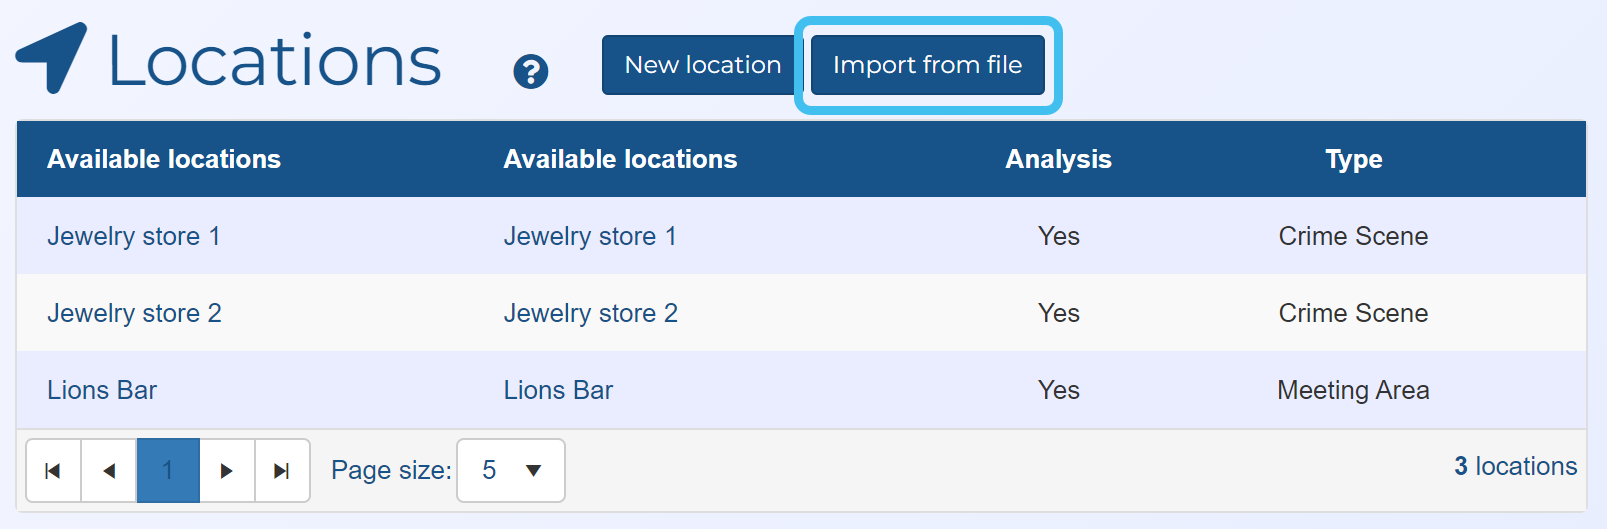
On the Manage case screen click New location.
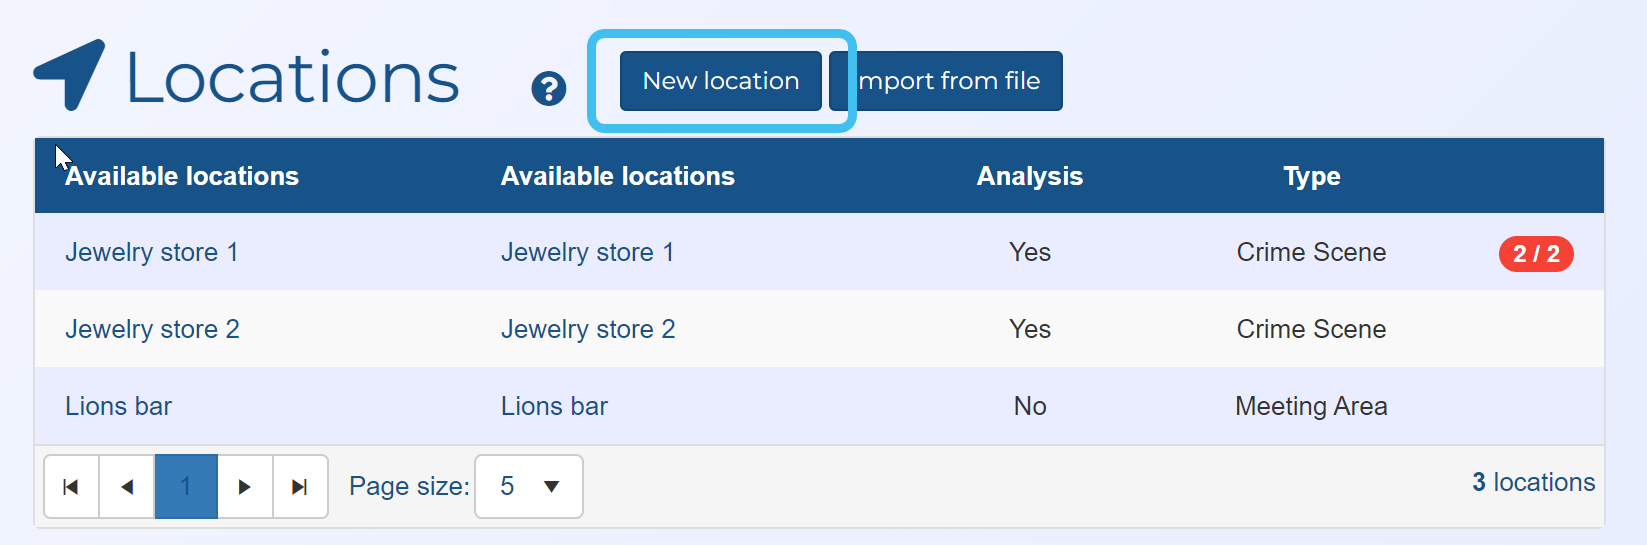
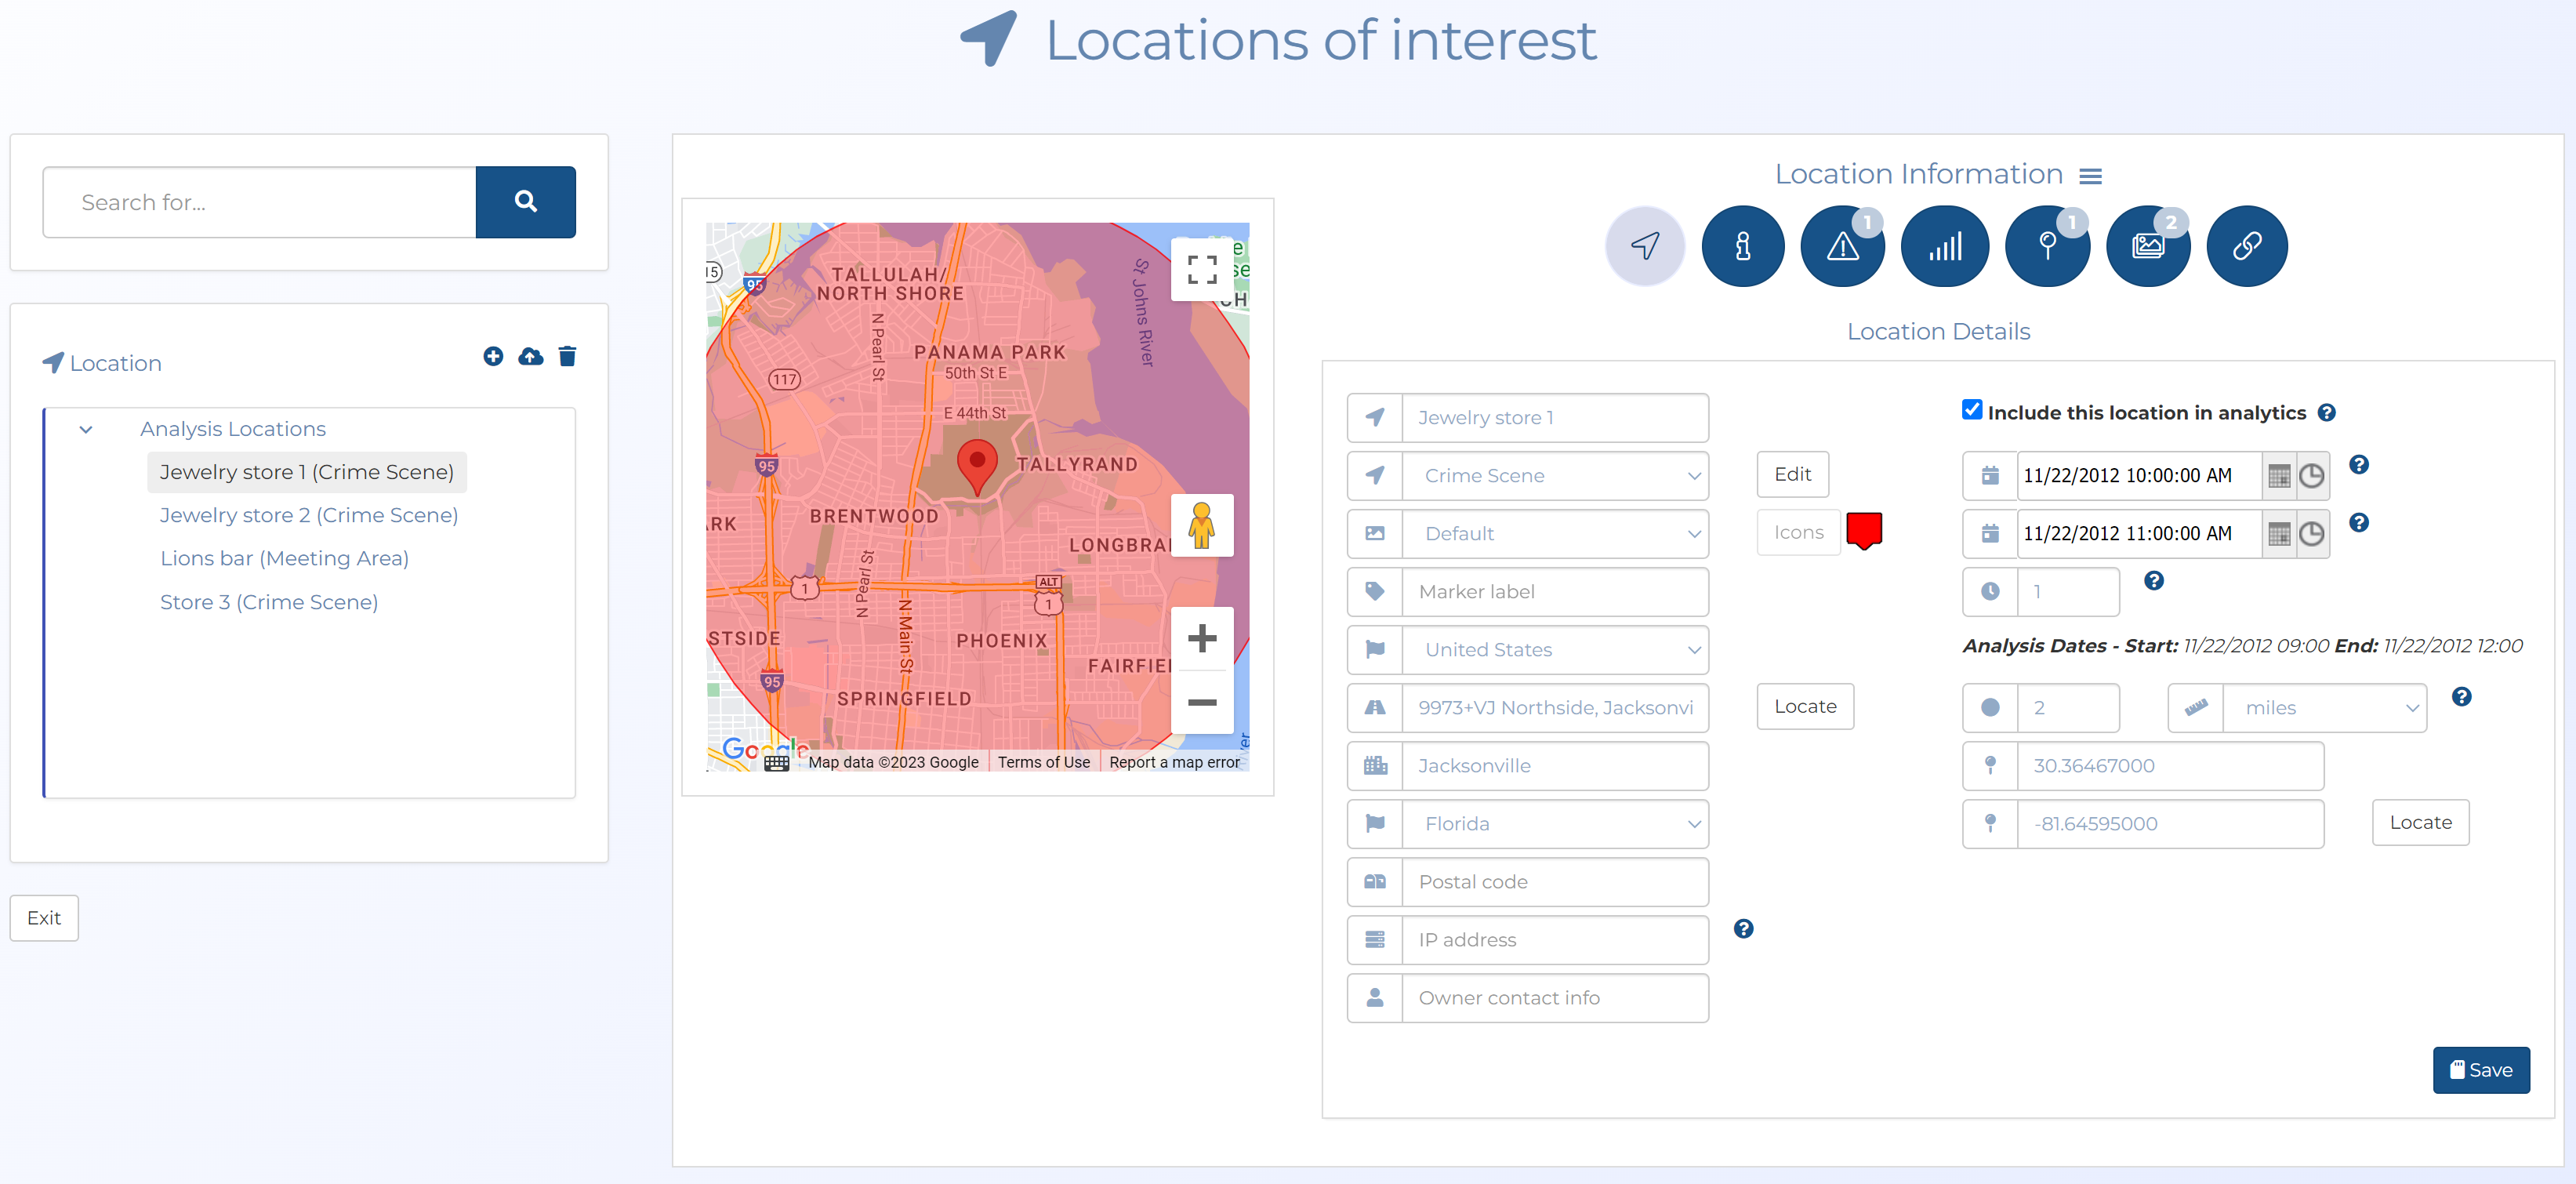
The Locations of interest screen opens.
If you prefer to use the wizard to manage all your case details then on the Manage case screen, click Go to wizard, click the Locations of interest screen and click Add/Edit location.The Locations of interest screen opens.
-
Complete the information on the screen as required. If you require a description of any settings refer to Locations of interest screen (Case management). Note, to initially create a location you must enter a minimum of Name and Location type, for example "Victim's home" and "Crime scene" respectively.
In addition, to then use your location in OSS-ESPA you must enter additional details depending on the type of location you want to create. There are two types of locations you can enter:
-
the first is referred to as a View location and is simply a location that is of interest that displays on the ESPA analysis center screen and the IQ packet report's map views. This requires you to enter the location's Latitude and Longitude. These can also be added by entering the Street address, Postal code then clicking Locate.
-
the second is referred to as an Analysis location, for example a crime scene, that compares the wireless records against the location producing a number of analyses that use the location. If you want the location included in analyses you must set the Time buffer, Event Start, Event end, Location buffer, Latitude and Longitude. You must also also select Include this location in analytics if you want to: For further information on location analysis, refer to Understanding location analytics.
OSS-ESPA provides a default target location icon for each type of target, but you can create, select or upload your own.
- to create a colored icon with two characters: in Marker icon select a color, then in Marker label enter the characters.
- to select an alternative or upload your own: in Marker icon select "Custom" then click Icons. The Available target location icons dialog box opens allowing you to select your required icon.
-
-
All the other settings on the screen are optional. Once you have entered all the details you require click Save.
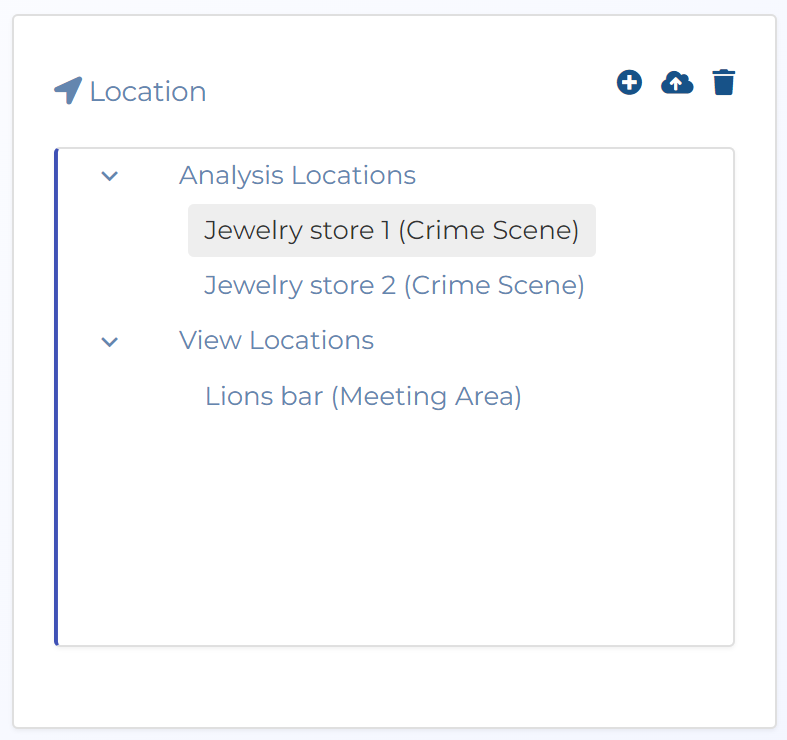
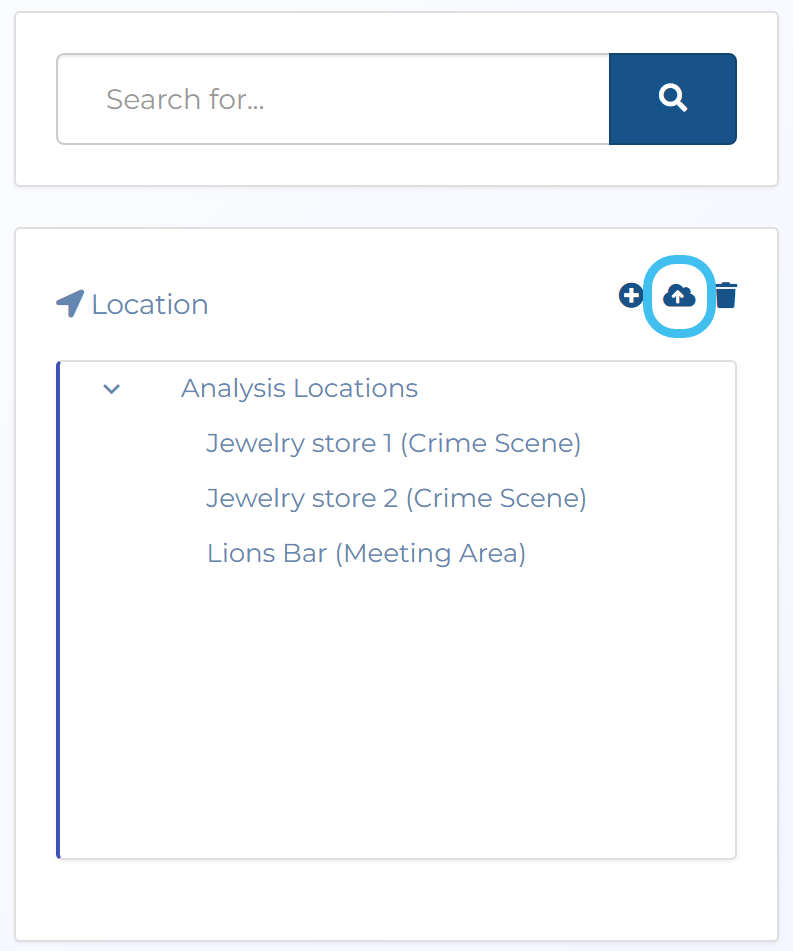
The location you just added is now displayed in the Locations section at the left of the screen.
Once a location is added, if you select the location, you can also include further location details including Smart Track geo-fence and reverse geo-fence alerts, target development files (tower dumps files and geofence files), pictures and hyperlinks.
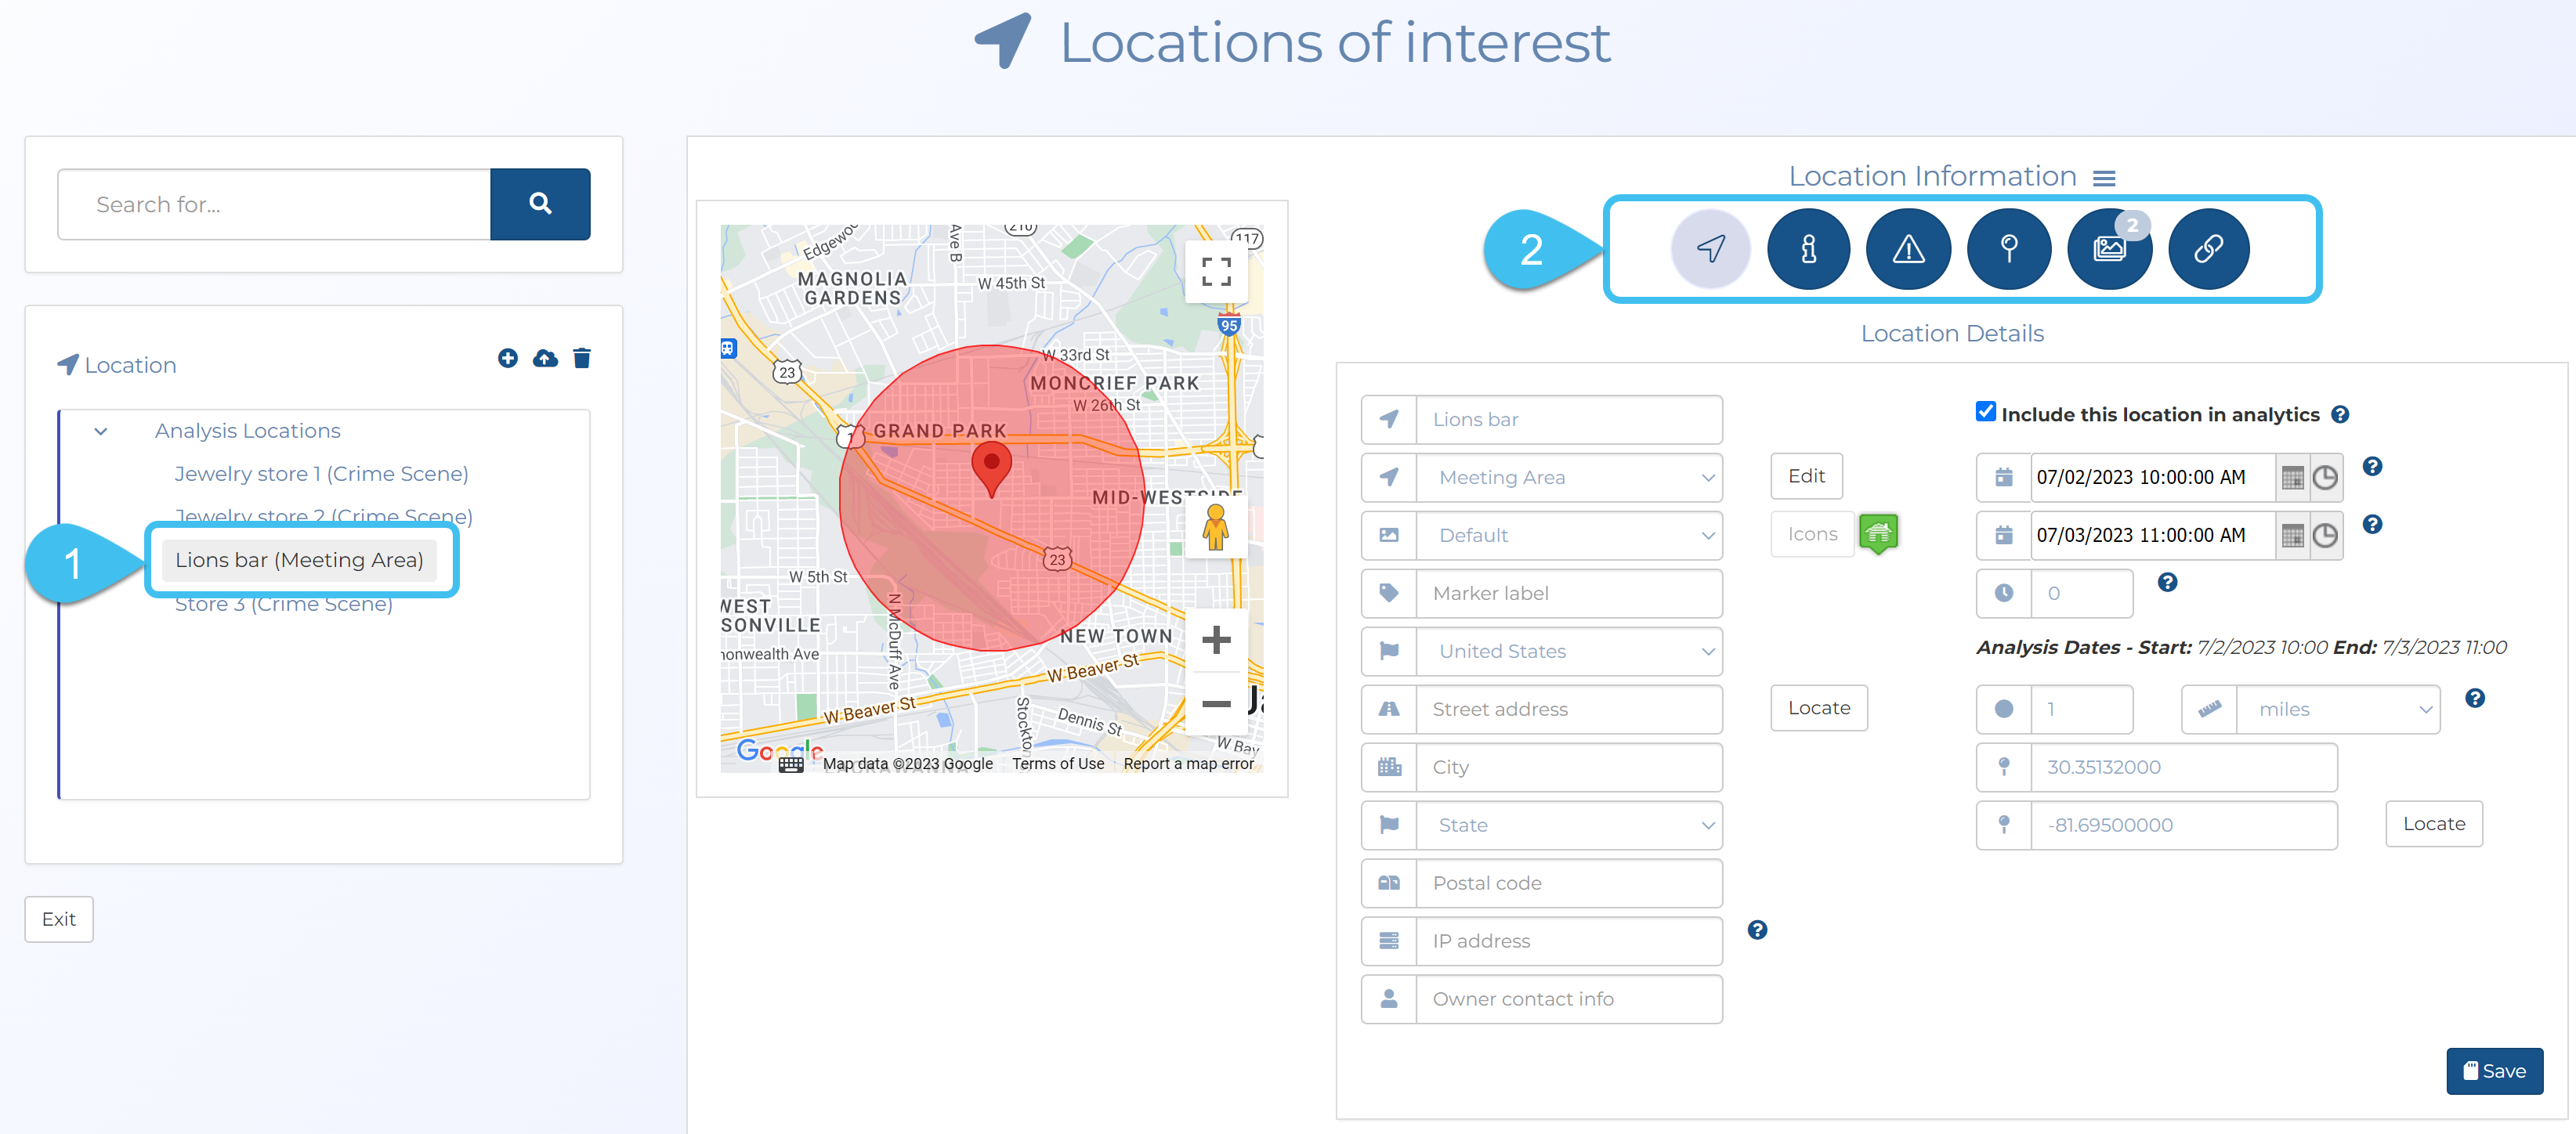
If these additional details do not display then click
 , then select from the menu to display the features you require.
 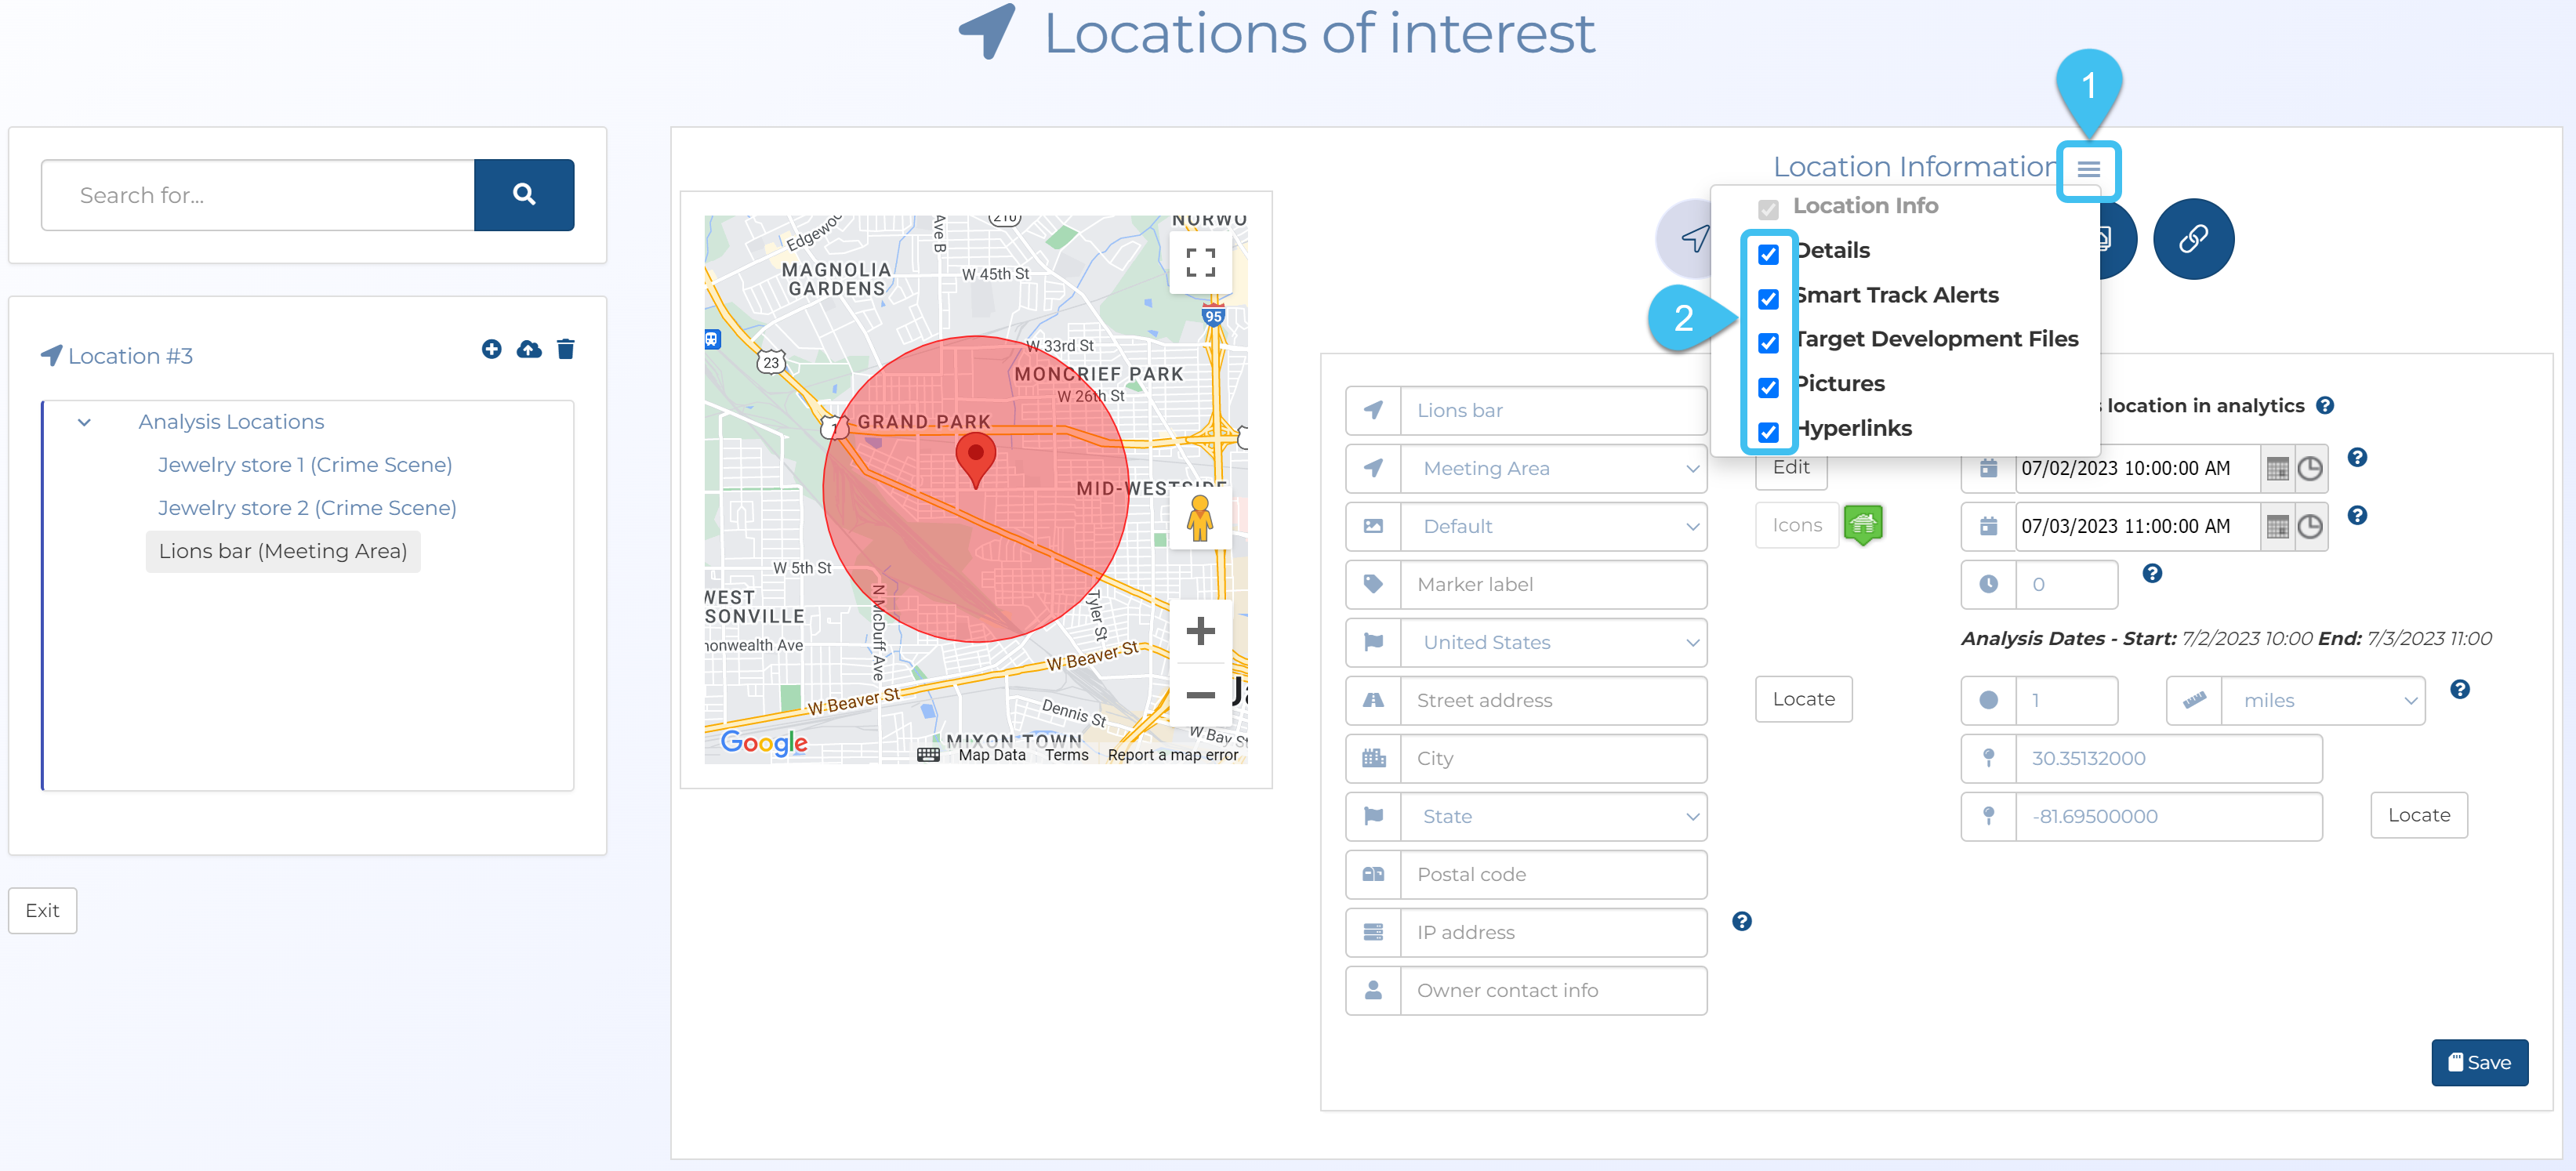 Add descriptive details
- Click
 to display the Details tab. Note, if is not displayed, click , then select Details.
 - Enter your required description, then click Save.
Add a Smart Track alert
-
Click
 to display the Smart Track Alerts tab. Note, if is not displayed, click , then select Smart Track Alerts.
 -
Select the required geo-fence alert, then click Save.
-
the geo-fence alert, which is based on the phone or vehicle being within a defined area. This allows you to monitor if a person is entering a specific location, perhaps the region around the home of a person they are legally not allowed to approach. This alert uses GPS ping, LPR and PRTT data.
-
the reverse geo-fence alert, which is based on the phone or vehicle being outside a defined area. This allows you to monitor if a person is leaving a specific location, perhaps the region around their home which they are legally not allowed to leave.
-
Upload geofence and tower dump files
- Click
 to display the Target development files tab. Note, if is not displayed, click , then select Target development files.
 - Click Target development files, then click Select. Windows Explorer opens. Navigate to the folder and select the required geofence or tower dump files. The files upload and a green circle alongside the file names indicate when the upload is complete. Click Upload. The files are then uploaded to the selected location and can now be managed on the Manage files screen.
Add a picture
- Click
 to display the Pictures tab. Note, if is not displayed, click , then select Pictures.
 - If the settings for uploading a new picture are not already displayed, then click New.
- Click Upload file. Windows Explorer opens. Navigate to the folder and select the required files.
- If required enter a description for the picture and set it as the default, then click Save. The Pictures tab now displays the new picture.
Add a hyperlink
- Click
 to display the Hyperlinks tab. Note, if is not displayed, click , then select Hyperlinks.
 - If the setting for entering a new URL is not already displayed, then click New.
- In URL enter the URL as required, then click Save. The Hyperlinks tab now displays the new hyperlink.
If you require a description of any settings refer to the Locations of interest screen (Case management).
- Click
-
Click Save.
The location you just added is now displayed in Locations at the left of the screen.
-
Click Exit to return to the Manage case screen where the new location is displayed in the Locations section.
To import a file containing new locations
You can import a file containing multiple locations from either the:
-
Manage case screen, or
-
the Locations of interest screen.
Use the following procedure if you require additional details.
The location file you select to import must meet the requirements detailed in Import locations from file screen.
-
For the case you want to import locations to, open the Manage case screen.
Need help finding your case?
On the main menu click View cases. The screen that opens depends on your setting of View cases. If it is set to:
- Advanced view, then the Advanced view cases screen opens.
- If your case is listed on the Favorite & recent cases tab, click the case name to open the Manage case screen.
- If it is not listed on the Favorite & recent cases tab, then click the Cases tab. Use the search filters to help locate your case. You can also click to open the FILTERS group which allows you to set your own default filter defining what is displayed on this tab, for example you may wish to set it to cases that you created which are currently open.
For further information refer to Searching for a case.
- Grid view, then the View cases screen opens.
- If your case is listed under My recent cases click it to open the Manage case screen.
- If it is not listed under My recent cases then select your case from the table, using the search filters to help locate it if required. Note, by default the search is set to only display cases that you created; if you are not the original creator but an assignee then ensure you set Case filter to Assigned cases before clicking Search.
- Tree view, then the View i-cases screen opens.
- Click at the top-right of the screen to open either the View Cases or Advanced view cases screen and follow the above description.
- Click
- Advanced view, then the Advanced view cases screen opens.
-
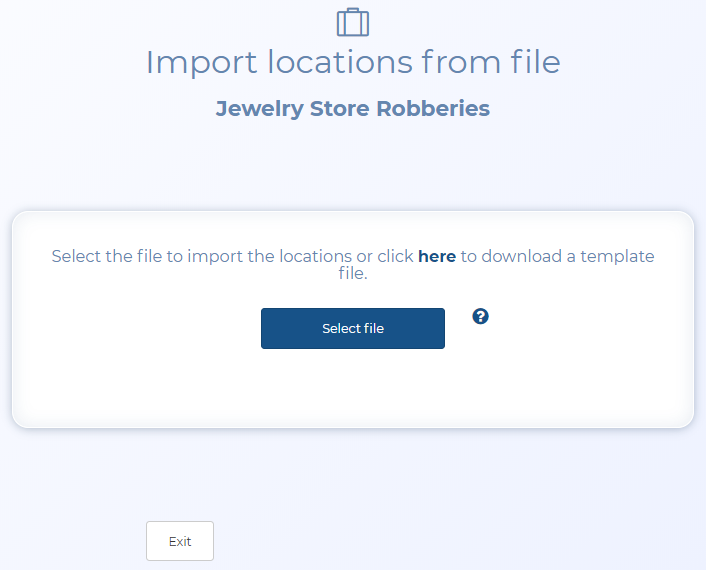
On the Manage case screen, above the Locations section, click Import from file.
The Import locations from file screen opens.
If you prefer to use the wizard to manage all your case details then on the Manage case screen, click Go to wizard, click Locations of interest then click Import from file.
-
Click Select file. Windows Explorer opens. Navigate to the folder and select the required file. Once the file name is displayed then the upload is complete.
-
Click Import.
-
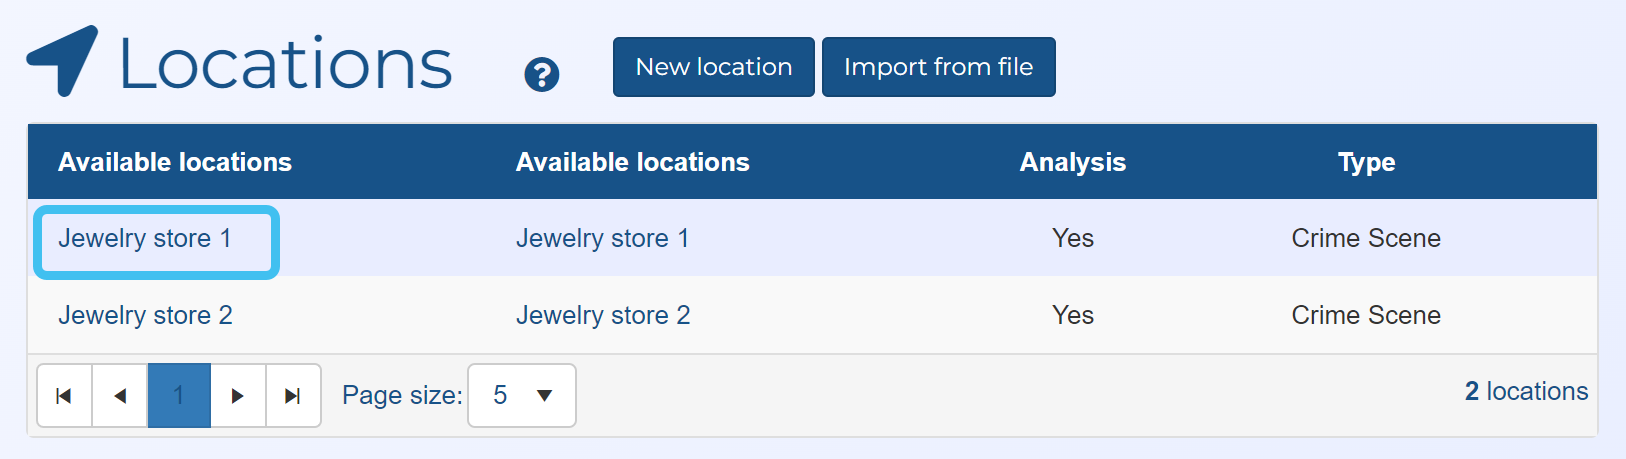
When the Target location file successfully imported message is displayed click Exit. The Manage case screen opens and all the locations from the imported file are now displayed in the Locations section.
-
For the case you want to edit a location on, open the Manage case screen.
Need help finding your case?
On the main menu click View cases. The screen that opens depends on your setting of View cases. If it is set to:
- Advanced view, then the Advanced view cases screen opens.
- If your case is listed on the Favorite & recent cases tab, click the case name to open the Manage case screen.
- If it is not listed on the Favorite & recent cases tab, then click the Cases tab. Use the search filters to help locate your case. You can also click to open the FILTERS group which allows you to set your own default filter defining what is displayed on this tab, for example you may wish to set it to cases that you created which are currently open.
For further information refer to Searching for a case.
- Grid view, then the View cases screen opens.
- If your case is listed under My recent cases click it to open the Manage case screen.
- If it is not listed under My recent cases then select your case from the table, using the search filters to help locate it if required. Note, by default the search is set to only display cases that you created; if you are not the original creator but an assignee then ensure you set Case filter to Assigned cases before clicking Search.
- Tree view, then the View i-cases screen opens.
- Click at the top-right of the screen to open either the View Cases or Advanced view cases screen and follow the above description.
- Click
- Advanced view, then the Advanced view cases screen opens.
-
On the Manage case screen, in the Locations section click the name of the location you want to edit.
The Locations of interest screen opens.
If you prefer to use the wizard to manage all your case details then on the Manage case screen, click Go to wizard, click Locations of interest and then click Add/Edit location. The Add location screen opens then click the location you want to edit.
-
Edit the location information settings as required. If you want to add or edit Smart Track geo-fence and reverse geo-fence alerts, target development files (tower dumps files and geofence files), pictures and hyperlinks and they do not appear then click
, then select from the menu to display the features you require. If you want to:
Manage location details
Edit the settings as required then click Save. If you want the location to be included in any analyses then you must select Include this location in analytics and ensure you've entered the Latitude, Longitude, Event Start, Event end and Location buffer. For further information on how these settings help you refer to Understanding location analytics.
Manage target development (geofence and tower dump) files
Add an additional geofence or tower dump file
- Click to display the Target development files tab. Note, if is not displayed, click , then select Target development files.
- Click Target development files, then click Select. Windows Explorer opens. Navigate to the folder and select the required geofence or tower dump files. The files upload and a green circle alongside the file names indicate when the upload is complete. Click Upload. The files are then uploaded to the selected location and can now be managed on the Manage files screen.
Delete a geofence or tower dump file
Geofence and tower dump files can only be deleted from the Manage files screen.
Manage hyperlinks
Add an additional hyperlink
- Click to display the Hyperlinks tab. Note, if is not displayed, click , then select Hyperlinks.
- If the setting for entering a new URL is not already displayed, then click New.
- In URL enter the URL as required, then click Save. The Hyperlinks tab now displays the new hyperlink.
Edit a hyperlink
- Click to display the Hyperlinks tab. Note, if is not displayed, click , then select Hyperlinks.
- Click
 for the hyperlink you want to edit, then from the menu select Edit hyperlink.
 - In URL edit the URL as required then click Save. The updated hyperlink is now displayed in the Hyperlinks tab.
Delete a hyperlink
- Click to display the Hyperlinks tab. Note, if is not displayed, click , then select Hyperlinks.
- Click for the hyperlink you want to delete, then from the menu select Delete hyperlink.
- Click Yes on the confirmation dialog box. The hyperlink is deleted from the Hyperlinks tab.
Manage pictures
To add an additional picture
- Click to display the Pictures tab. Note, if is not displayed, click , then select Pictures.
- If the settings for uploading a new picture are not already displayed, then click New.
- Click Upload file. Windows Explorer opens. Navigate to the folder and select the required files.
- If required enter a description for the picture and set it as the default, then click Save. The Pictures tab now displays the new picture.
To edit a location's picture information
- Click to display the Pictures tab. Note, if is not displayed, click , then select Pictures.
- Click for the picture you want to edit, then from the menu select Edit picture.
- Edit the settings as required such as setting it as the default image then click Save. The updated picture is now displayed in the Pictures tab.
To delete a picture
- Click to display the Pictures tab. Note, if is not displayed, click , then select Pictures.
- Click for the picture you want to delete, then from the menu select Delete picture.
- Click Yes on the confirmation dialog box. The picture is deleted from the available Pictures tab.
Manage Smart Track alerts
-
Click
to display the Smart Track Alerts tab. Note, if is not displayed, click , then select Smart Track Alerts. -
Select or remove the required geo-fence alert, then click Save.
-
the geo-fence alert, which is based on the phone or vehicle being within a defined area. This allows you to monitor if a person is entering a specific location, perhaps the region around the home of a person they are legally not allowed to approach. This alert uses GPS ping, LPR and PRTT data.
-
the reverse geo-fence alert, which is based on the phone or vehicle being outside a defined area. This allows you to monitor if a person is leaving a specific location, perhaps the region around their home which they are legally not allowed to leave.
-
- Click
-
Click Save.
To delete locations
On the Locations of interest screen:
-
In Locations click
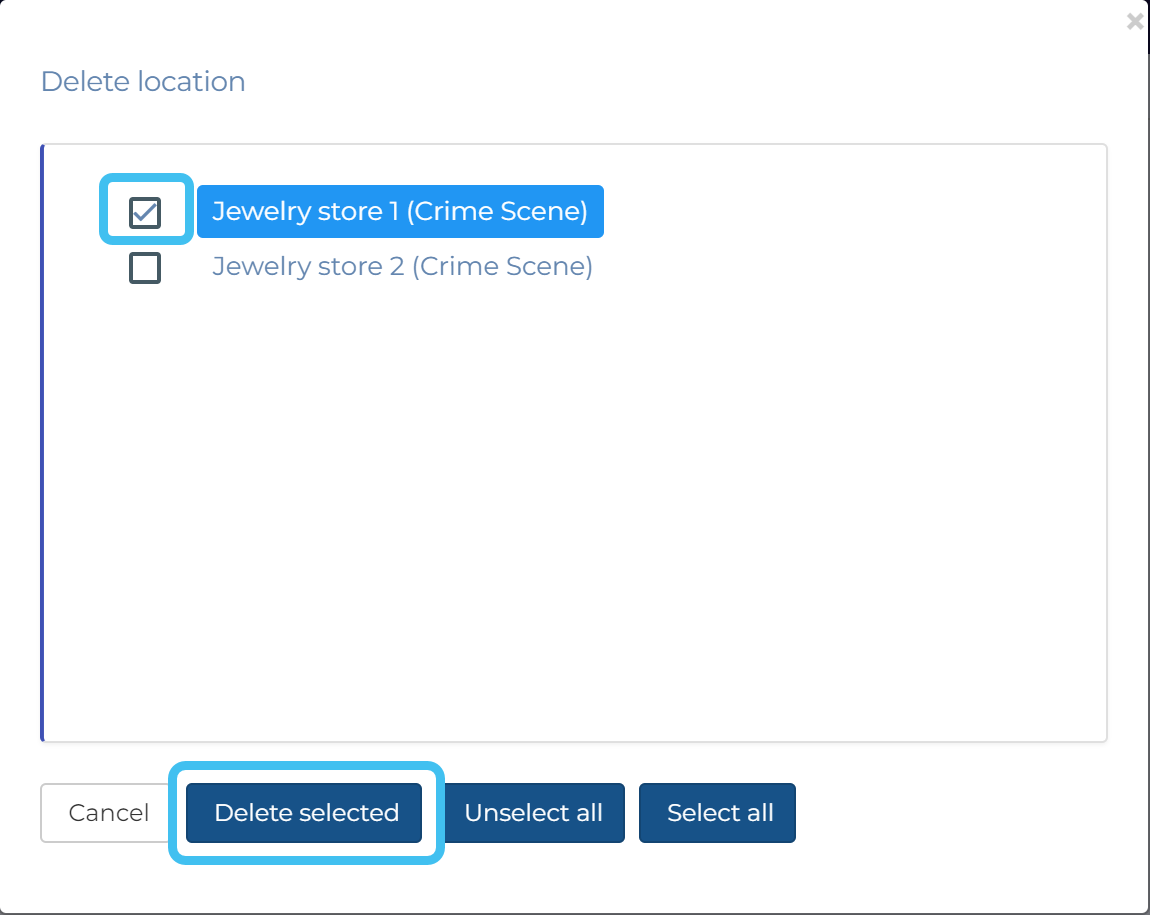
 . A dialog opens.
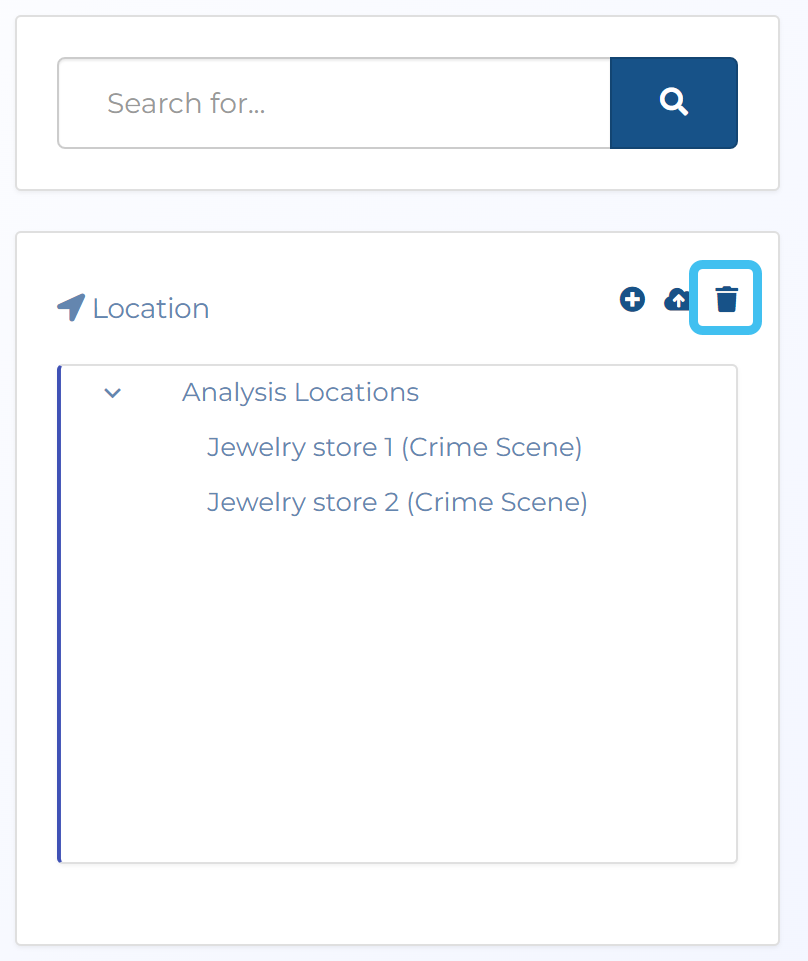
-
Select the check-box next to the locations you want to delete then click Delete selected.
-
For the case you want to delete a location on, open the Manage case screen.
Need help finding your case?
On the main menu click View cases. The screen that opens depends on your setting of View cases. If it is set to:
- Advanced view, then the Advanced view cases screen opens.
- If your case is listed on the Favorite & recent cases tab, click the case name to open the Manage case screen.
- If it is not listed on the Favorite & recent cases tab, then click the Cases tab. Use the search filters to help locate your case. You can also click to open the FILTERS group which allows you to set your own default filter defining what is displayed on this tab, for example you may wish to set it to cases that you created which are currently open.
For further information refer to Searching for a case.
- Grid view, then the View cases screen opens.
- If your case is listed under My recent cases click it to open the Manage case screen.
- If it is not listed under My recent cases then select your case from the table, using the search filters to help locate it if required. Note, by default the search is set to only display cases that you created; if you are not the original creator but an assignee then ensure you set Case filter to Assigned cases before clicking Search.
- Tree view, then the View i-cases screen opens.
- Click at the top-right of the screen to open either the View Cases or Advanced view cases screen and follow the above description.
- Click
- Advanced view, then the Advanced view cases screen opens.
-
On the Manage case screen, click the title Locations.
The Locations of interest screen opens.
-
In the available locations table select the check-box next to the locations you want to delete then click Delete selected.
-
In Locations click
. A dialog opens.
-
Select the check-box next to the locations you want to delete then click Delete selected.
-
Click Yes on the confirmation dialog box.
The selected locations are deleted from the list.
- Click Exit to return to the Manage case screen.