Using narratives in advanced analysis reports
This topic describes how to use narratives in advanced analysis reports on the ESPA analysis center screen.
This feature requires option E13 Narrative data. If you do not have this option this feature is not available.
This procedure assumes you have created a report as detailed in the first three steps of To create a new report. For further information on what details are included refer to Add narrative section.
If you currently have the <Report name> tab open then go directly to step 3.
-
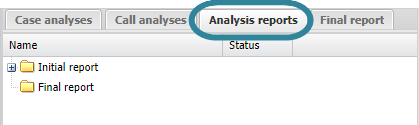
On the ESPA analysis center screen's Case management view select the Analysis reports tab.
-
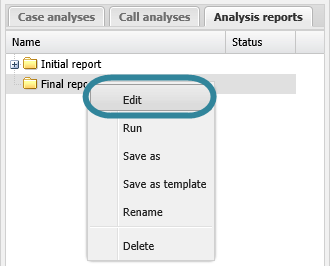
Right-click the report folder then click Edit on the displayed menu.
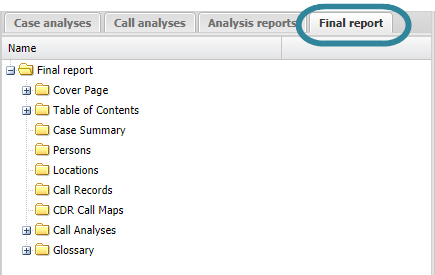
A new tab opens which is titled with the report's name.
- Ensure your narrative is open. You can open it on the Case analyses tab by right-clicking it then selecting Open narrative.
-
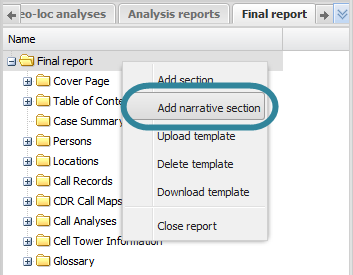
On the <Reports name> tab, right-click the folder in the report to which you want to add the narrative event, then click Add narrative section.
-
The narrative section is displayed in the report structure. Note, each event from the narrative is added individually and it may take a few seconds for each event to be displayed. The narrative is replayed whilst it is being added to the report and a confirmation is displayed on the map once the narrative has been successfully added to the report.
- If you want to move the narrative section's position then left-click it and drag it to a new position.
-
By default the item is named "Narrative - <narrative name>", you may want to rename it by right-clicking it and selecting Rename.
This procedure renames the item as it is displayed on the <Reports name> tab, this name does not appear in your report.
This procedure assumes you have created a report as detailed in the first three steps of To create a new report and that you have previously added a narrative section as detailed in To add a narrative to a report.
If you currently have the <Report name> tab open then go directly to step 3.
-
On the ESPA analysis center screen's Case management view select the Analysis reports tab.
-
Right-click the report folder then click Edit on the displayed menu.
A new tab opens which is titled with the report's name.
-
On the <Reports name> tab, locate the position in your report of the narrative section then right-click and select Rename.

The Rename section dialog box opens.
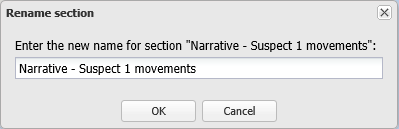
- Enter the new name for your narrative section then click OK. The name is updated on the <Reports name> tab.
This procedure assumes you have created a report as detailed in the first three steps of To create a new report and that you have previously added a narrative section as detailed in To add a narrative to a report.
If you currently have the <Report name> tab open then go directly to step 3.
-
On the ESPA analysis center screen's Case management view select the Analysis reports tab.
-
Right-click the report folder then click Edit on the displayed menu.
A new tab opens which is titled with the report's name.
-
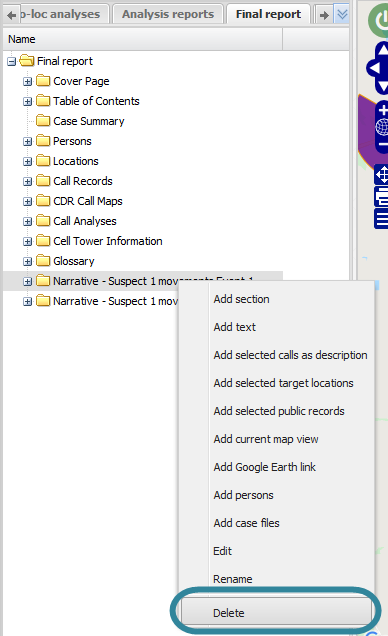
On the <Reports name> tab, locate the position in your report for the narrative section then right-click and select Delete. Click OK on the Delete section dialog box to remove the narrative section from the <Reports name> tab and as content within your report when you run a new version of your report.