How to create a pick list
To create a pick list in a template, add this key along with your other keys to the template, then in OSS-ESPA create a key where Key data type is set to "Advanced drop down" and upload your Excel file with all the data.

Click the hyperlink below for further details.
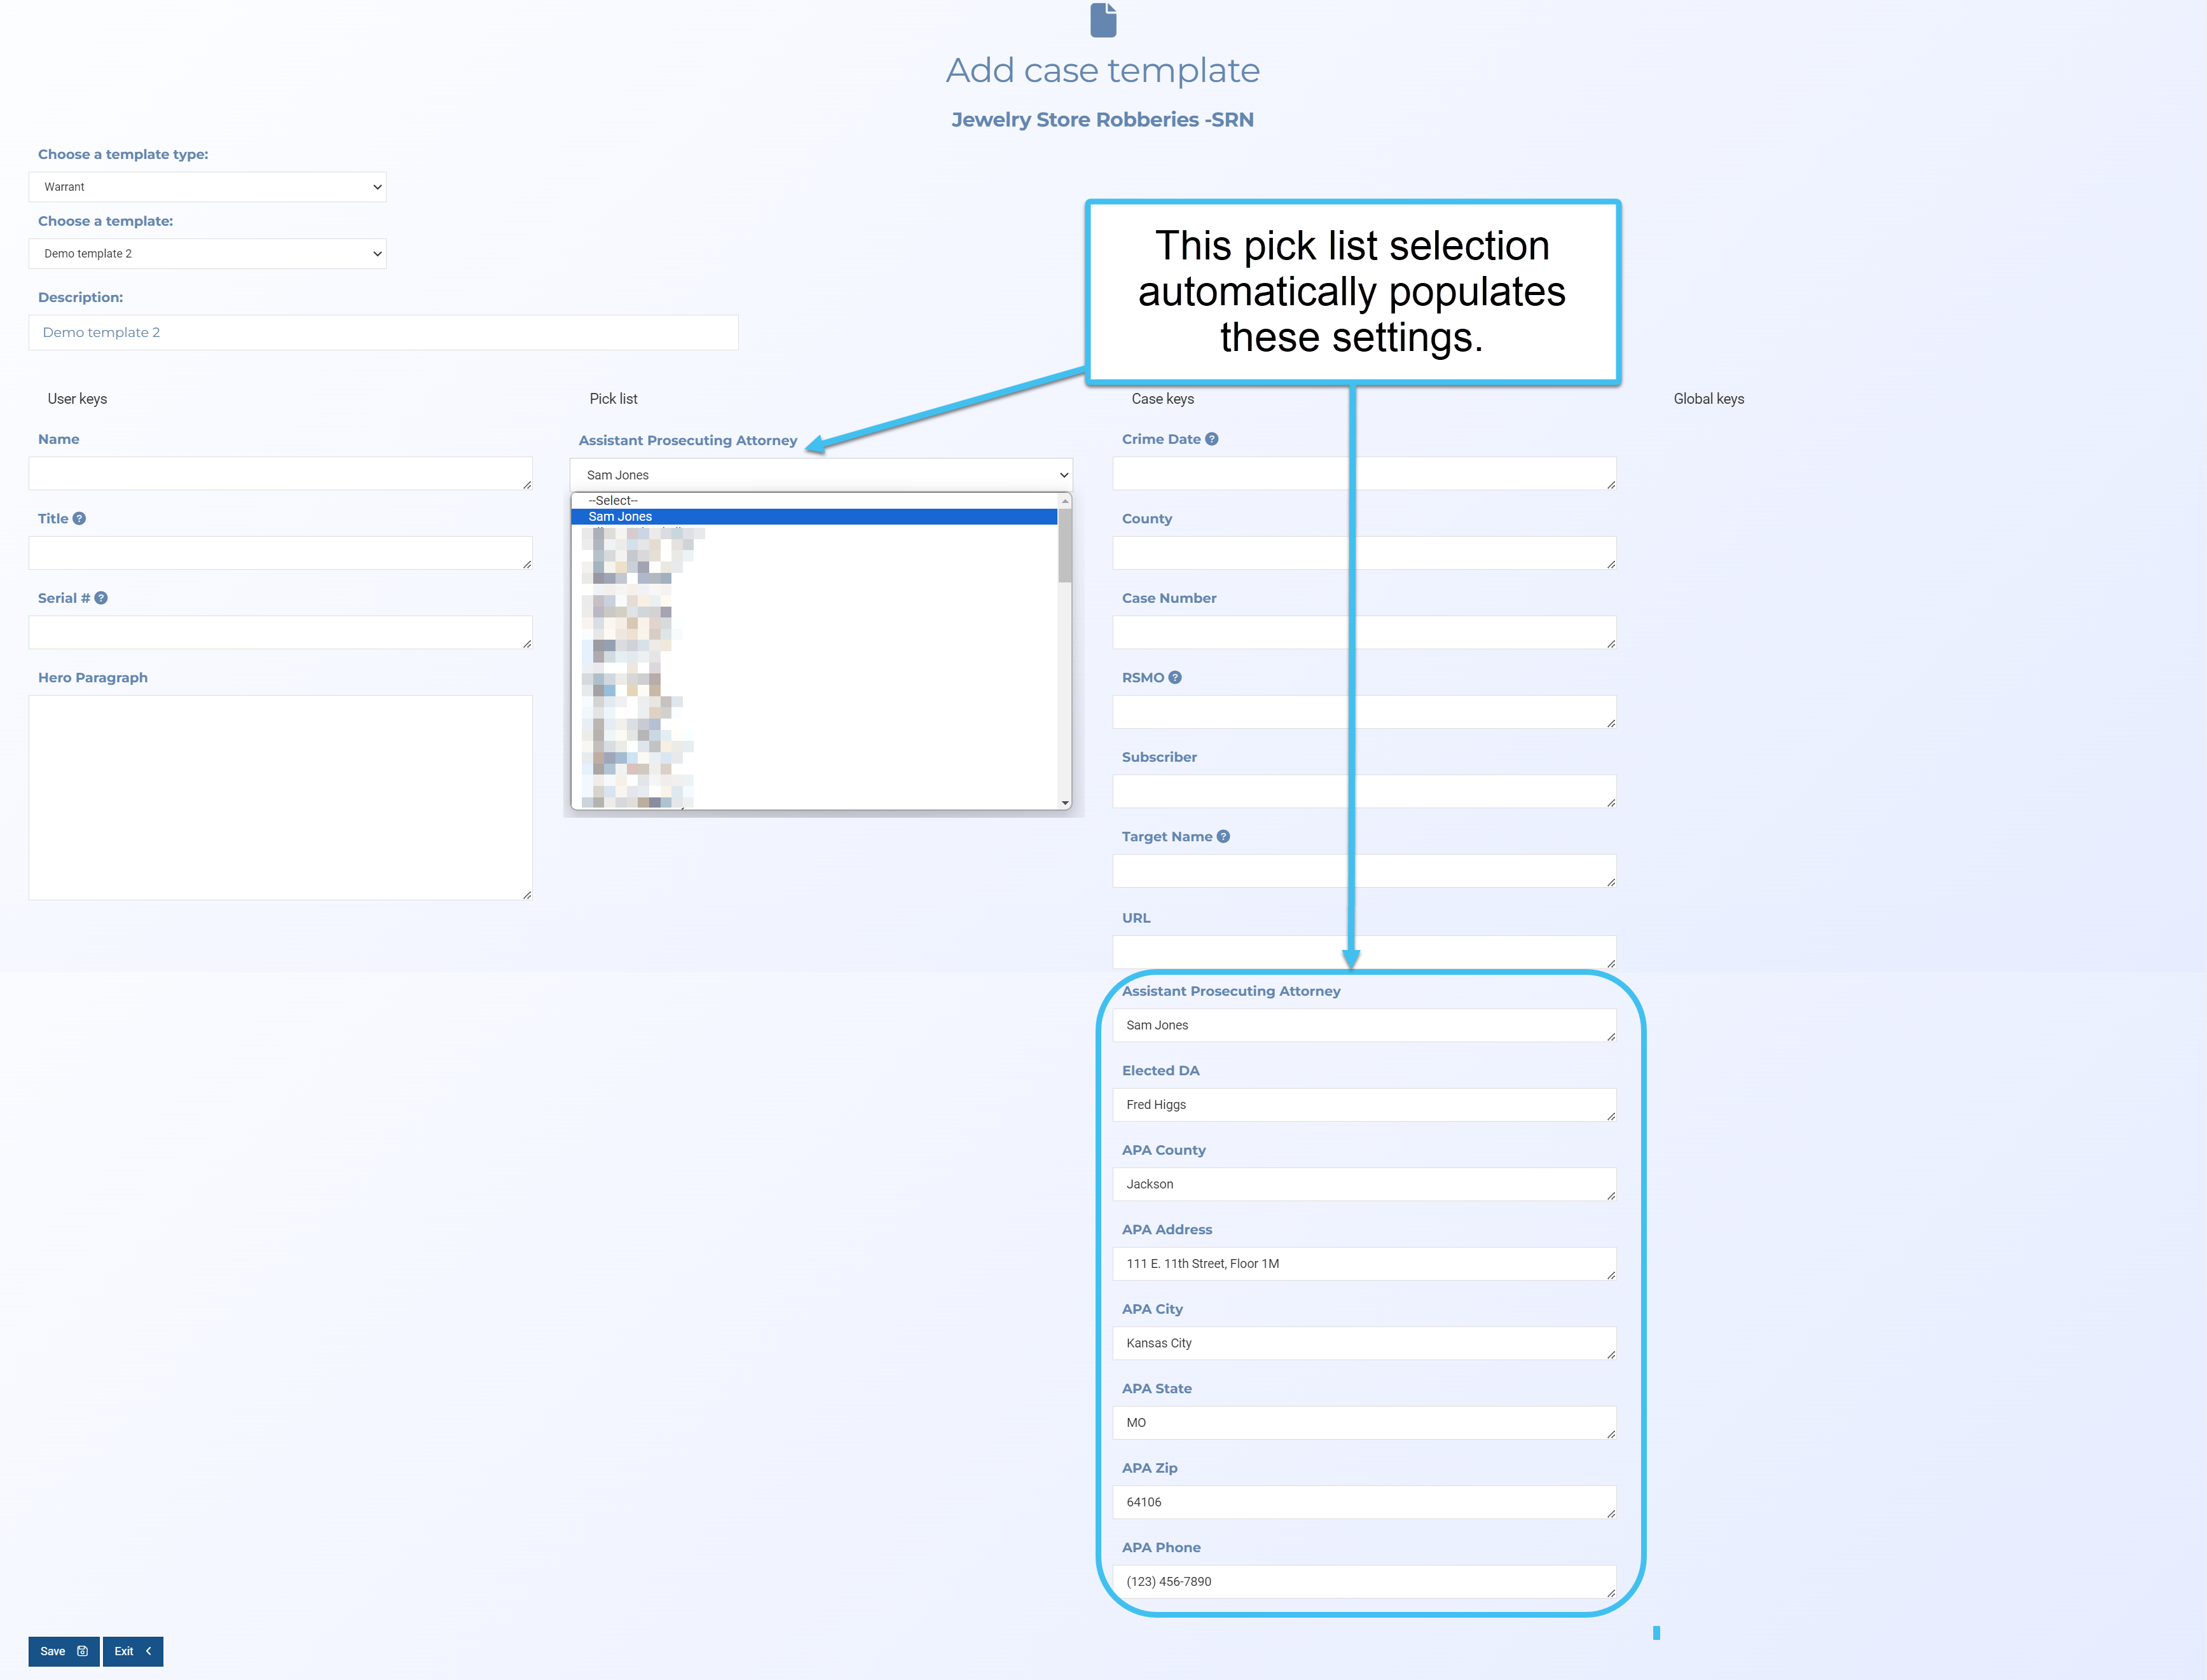
This topic details how to create a specific type of key that provides you with a menu of items that can be selected, then once the item is selected it automatically populates the data in other keys as shown in the following graphic.
NOTE: This topic is only for administrators or users with the Templates manager permission. If you are not an administrator or do not have this permission and simply want information on using templates and keys refer to Using templates.
-
Identify the key words in your Microsoft Word template file that define the pick list key word and the key words that are to be auto-populated from the pick list.
-
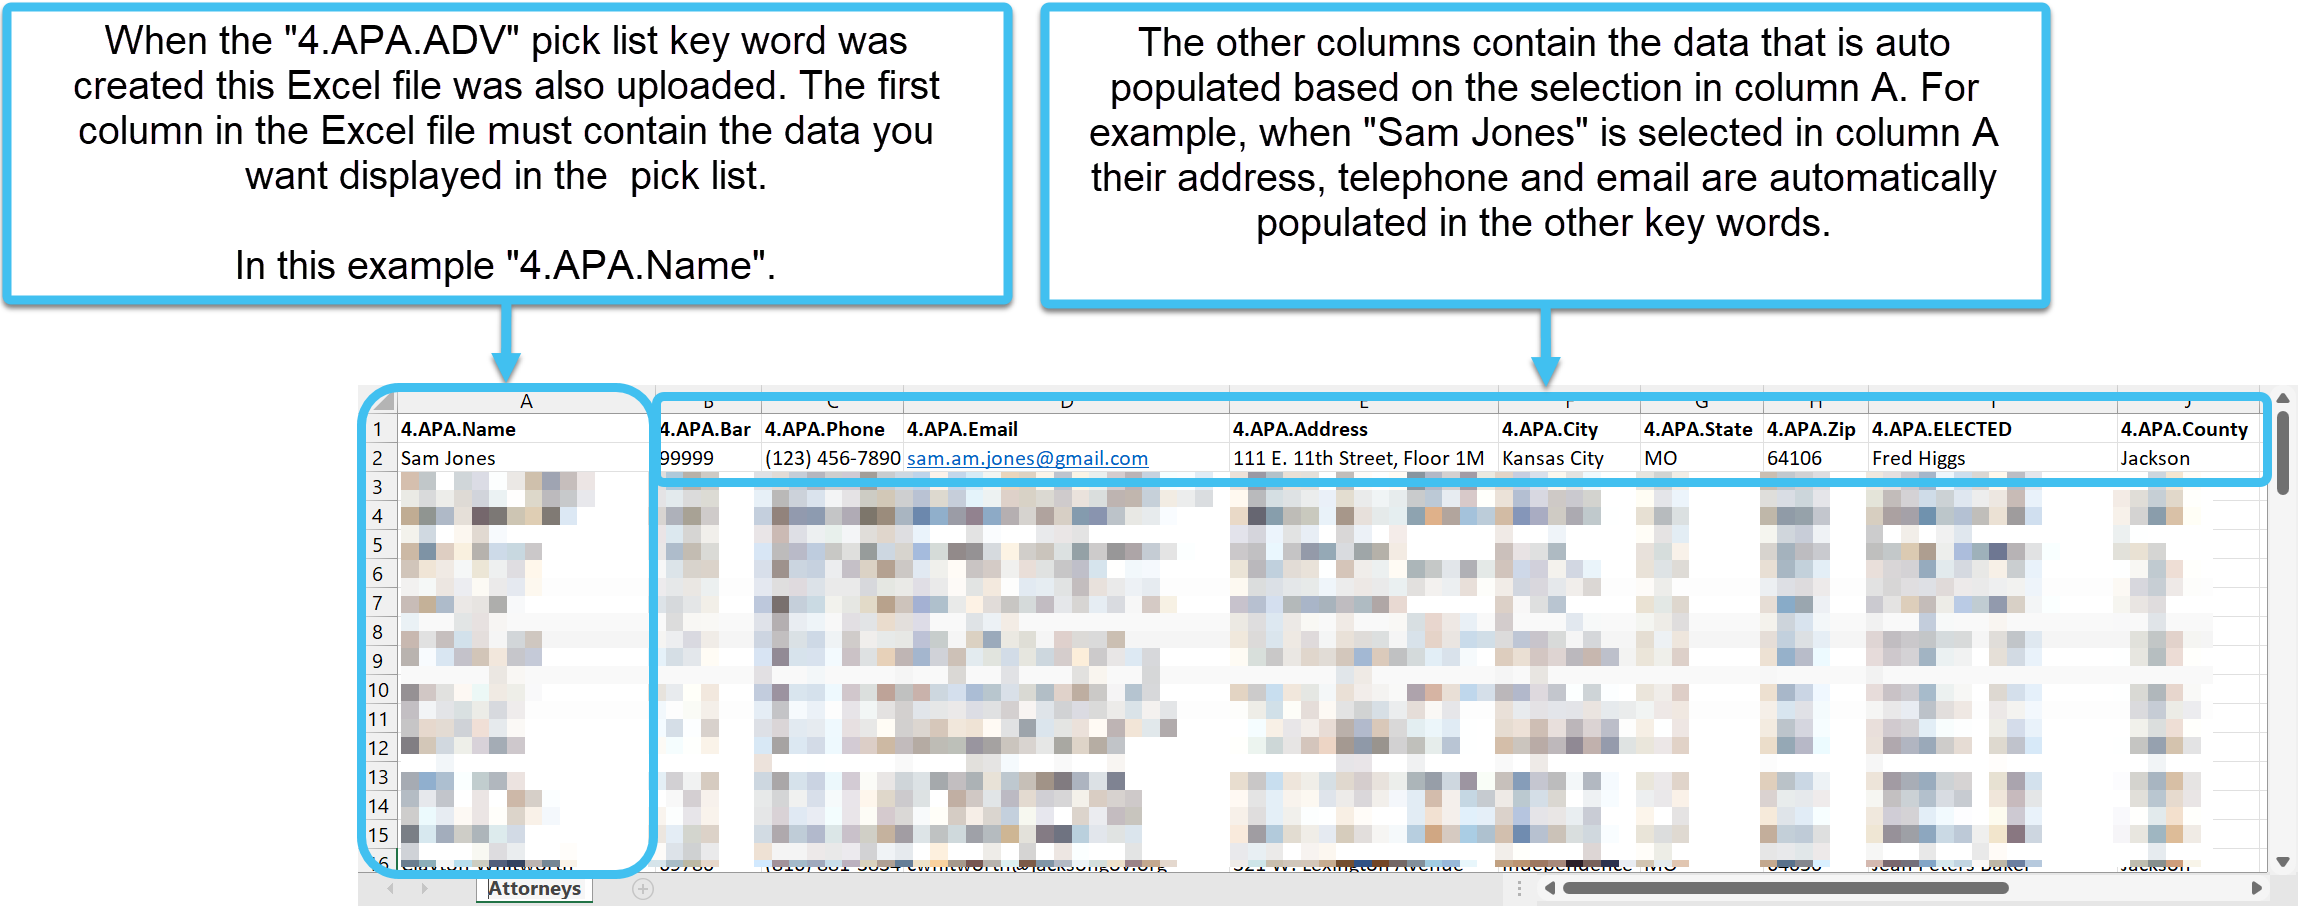
Create an Excel file where the first column contains the content you want displayed in the pick list. The other columns must include the data you want auto-populated when each item is selected from the pick list. For example:
-
Create the auto-populated key words using the same method as other key words, as described in How to create a key.
-
Create the pick list key word using the same method, however you must set:
-
Key type to either "User" or "Case", it does not matter which you select.
-
Key data type to "Advanced drop down".
Click Save. The Key management screen opens. Click
 for the pick list key word you just created then click Choose file. Windows Explorer opens. Navigate to the folder and select the required Excel file that you created in step 2, then click Load keys <. The data from the Excel file is displayed on the screen and the template with the pick list is now available to use.
 -