Importing cell tower data files using the system importer tool
This topic describes how to import your system (often referred to as cell tower data) files using the System importer tool so that they can be used in cases. The System importer tool allows you to import your system files and allows them to be used on maps to displays the site locations and site labels. Note that this tool can only be run by a system administrator who has operating system access to the servers where OSS-ESPA is installed.
This is the original method of uploading system files which is only available to system administrators. All users can now upload system files using the Manage files screen. The Manage files screen is the recommended method you should use to upload system files as it provides automatic detection of system file formats. For further information on using this method refer to Managing files .
The following procedure explains how system files can be imported using the System importer tool, however there are other methods that can be used for importing system files.
-
To open the System importer tool, on your computer, open Command prompt and run the GNetRunTask application along with the si parameter. For example;
C:\Program Files(x86)Qualitest\GNet\GNetRunTask.exe si
The System importer dialog box opens.

- Click Add and select the system files you want import.
- In Customer select the customer that the system files are for.
- Ensure Generate map is selected.
- In Operator select which operator the system files are for.
-
In Import to database select the system database mapping that the system files are to be imported to.
Note, if you need to create a database select (Create new database). The Create new tower database dialog box opens. Complete the following steps:
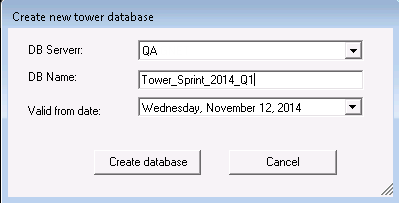
- In DB Server select the server you want to use.
- In DB Name enter the name for the new database.
- In Valid from date select the date from which these files are valid.
- Click Create database. The Create new tower database dialog closes.
- On the System importer dialog box, in Import to database select the database name you have just created.
-
Click Import. The workflow's analysis queue task then automatically imports the system files. The Event box displays the progress of the upload along with any errors. The import is complete when the message: Import completed Done is displayed. Note, it is common for system files to contain some errors that are displayed in Event during the upload. If you want to examine these errors you can view the log file which is created when the import completes.
The log files are saved to the same folder as the application is located, for example C:\Program Files(x86)Qualitest\GNet. The log file name is of the format GnetRuntTask_SystemImport_<date>.log, where <date> is yyyymmdd, for example GNetRunTask_SystemImport_20120625.log.