Create an alert from selected location dialog box
This topic describes the purpose of the Create an alert from selected location dialog box, how to access it and all the settings and buttons on it.
This feature requires option E10 Live location monitoring. If you do not have this option this screen is not available.
The Create an alert from selected location dialog box allows you to create, from the Real time smart track location screen, a new target location and a geo-fence or reverse geo-fence alert based on the location of an existing ping.

This setting is mandatory. Enter a name for the location that is meaningful to you, for example Jewelry store or Suspect's main residence.
This setting is mandatory. Select the type of location. The location is then displayed on the
The Notes type is not typically created as a location from here. The Notes type is used to create a note on the map of the ESPA analysis center screen for use in advanced analysis reports, and is typically added to the case using the Target location information dialog box as it allows you to click on the map to easily define the location you want to anchor your note to.
The latitude and longitude are automatically completed with the ping's location.
The latitude and longitude are automatically completed with the ping's location.
Enter the distance you want used for your alert. This distance means different things depending on your alert type. For:
-
Geo-fence: this setting defines the radius from the selected target locations that the phone or vehicle must be within before a geo-fence email is sent. Note, if the selected target location has a distance set using its own buffer on the Add/Edit location screen, then that is the distance used and not the one specified by this setting.
-
Reverse geo-fence: this setting defines the radius from the selected target locations that the phone or vehicle must be outside before a reverse geo-fence email is sent. Note, if the selected target location has a distance set using its own buffer on the Add/Edit location screen, then that is the distance used and not the one specified by this setting.
Select only if you want to customize how the target location icon marker is displayed in the ESPA analysis center screen and the reports.
- select a color, then in Marker label enter the characters to create a colored icon with two characters.
- do not select "Custom", as it is not possible to create a custom icon from this dialog box. If you want to select an alternative icon or to upload your own you can do this using the Locations of interest screen (Case management).
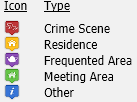
The default icons are shown in the following graphic.
This setting is only applicable if Marker icon is set to one of the color options. Enter up to two characters to customize how the location icon marker is displayed on the ESPA analysis center screen and the reports.
This setting is mandatory. Enter a name for the alert.
This setting is mandatory. Select the type of alert either:
-
Geo-fence: select if you want to monitor when a phone or vehicle enters the defined area. If a live location monitoring event occurs for a phone or vehicle within the defined area then OSS-ESPA will send a GEO FENCE ALERT email.
- Reverse geo-fence: select if you want to monitor when a phone or vehicle leaves the defined area. If a live location monitoring event occurs for a phone or vehicle outside the defined area then OSS-ESPA will send either a REVERSE GEO FENCE ALERT email.
Select which phones and vehicles you want used in the alert. Note, the only phones that are displayed are those who have a provider that supports live location monitoring, which is currently only ATT, T-Mobile, Sprint and Verizon.
Click to close the dialog box without applying any changes you may have made.
Click to apply any changes you have made. The dialog box closes automatically.