Sentinel discovery queue screen
This topic provides an overview of the Sentinel discovery queue screen and all the settings and buttons on it.
This feature requires option E14 Sentinel. If you do not have this option this feature is not available.
The Sentinel discovery queue screen is used to:
- analyze raw hexadecimal streams that have been accepted by OSS-ESPA's import and packet inspection processes and then failed to be decoded.
- display and manage Intercept messages that have been received by OSS-ESPA that do not have an associated i-case with a matching CASEID (LIID). When an i-case with a matching CASEID (LIID) is created in OSS-ESPA then the intercept messages listed are automatically moved to the correct i-case and are no longer listed on this screen.
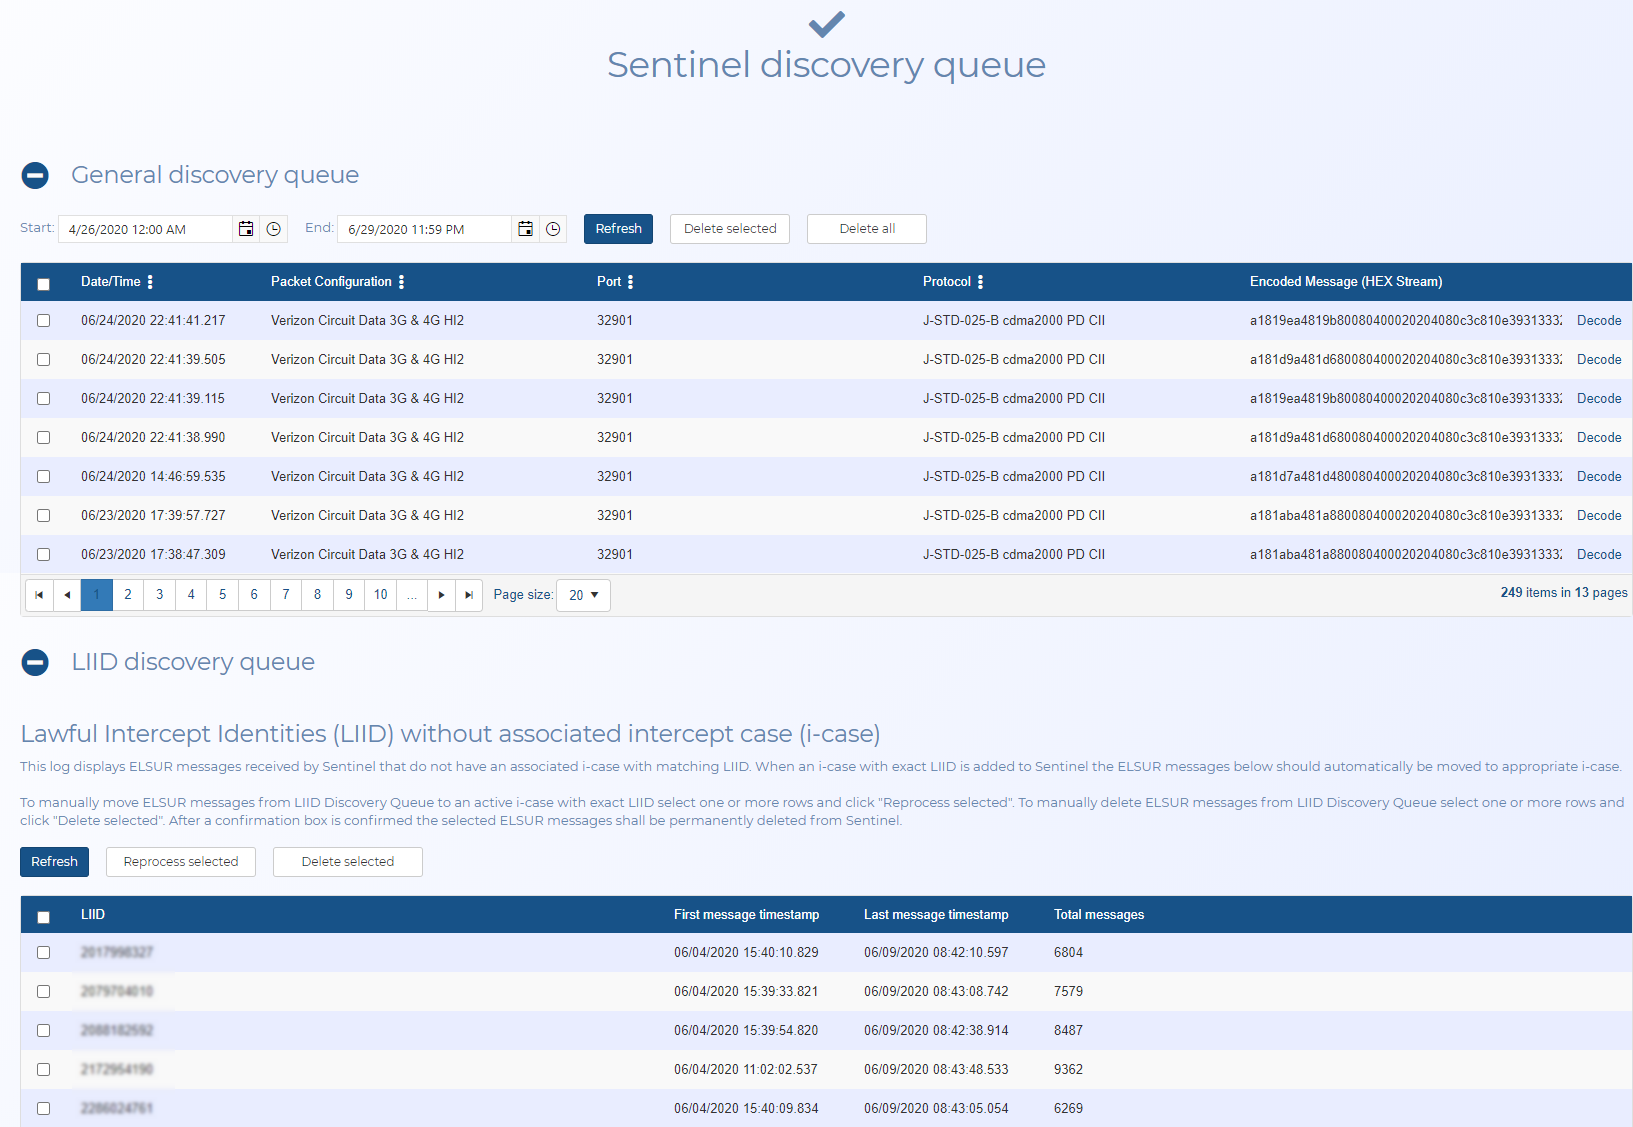
This tab allows you to analyze raw hexadecimal streams that have been accepted by OSS-ESPA's import and packet inspection processes and then failed to be decoded.
Enter the start and end dates to filter the hexadecimal strings so that the ones that are of interest to you are displayed on the screen then click Refresh.
Enter the start and end dates to filter the hexadecimal strings so that the ones that are of interest to you are displayed on the screen then click Refresh.
If you have edited the date range then click to update the packets displayed in the table.
Click if you want to delete the HEX streams you have the check-box selected for in the table below.
Click if you want to delete all the HEX streams irrespective of whether or not you have the check-boxes selected or not. This allows you to delete multiple pages of HEX streams at once.
Clicking to open the ELSUR Packet Decoder screen with the HEX stream already populated.
 Column header menu
Right-click on any column header in the table to display this menu.
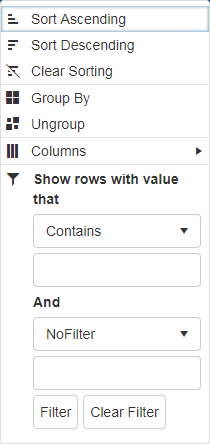
This menu allows you to perform the following:
- Sort ascending: click to sort the column text from A to Z or to sort numbers from smallest to largest.
- Sort descending: click to sort the column text from Z to A or to sort numbers from largest to smallest.
- Clear sorting: click to clear any sorting you have applied using Sort ascending or Sort descending.
- Group by: click to group the cases by the selected column.
- Ungroup: click to ungroup the cases by the selected column.
-
Columns: select to display a list of which columns you can display on this table.
-
 : use to filter further the results that are displayed in the table. You can filter based on the settings in that column and/or values that occur across the case row.
 - Use the check-boxes if any are displayed for your selected column. These allow you to filter based on all the settings that are applicable to that column. For example, the Port column allows you to filter by the different port numbers that are available.
- Set up to two values that you can filter for using the drop-downs and the data entry field. For example, you could select "Contains" the value "32901" to search for that port number.
- Click Filter when you have entered the required filter information.
- Click Clear filter to remove any filter from the column.
This tab displays and allows you to manage Intercept messages that have been received by OSS-ESPA that do not have an associated i-case with a matching CASEID (LIID). When an i-case with a matching CASEID (LIID) is created in OSS-ESPA then the intercept messages listed are automatically moved to the correct i-case and are no longer listed on this screen.
Click to refresh the intercept messages that are listed.
Intercept messages are automatically moved to the correct i-case once a case is available, however if you want to speed up the process and move the intercept messages from this discovery queue yourself then use the check-boxes to select the intercept messages you want to move then click this button.
Click if you want to delete the intercept messages you have the check-box selected for in the table below. Once you have confirmed you want to delete the intercept message they are permanently deleted from OSS-ESPA.