Managing users
Administrators can manage users using the Add user and Edit user screens. These screens are opened from the main menu by clicking Settings, Admin settings then selecting Manage users in the Manage account group. To add a new user click Add a new user, or to edit an existing user click their name in the table. Managing users involves: adding, editing, deleting, activating, configuring for live monitoring, deactivating, inviting, disconnecting, and resetting passwords.
This topic describes how to manage users.
NOTE: To manage users you must be a customer administrator.
If you require detailed descriptions of the user settings refer to the Add/Edit user screen.
NOTE: To create new users you must be a customer administrator.
-
On the main menu click Settings, then click Admin settings.
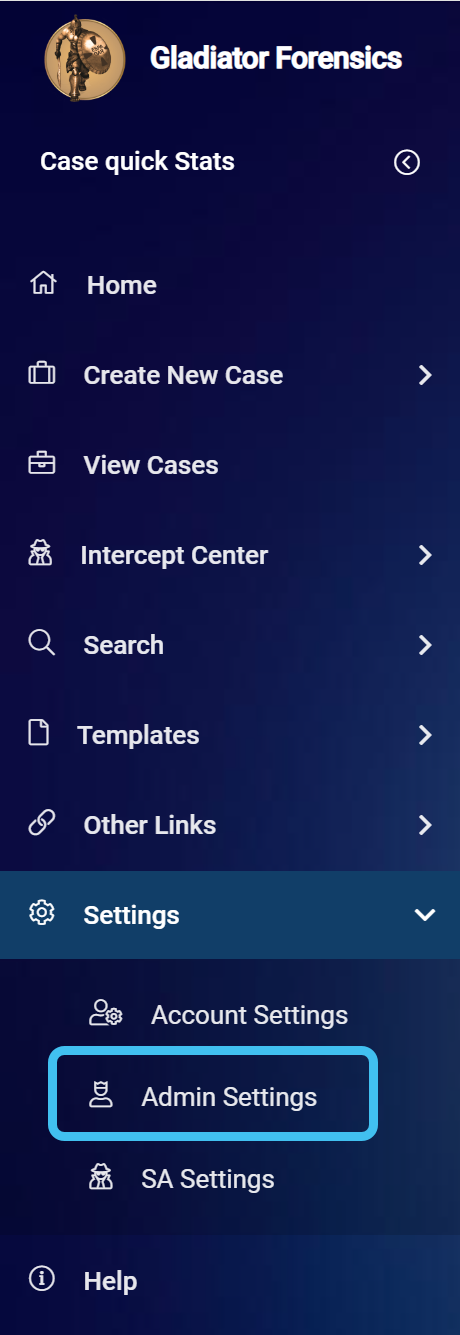
The Admin settings screen opens.
-
Click Manage users. The Manage user screen opens.
-
Click Add a new user.
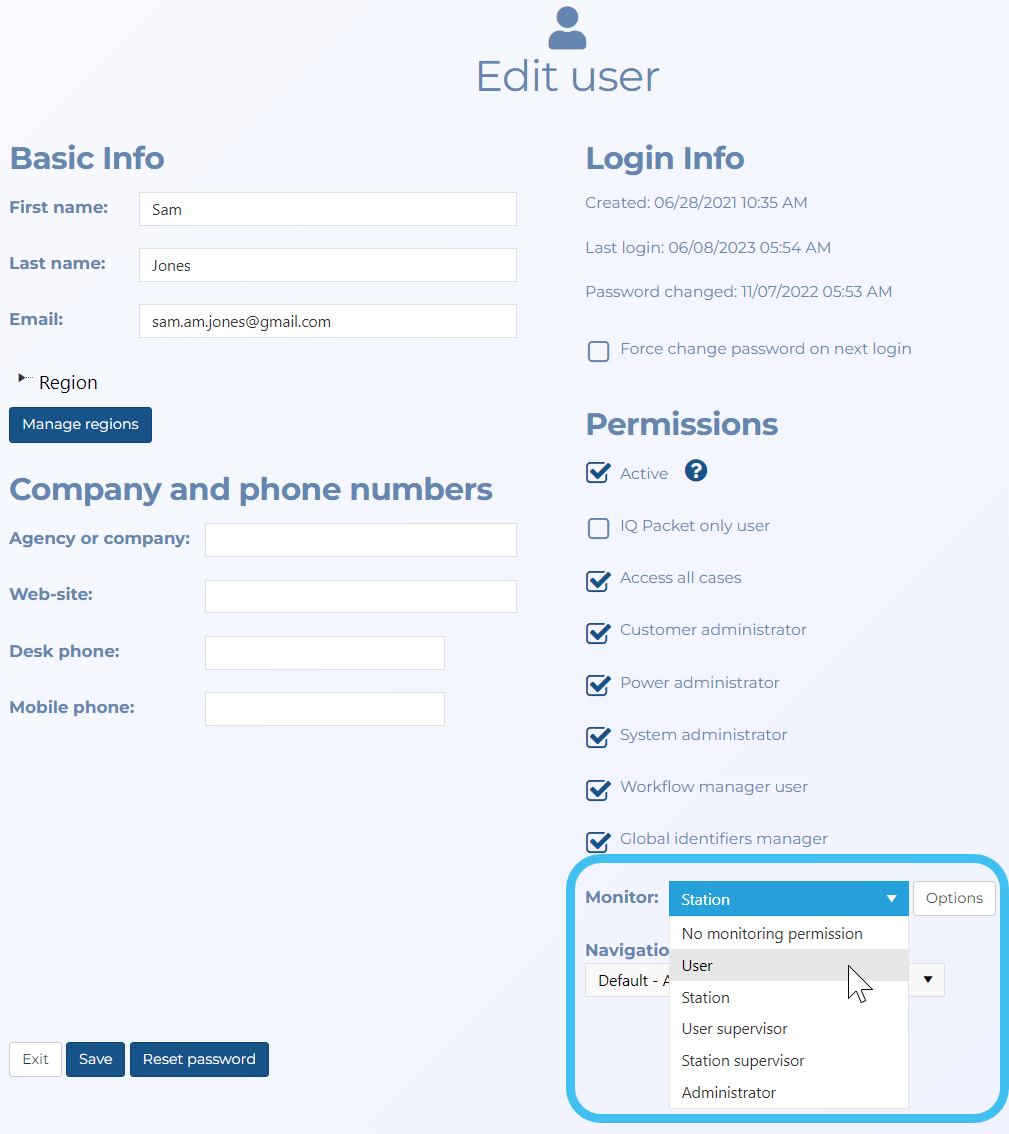
The Add user screen opens.
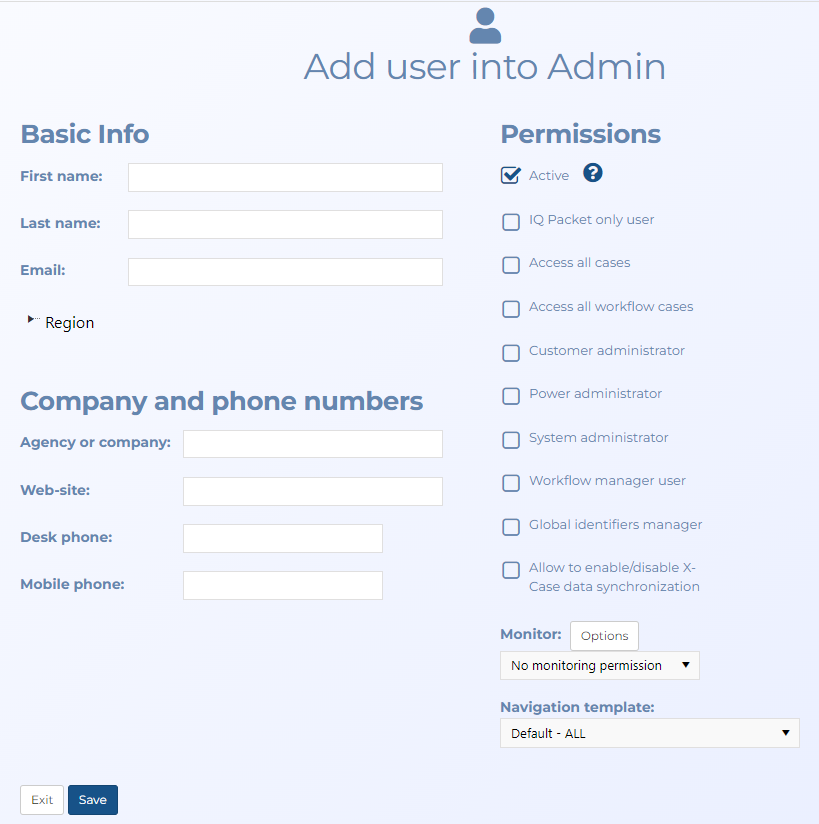
- On the Add user screen you must complete the following settings:
- In First name enter the user's first name.
- In Last name enter the user's last name.
- In Email enter the user's email address.
Note, Active is set by default for new users. New users are automatically sent an email by OSS-ESPA. When they respond to this email their OSS-ESPA account becomes registered and they are given membership to the customer account. They can then use their account.
If you have an account which requires users to use an authentication code when they log in, the authentication code is sent to their email by default. However if they would prefer it also be sent to their mobile phone as a text message then enter their number in Mobile phone.
-
In Permissions, select the ones required for the user.
-
In Type, select which products the user requires. Note, licenses for each product are managed separately.
-
In Monitor, only select an option if the user is performing Live monitoring. For further information refer to To configure an individual user for Live monitoring.
-
In Navigation template select the appropriate template for the user.
-
Click Save. Your new user is created and listed on the Manage users screen.
Initially the user is listed as not registered. However, when you clicked Save an email was sent automatically to the email address you entered. When the new user responds to this email their account will change and become both active and registered.
NOTE: To edit another user's name you must be a customer administrator. Users can also edit their own name using the Edit user information screen. You cannot edit a user's email address.
-
On the main menu click Settings, then click Admin settings.
The Admin settings screen opens.
-
Click Manage users. The Manage user screen opens.
-
Click the name of the user you want to edit.
The Edit user screen opens.
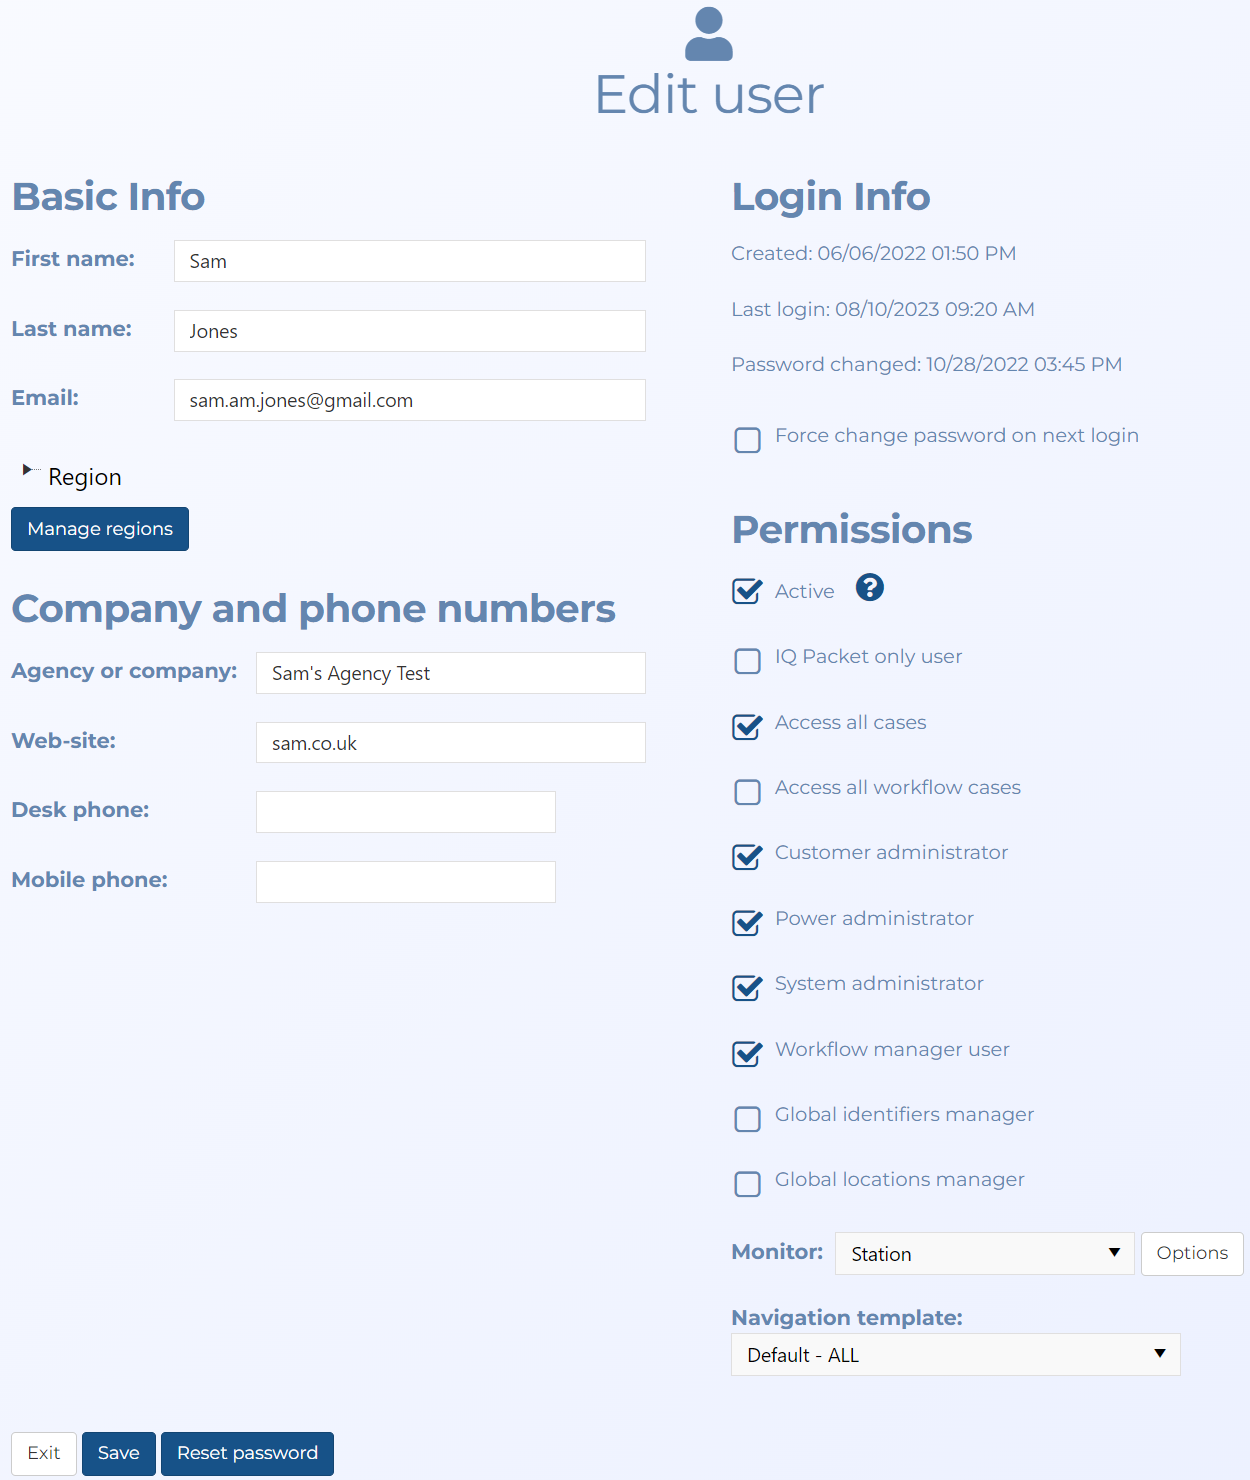
- Edit the settings you want to change.
- Click Save. The user information is updated.
NOTE: To delete a user you must be a customer administrator.
You cannot easily delete a user who has previously registered and also created a case instead you must deactivate their account as described in To deactivate a user. However, if you do want to permanently delete them then you must also delete their cases and then wait one week until an internal OSS-ESPA administrative task is run which finalizes the removal of the cases before you can then delete the user.
-
On the main menu click Settings, then click Admin settings.
The Admin settings screen opens.
-
Click Manage users. The Manage user screen opens.
-
Select the check-box beside the name you want to delete then click Delete selected.
The user account is deleted and the user is removed from the Manage Users screen.
NOTE: To activate a user you must be a customer administrator.
-
On the main menu click Settings, then click Admin settings.
The Admin settings screen opens.
-
Click Manage users. The Manage user screen opens.
-
Click the name of the user you want to activate.
The Edit user screen opens.
-
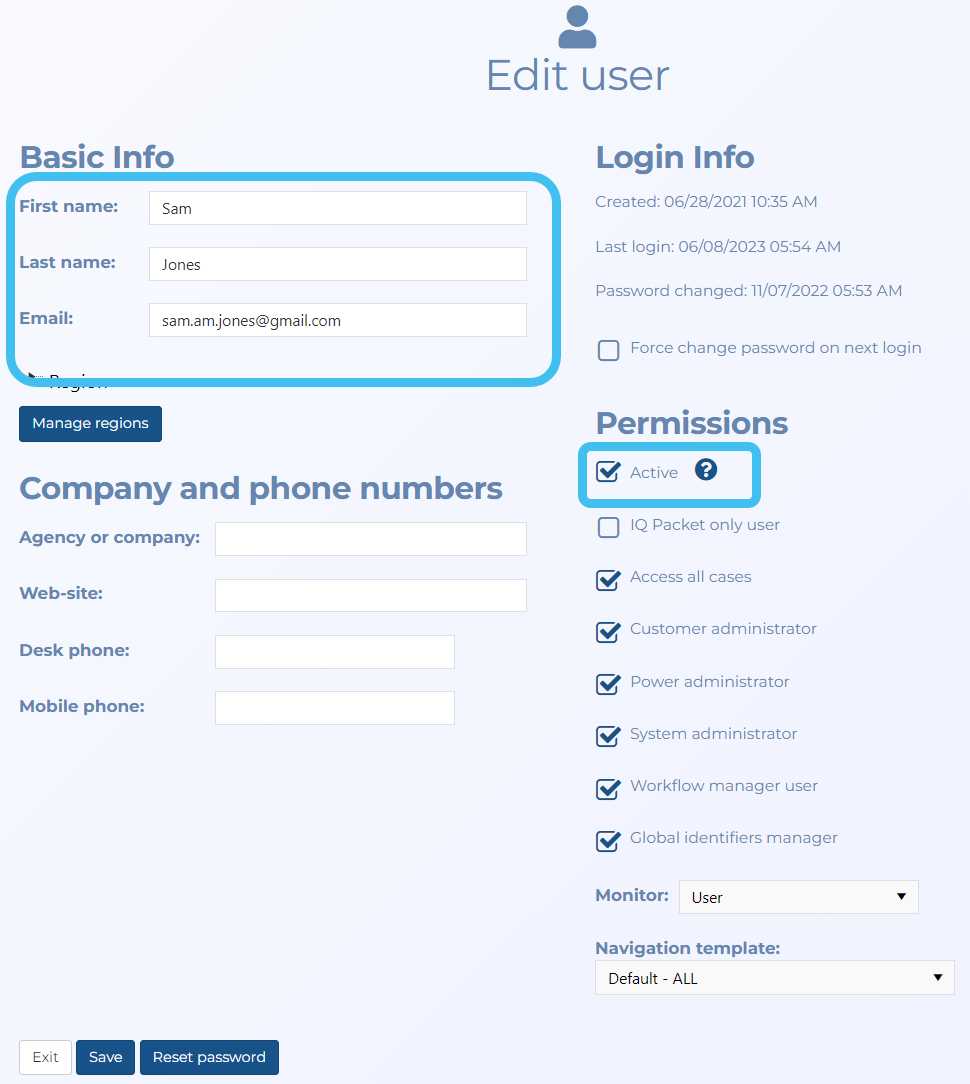
Select Active.
The user can now access your OSS-ESPA customer account.
NOTE: To configure a user for Live monitoring you must be a customer administrator.
-
On the main menu click Settings, then click Admin settings.
The Admin settings screen opens.
-
Click Manage users. The Manage user screen opens.
-
Click the name of the user you want to configure for Live monitoring, or if you are adding a new user click Add a new user below the table.
The Edit user screen opens.
-
If you are adding a new user then complete: First name, Last name and Email and ensure Active is selected.
-
In Monitor, select User.
The person is now set up as a monitor and can now monitor i-cases which they are given permission to monitor using the Create new monitoring queue screen and Editing queue screen.
For further information refer to Setting up a person or a station for live monitoring.
-
On the main menu click Settings, then click Admin settings.
The Admin settings screen opens.
-
Click Manage users. The Manage user screen opens.
-
Click the name of the station you want to configure for Live monitoring, or if you are adding a new station user click Add a new user below the table.
The Edit user screen opens.
-
If you are adding a new user then complete: First name, Last name and Email and ensure Active is selected. For example, you may want to add a first and last name of "Monitoring Station1" and optionally create an email account.
-
In Monitor, select Station.
-
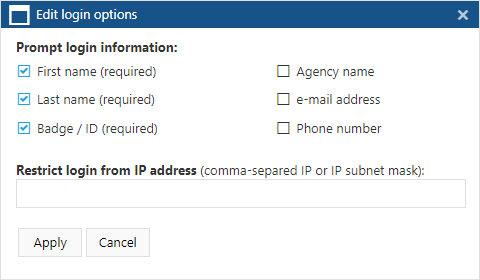
Click Options.

The Edit login options dialog box opens.
-
In Prompt login information, select which details the station users must enter immediately after they have logged into the station account. These individual user details are then stored by OSS-ESPA in the audit trail so that if required you can trace who was monitoring the subject at any point in time and any actions that they too.
In Restrict login from IP address, you can enter optional IP data if you want to restrict the access of the station account.
The station account is now set up and can monitor i-cases which you have given the station account permission to monitor using the Create new monitoring queue screen and Editing queue screen.
-
In Navigation template select the appropriate template for the monitor.
NOTE: To deactivate a user you must be a customer administrator.
Use this procedure if you want to prevent a user from using OSS-ESPA.
-
On the main menu click Settings, then click Admin settings.
The Admin settings screen opens.
-
Click Manage users. The Manage user screen opens.
-
Click the name of the user you want to deactivate.
The Edit user screen opens.
-
Clear Active.
The user can no longer access their OSS-ESPA customer account.
NOTE: To invite a user you must be a customer administrator.
Use this procedure to resend the activation email to the user who has not yet registered.
-
On the main menu click Settings, then click Admin settings.
The Admin settings screen opens.
-
Click Manage users. The Manage user screen opens.
-
Select the check-box beside the name you want to invite then click Invite selected.
A new activation email is sent to the user.
NOTE: To disconnect a user you must be a customer administrator.
Use this procedure if you know a user is not currently using OSS-ESPA and you want to disconnect their session. This is useful if your current user count is at its maximum and you want to free up a license for another user.
-
On the main menu click Settings, then click Admin settings.
The Admin settings screen opens.
-
Click View connected users. The View connected users screen opens.
-
Select the check-box for the person you want to disconnect then click Delete selected.
The user is then disconnected from OSS-ESPA.
NOTE: To reset a user password you must be a customer administrator.
Use this procedure to reset the users password.
-
On the main menu click Settings, then click Admin settings.
The Admin settings screen opens.
-
Click Manage users. The Manage user screen opens.
-
Click the name of the user whose password you want to reset.
The Edit user screen opens.
-
Click Reset password.
A new password email is sent to the user.