Managing case data sharing
Administrators can manage data sharing using the Info sharing agreement and Info sharing summary screens. These screens are opened from the main menu by clicking Settings, Admin settings then selecting either Agreements or Cases respectively in the Info sharing group. To share data between accounts you must first select Allow inbound data sharing and Allow outbound data sharing on the Info sharing agreement screen. Once data has been shared to your account you must then configure which case uses the data and resolve any conflicts using the Info sharing summary.
This topic describes what administrators must do to support case data sharing between agencies.
You can also click here for a short video showing how to share case data.
NOTE: To manage info sharing you must be a customer administrator.
-
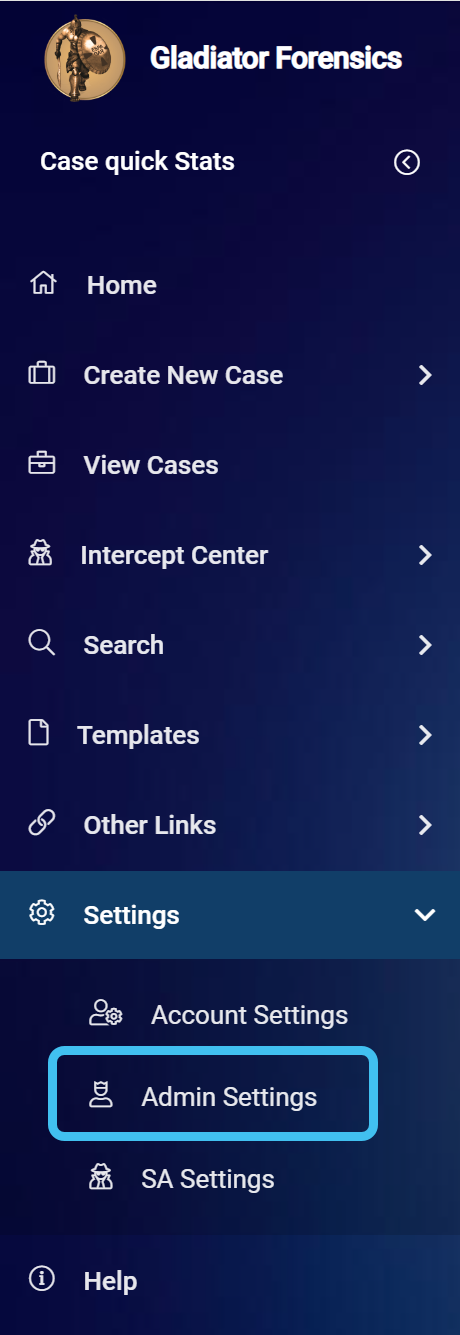
On the main menu click Settings, then click Admin settings.
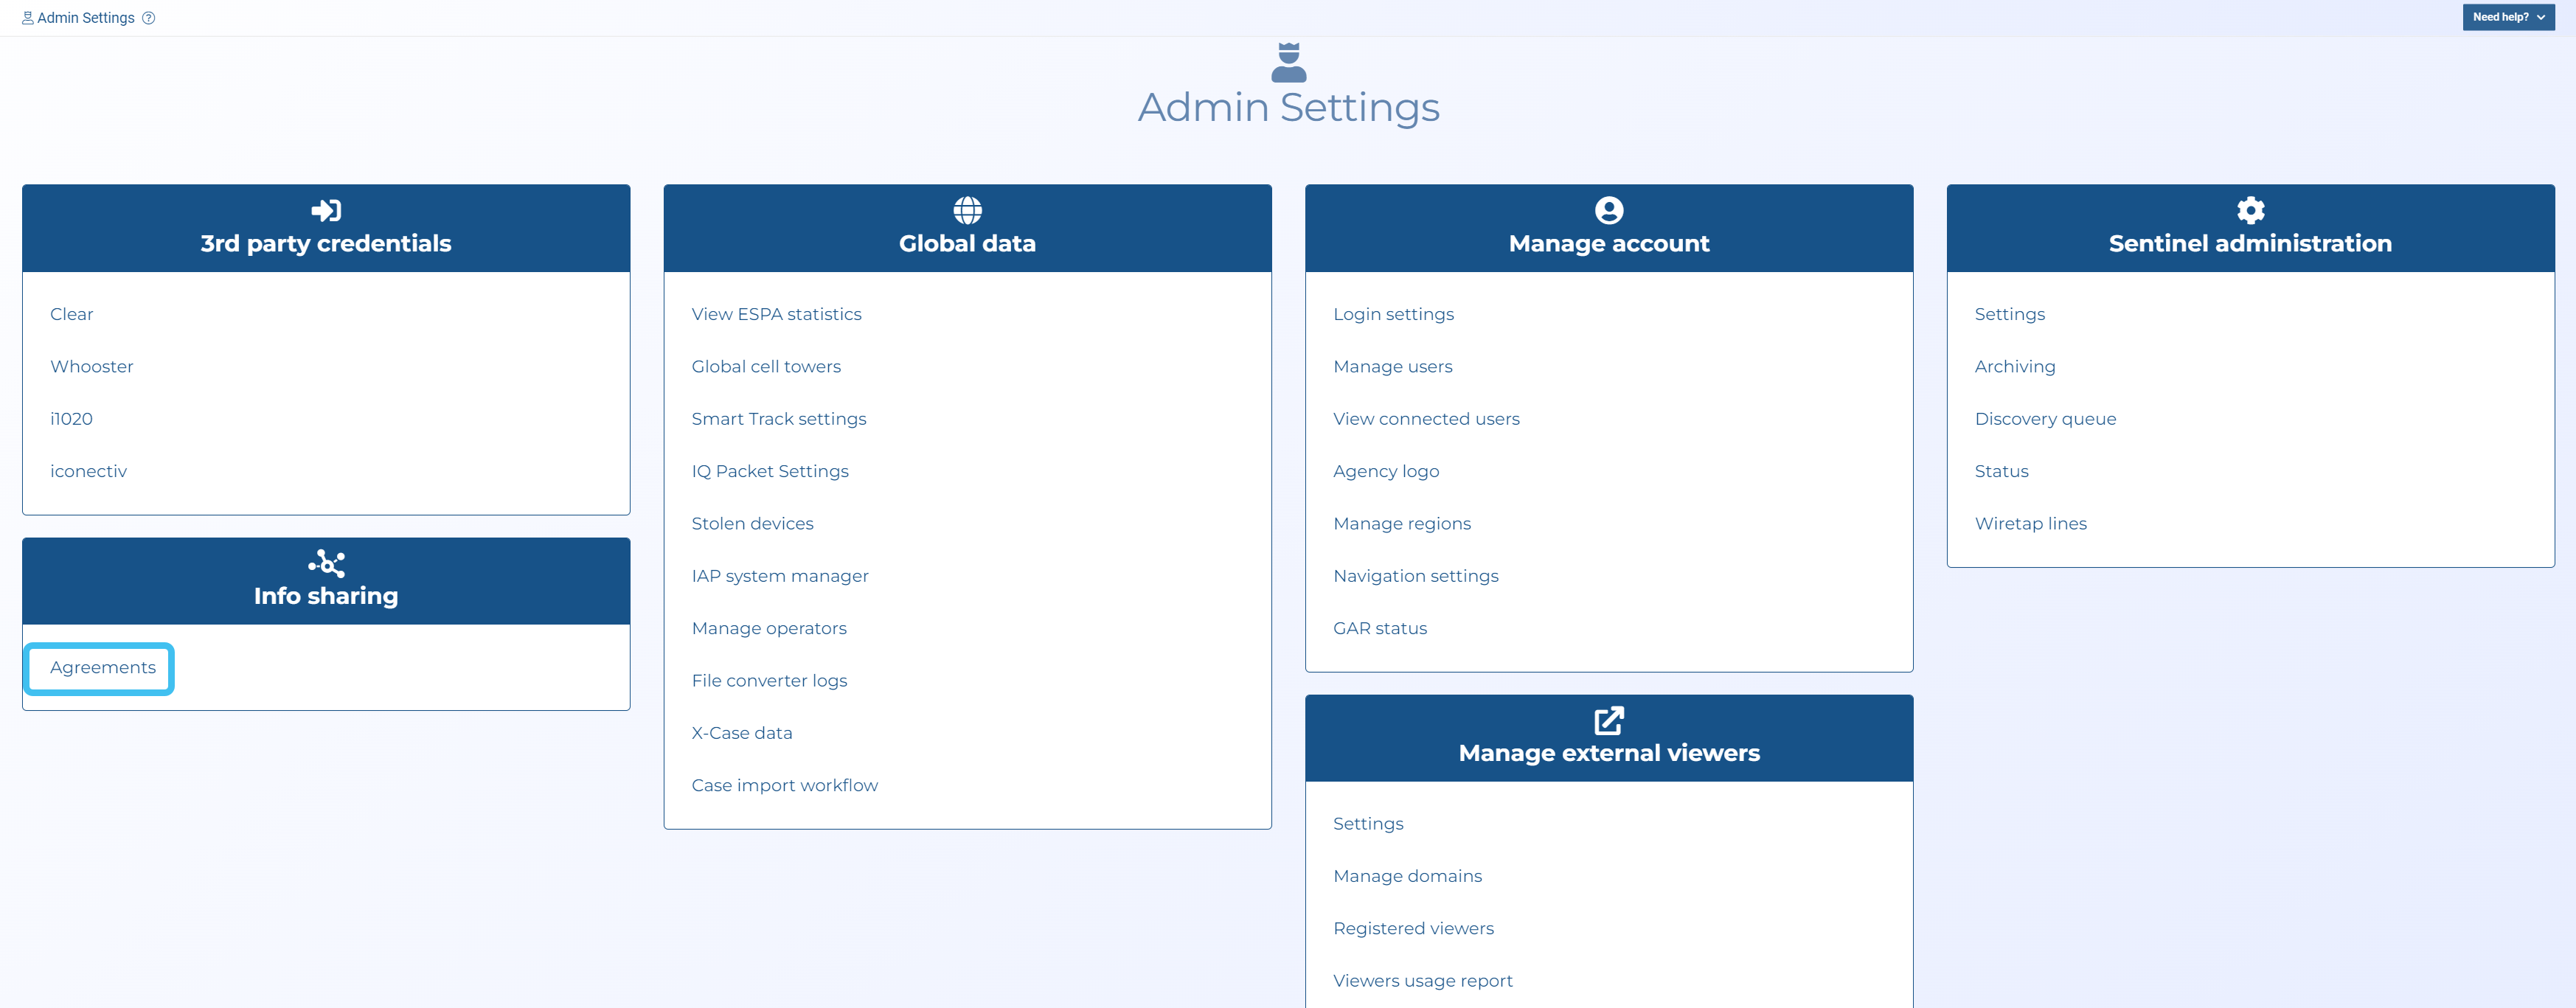
The Admin settings screen opens.
-
Click Agreements in the Info sharing group.
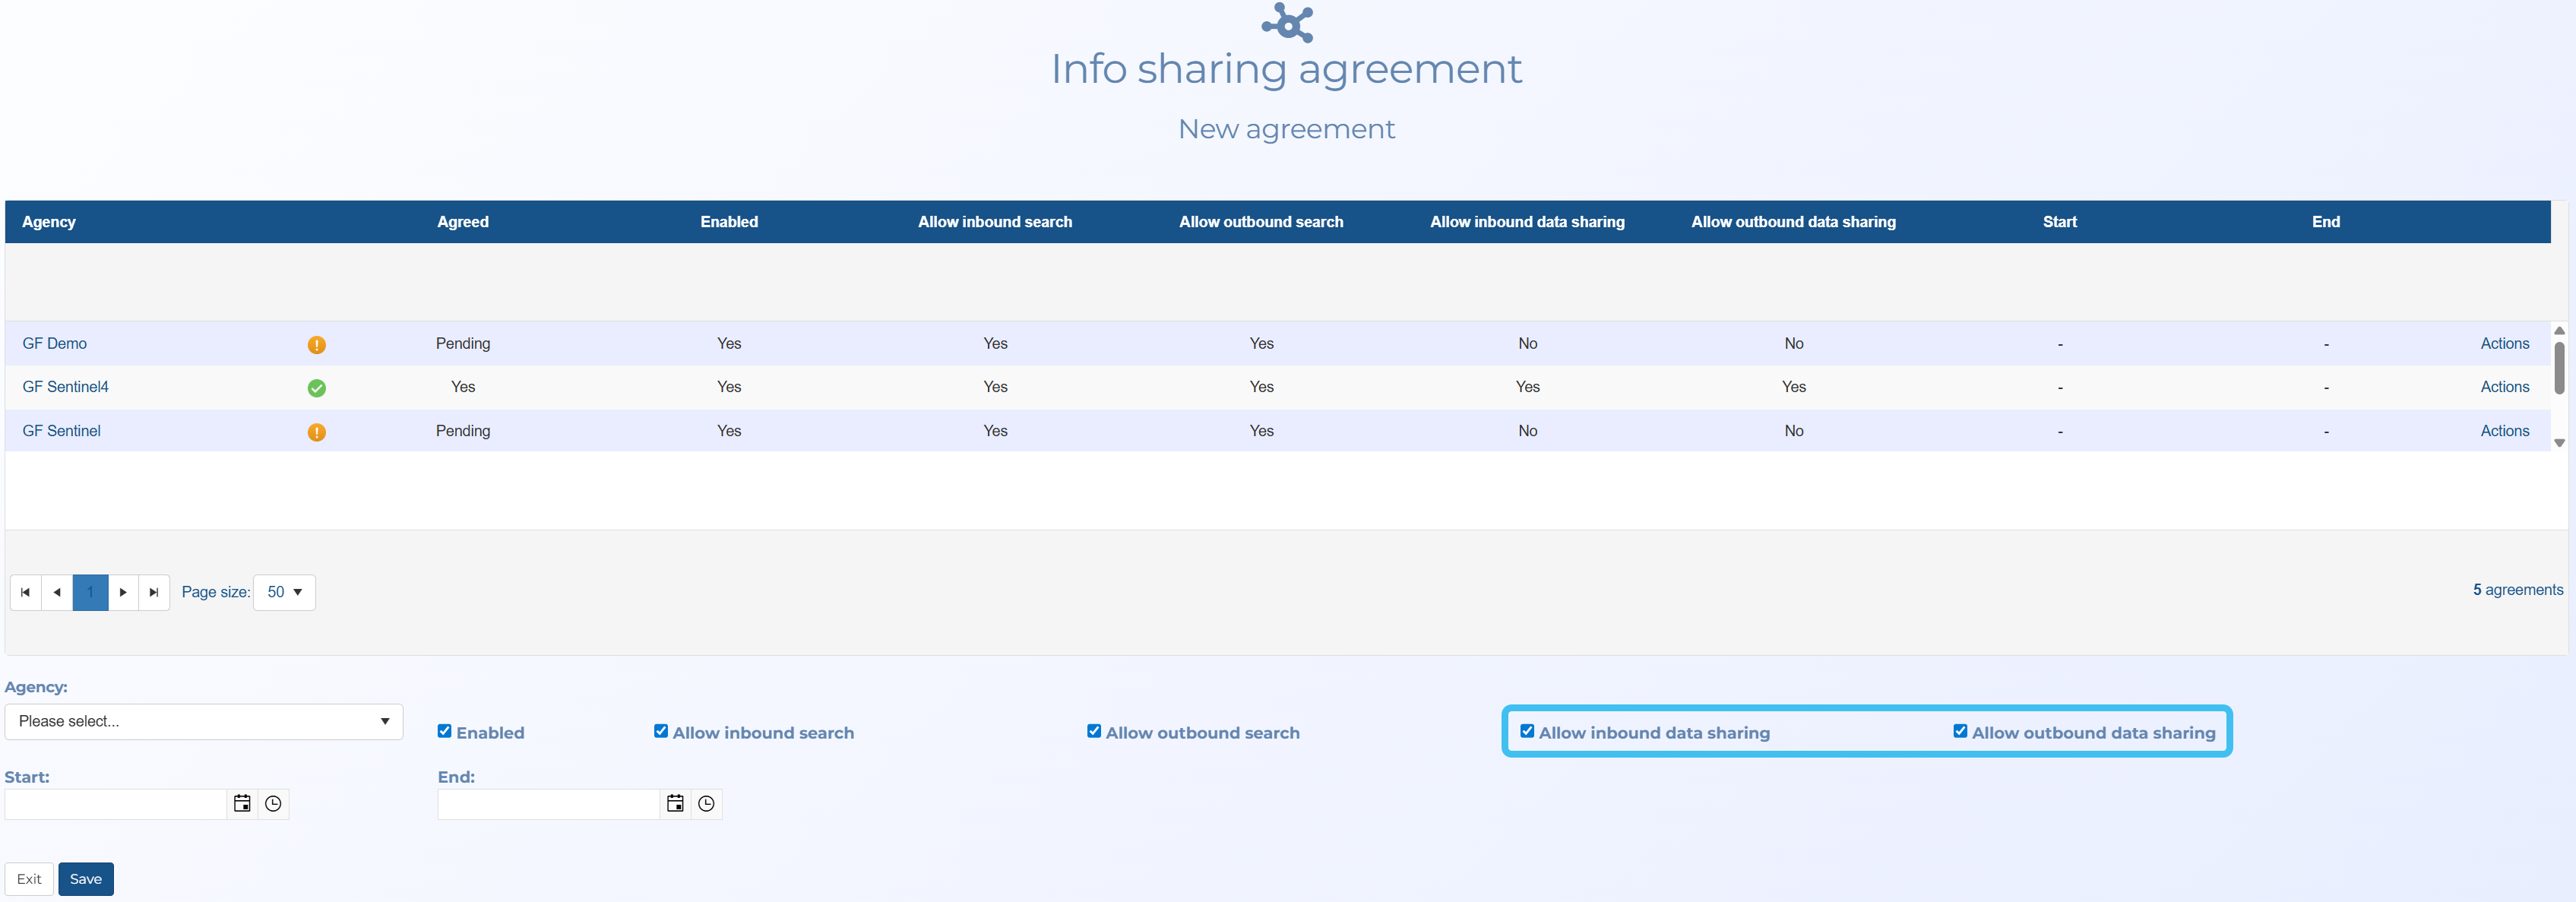
The Info sharing agreement screen opens.
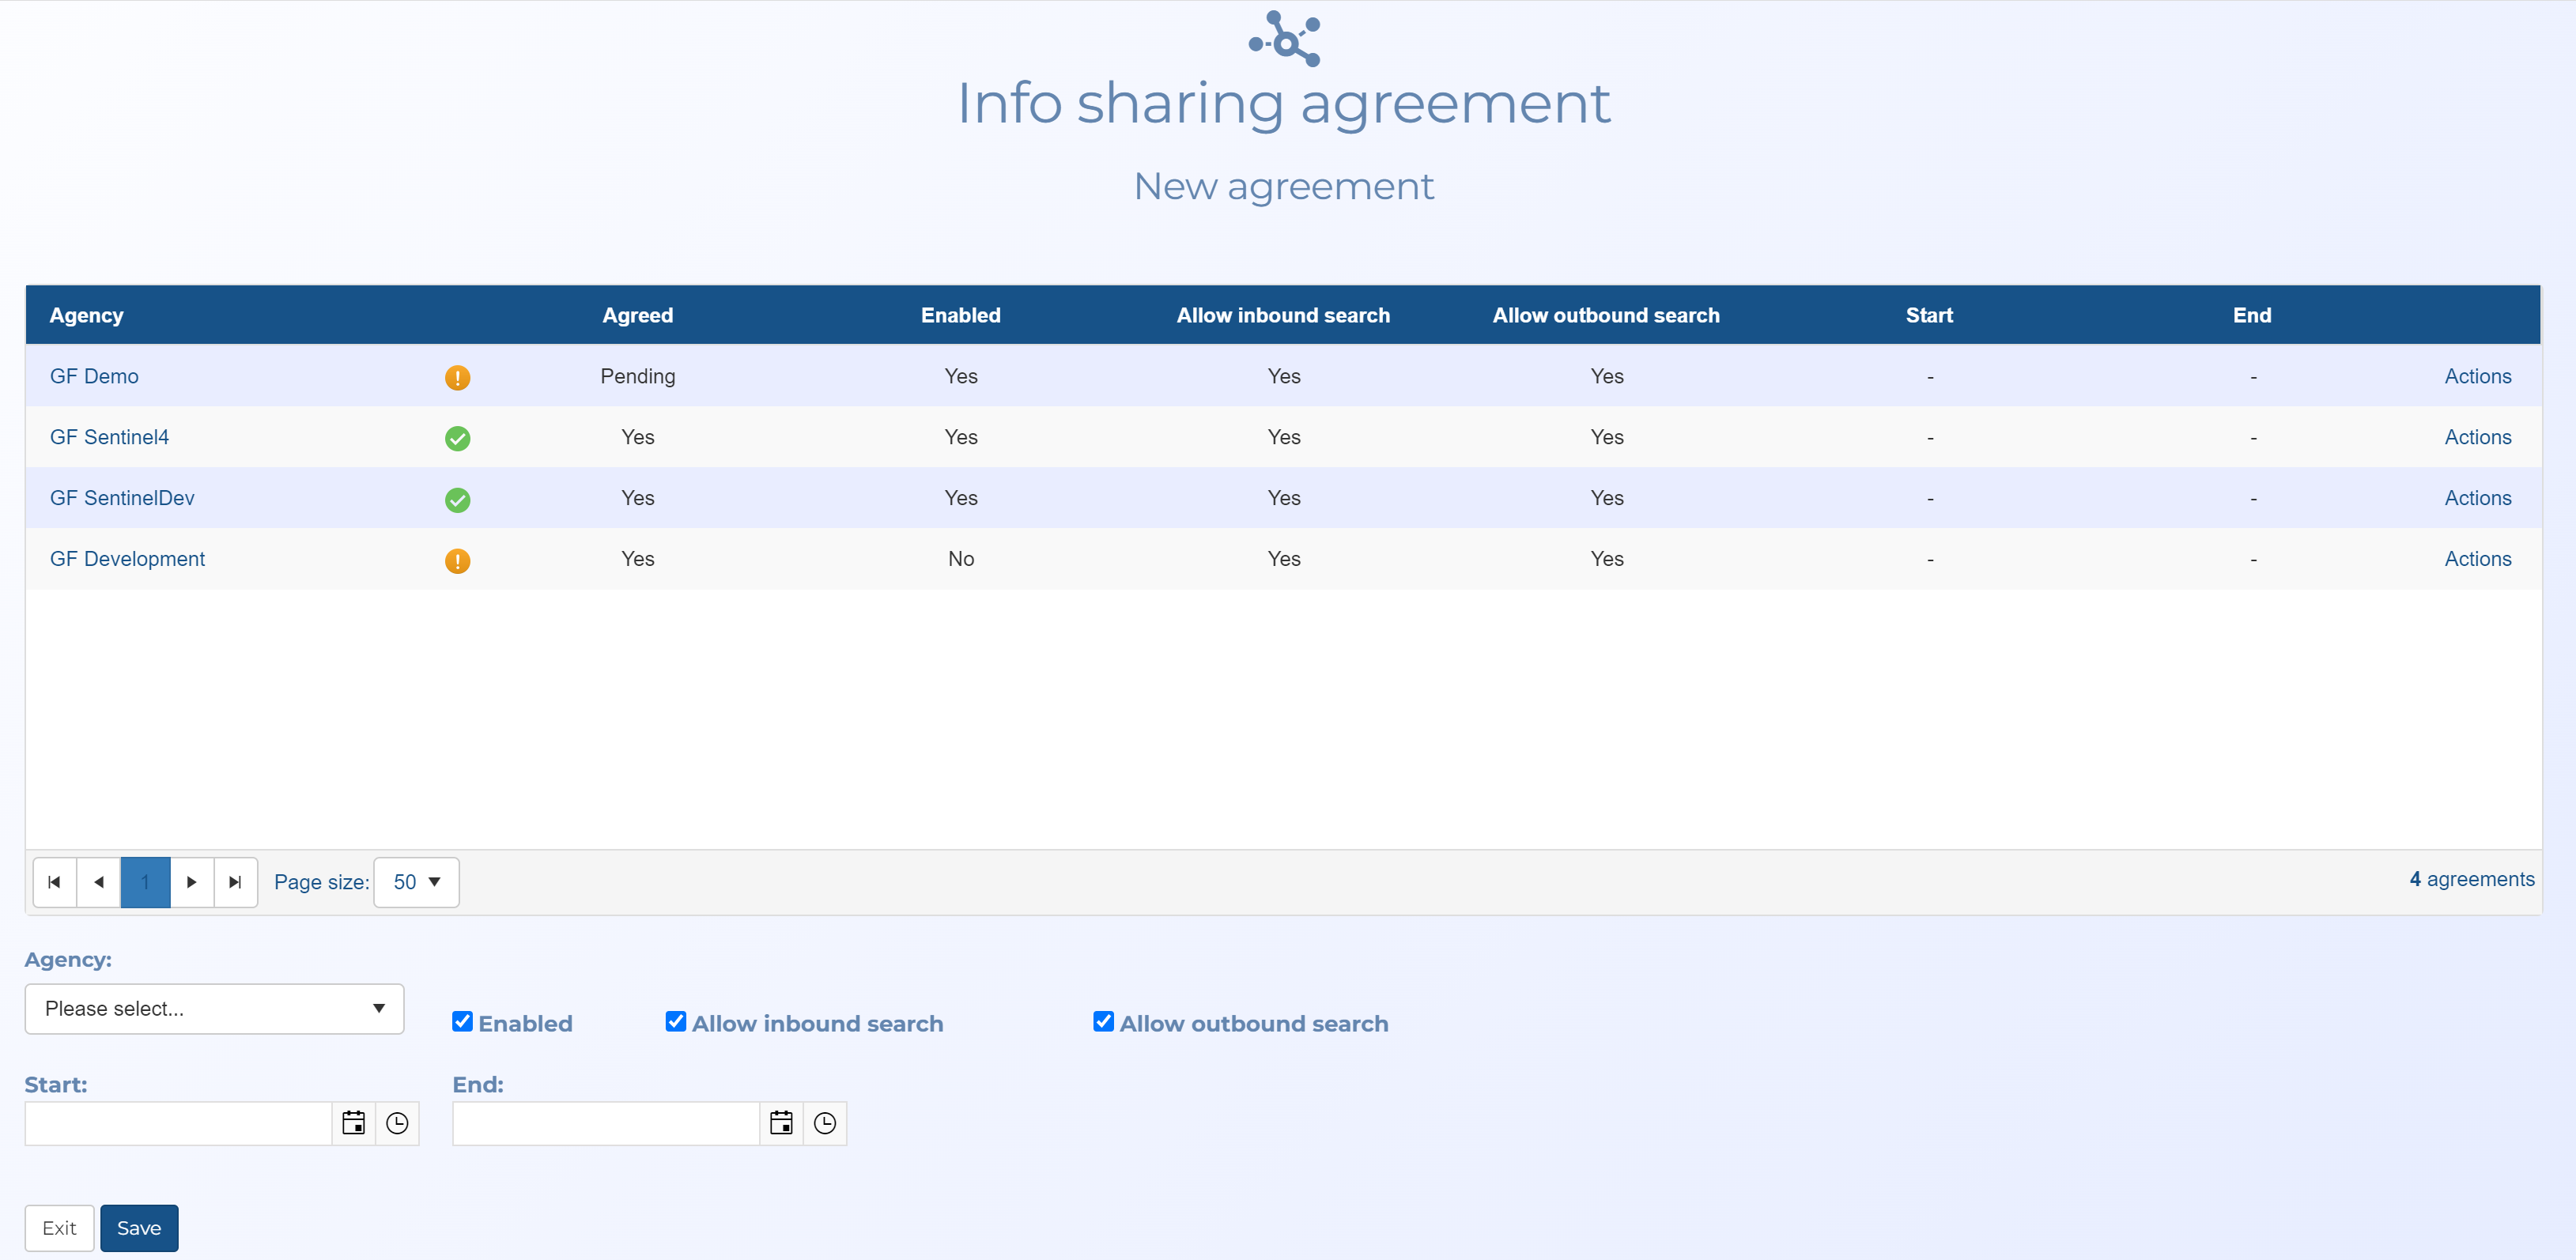
-
In Agency, select who you want to share data with.
NOTE: If the agency you want to share data with is not listed then contact Gladiator Forensics support.
-
By default Enabled, Allow inbound search, Allow outbound search, Allow inbound data sharing and Allow outbound data sharing are all selected. Typically these are the normal settings but to share data between you must ensure Allow inbound data sharing and Allow outbound data sharing are selected.
-
If the agreement is only planned for a fixed period of time then select a Start and End date. If the agreement is indefinite then these settings must remain clear.
-
Click Save.
An email is sent to the administrator of the other agency who must then approve the agreement before information can be shared. A link in the email opens this screen where the agreement can be approved by selecting Approve in the Actions menu.

-
Once a user from another agency shares case data with your OSS-ESPA account you will receive an email notifying you that you must take action.
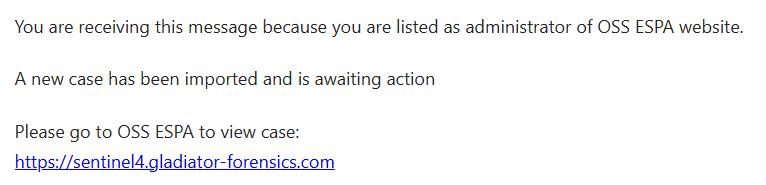
-
On the main menu click Settings, then click Admin settings.
The Admin settings screen opens.
-
Click Cases in the Info sharing group.
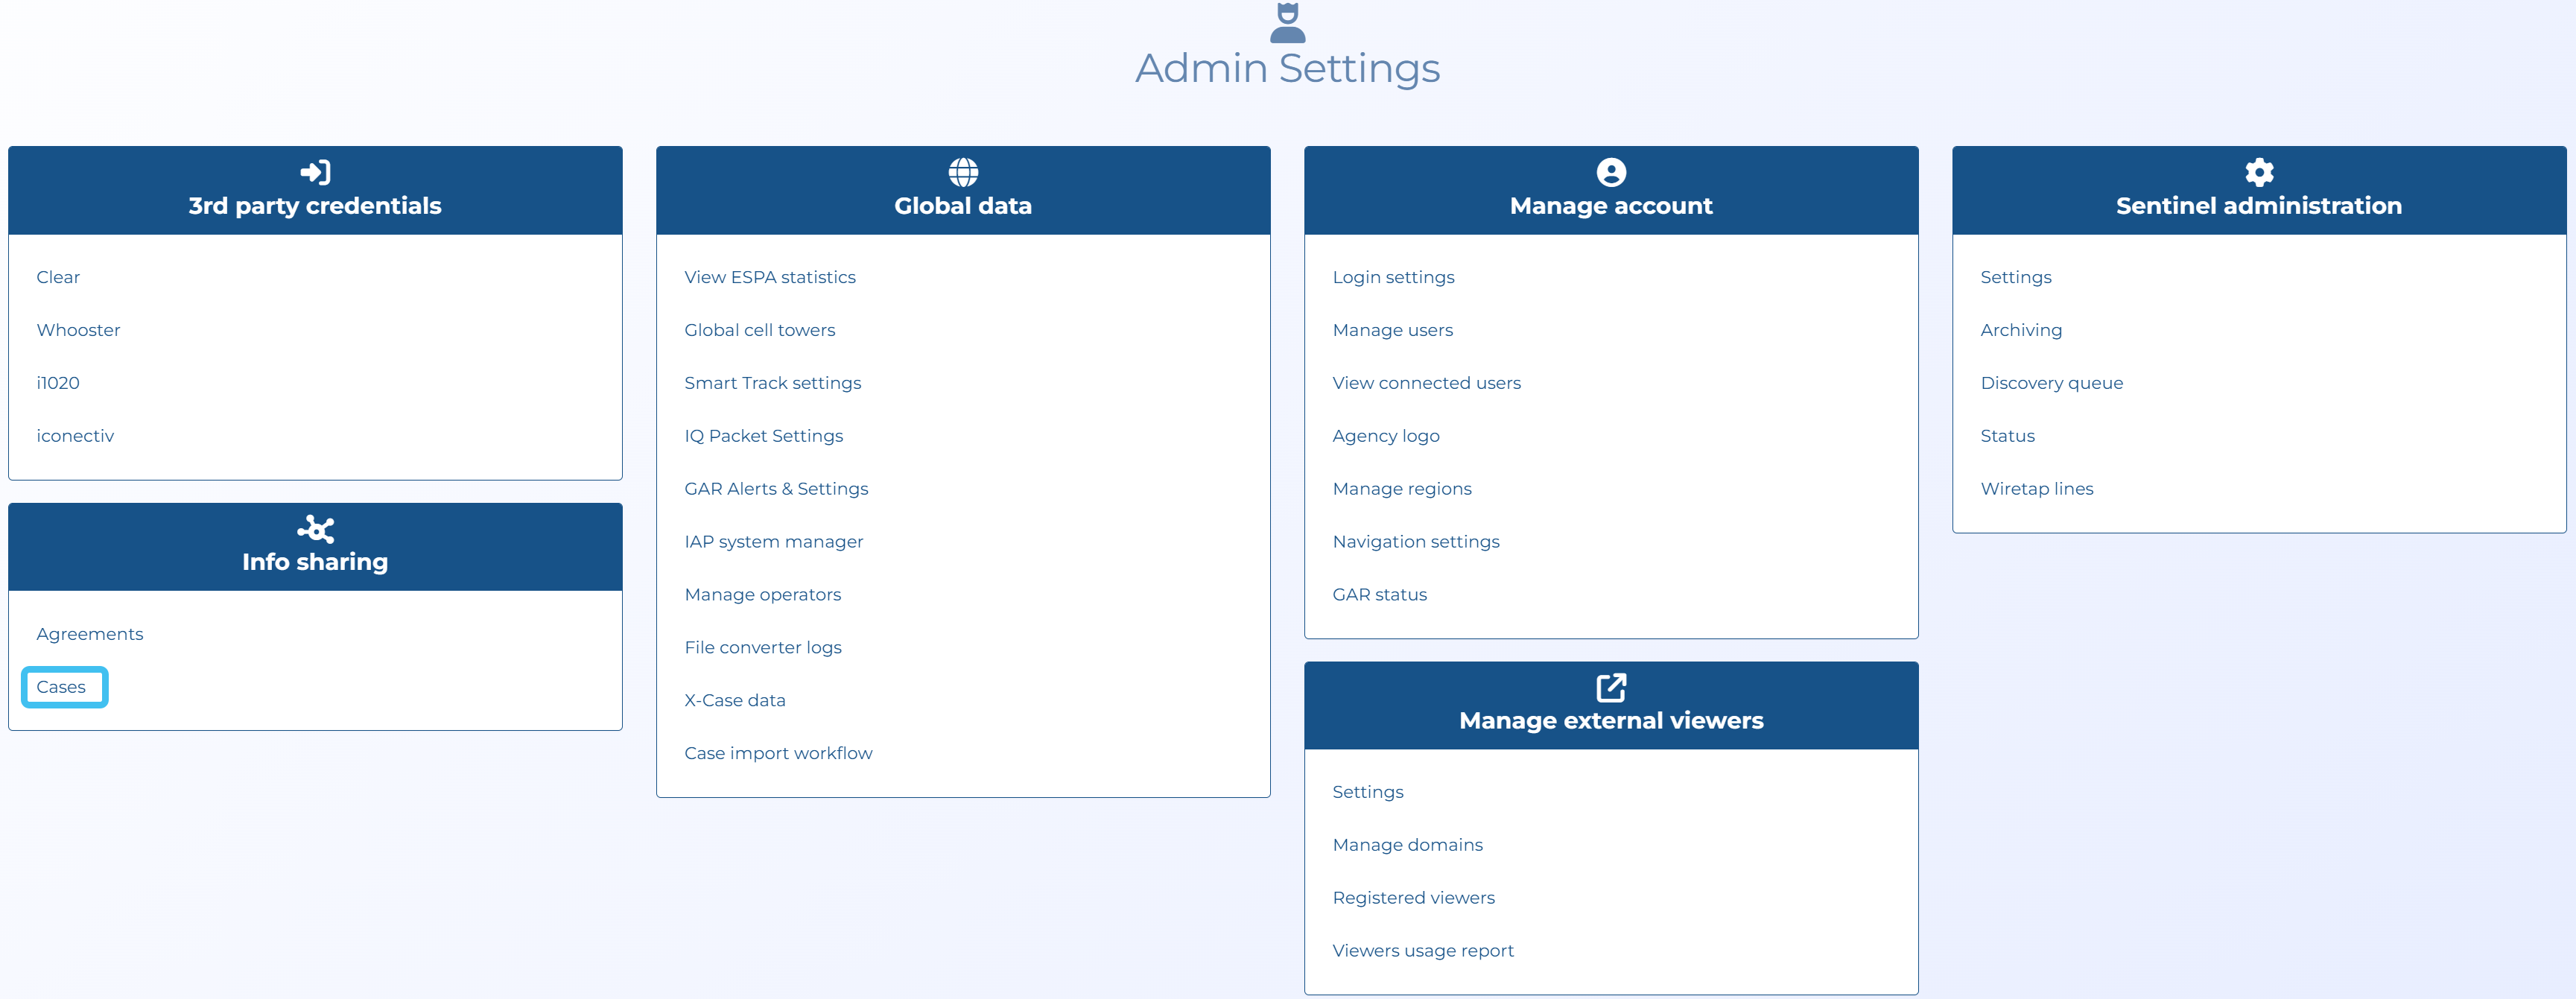
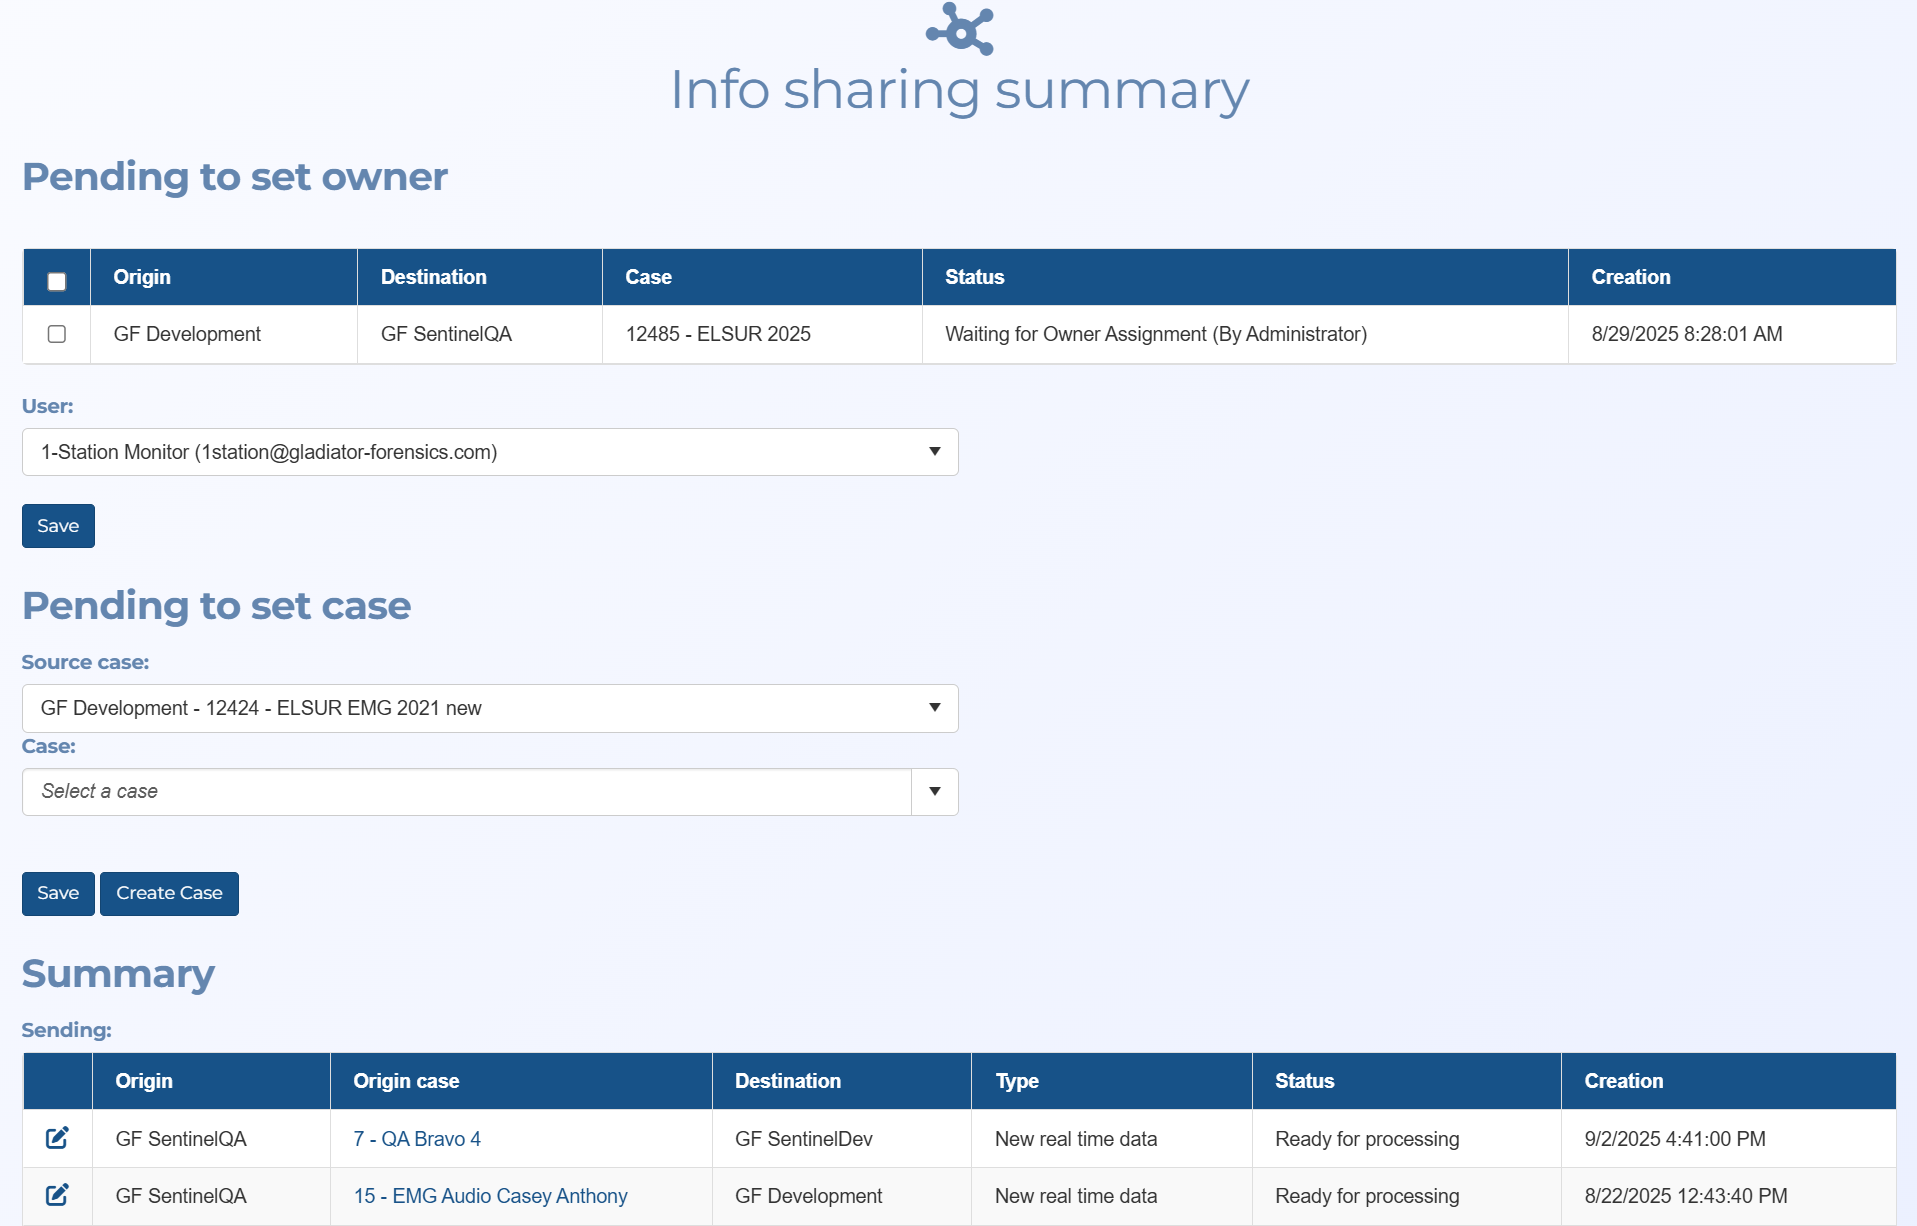
The Info sharing summary screen opens.
-
In Pending to set owner:
-
Use the check-box to select the source case you want to assign to a user.
-
In User select their name.
-
Click Save.
This filters what cases are available in the following step.
-
-
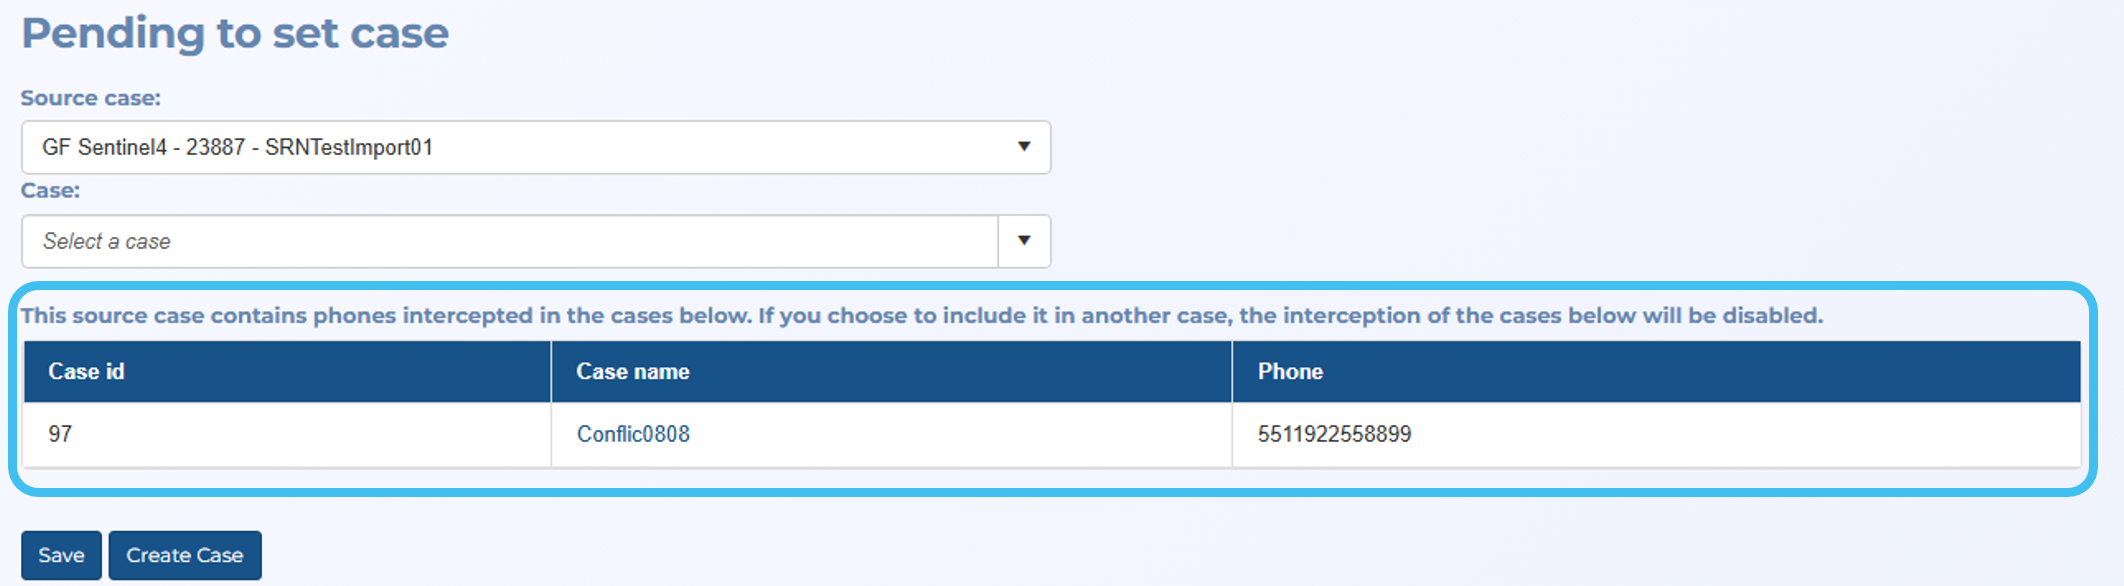
In Pending to set case:
-
In Source case select the source case you want to assign.
-
This step is only required if you want to change the case owner you selected in the previous step. Click Change owner and select the new owner. Note you must do this prior to selecting the Case.
-
In Case select the case on your account that you want the shared data to go to. You can also create a new case if required by clicking Create case.
-
Click Save.
This Receiving table will now show the Status as Ready for processing.
-
-
Note, if your account is already receiving intercept data for a Case ID (LIID) then you will receive one of the following messages:
-
If you are assigning a new source case you will receive the message below detailing that if you assign the source case to a destination case then the existing intercept in your account will be disabled.
-
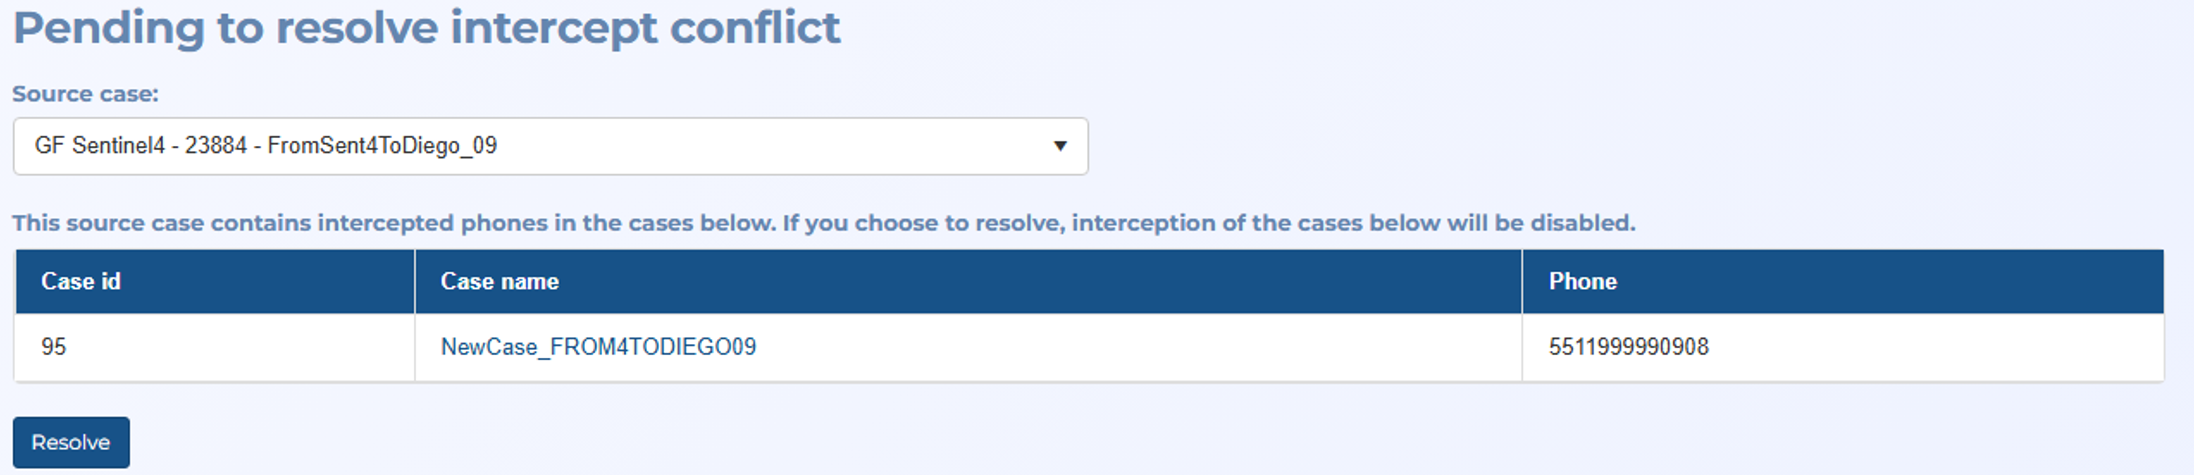
If a new intercept arrives for an existing case you will receive the message below detailing that if you click Resolve all cases receiving the existing intercept in your account will be disabled.
-