Configuring non-ESPA users with access to Smart Track data and IQ packet reports
All your OSS-ESPA users can by default view the hyperlinks embedded in emails allowing them to view Smart Track data on the External locations screen and IQ packet reports. However if you want to give non-OSS-ESPA users access then you must provide them access using one of the following methods:
-
Define which domains you want to allow access, as described in How to allow external domains access to Smart Track data and IQ packet reports.
-
Define which individual people you want to allow access, as described in How to allow individual people access to Smart Track data and IQ packet reports.
NOTE: To configure this access and settings you must be an administrator.
How to allow non-OSS-ESPA users access to Smart Track data and IQ packet reports
Administrators can allow both full external domains or individual email addresses access to Smart Track data and IQ packet reports.
-
For full domains use the External domains screen. To open, click Settings, Admin settings, then Manage domains.
-
For individual emails use the Registered viewers screen. To open, click Settings, Admin settings, then Registered viewers.
Click the link below for further details.
-
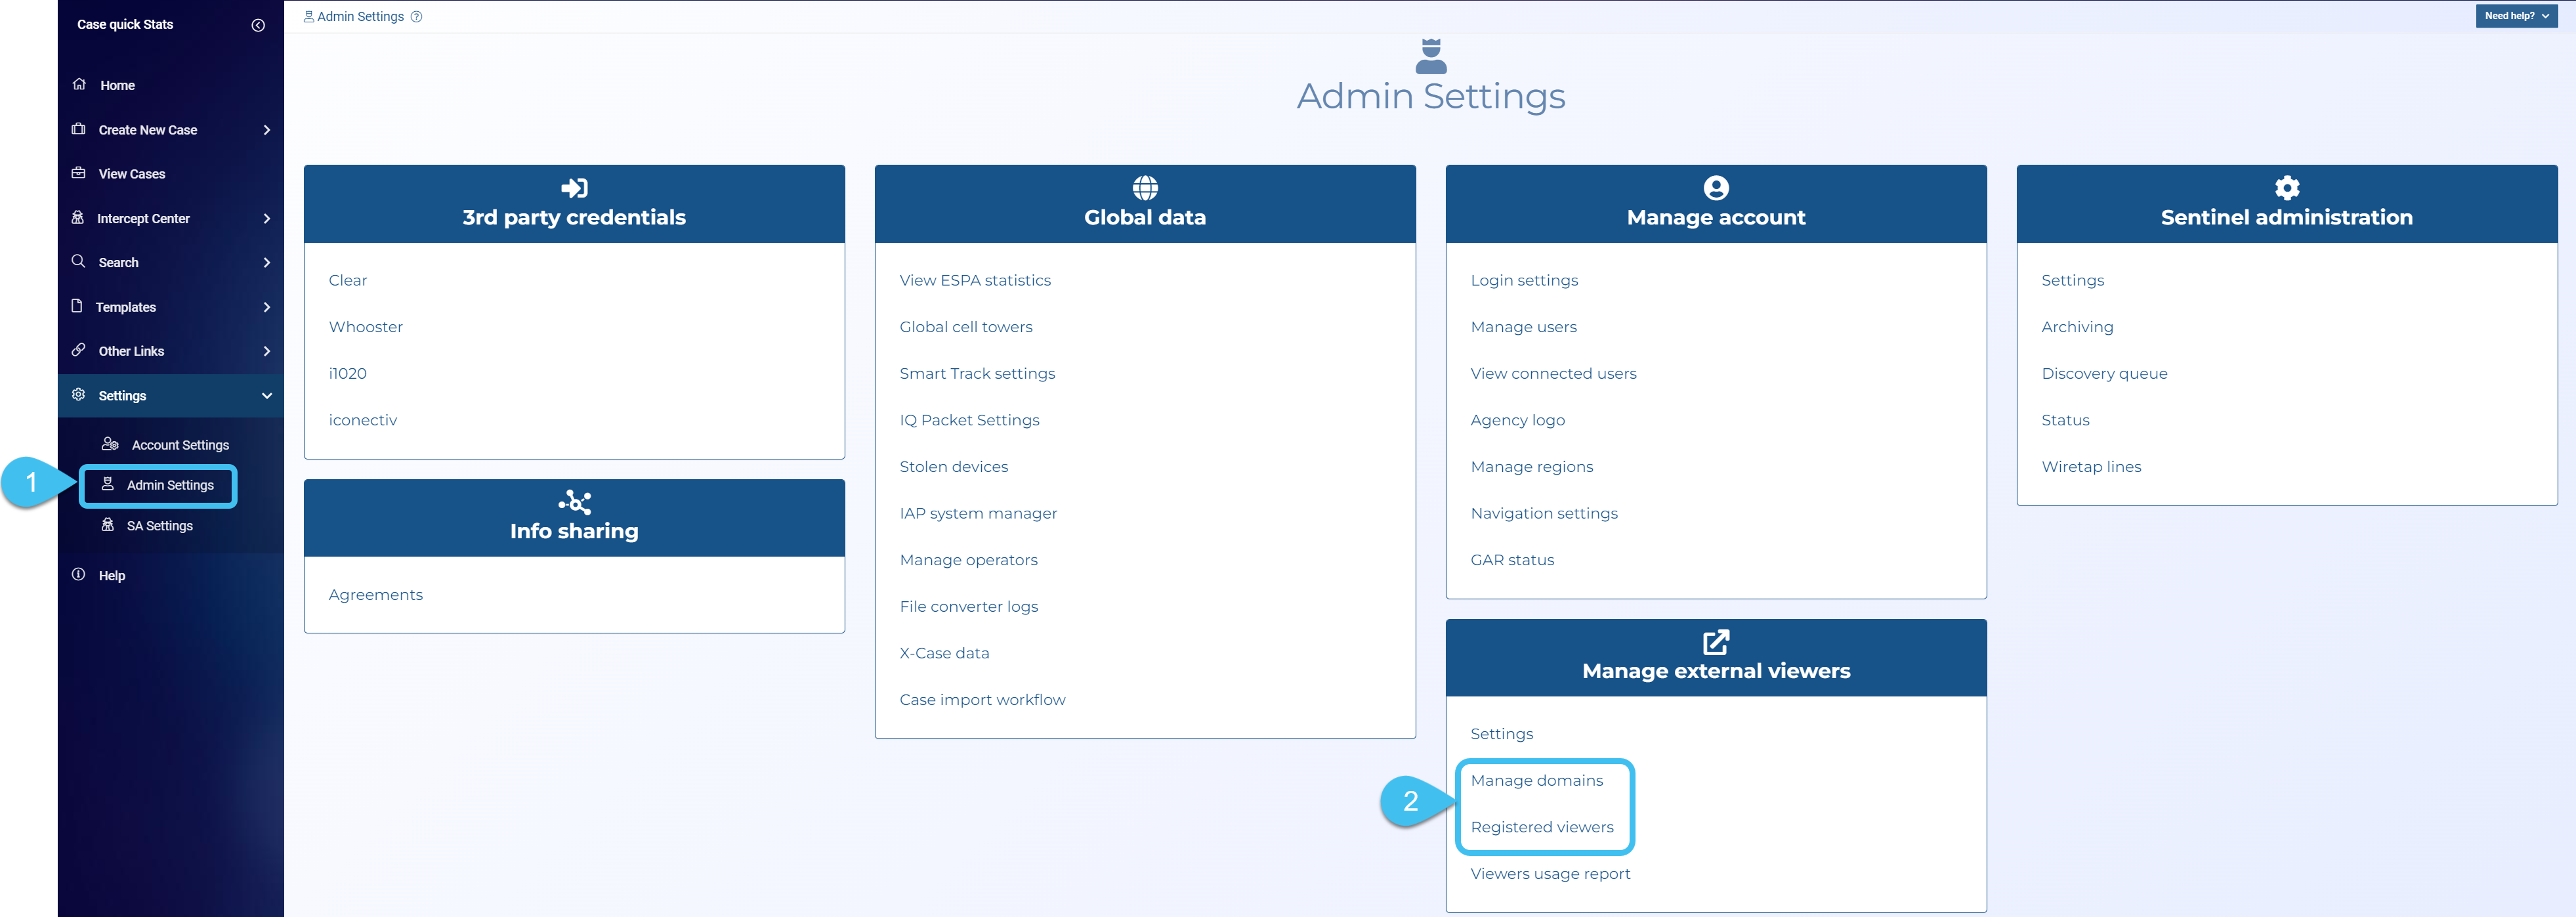
On the main menu click Settings, then click Admin settings.
The Admin settings screen opens.
-
In Manage external viewers click Manage domains.
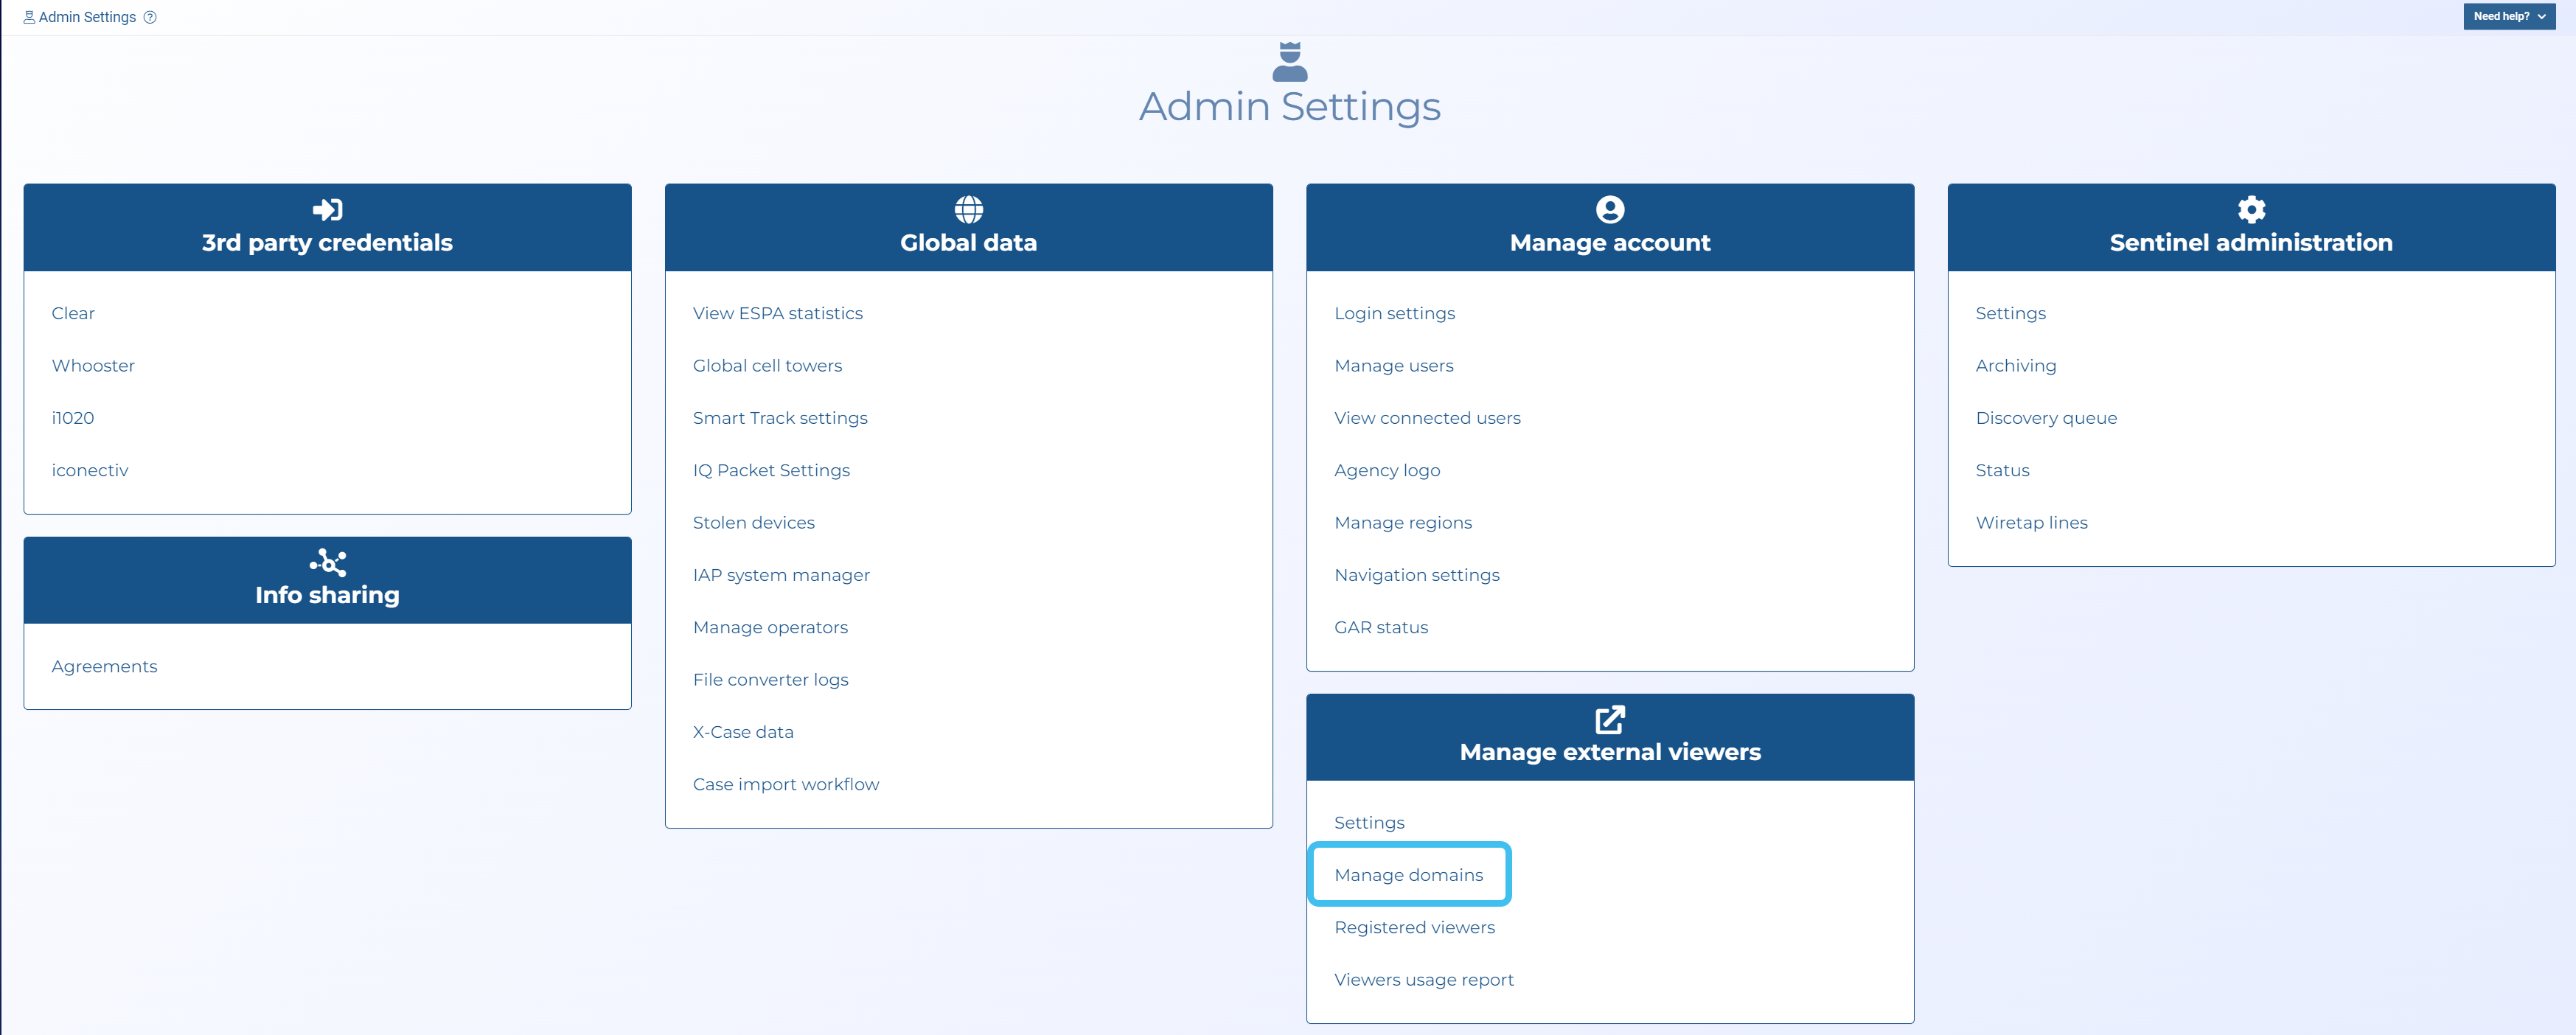
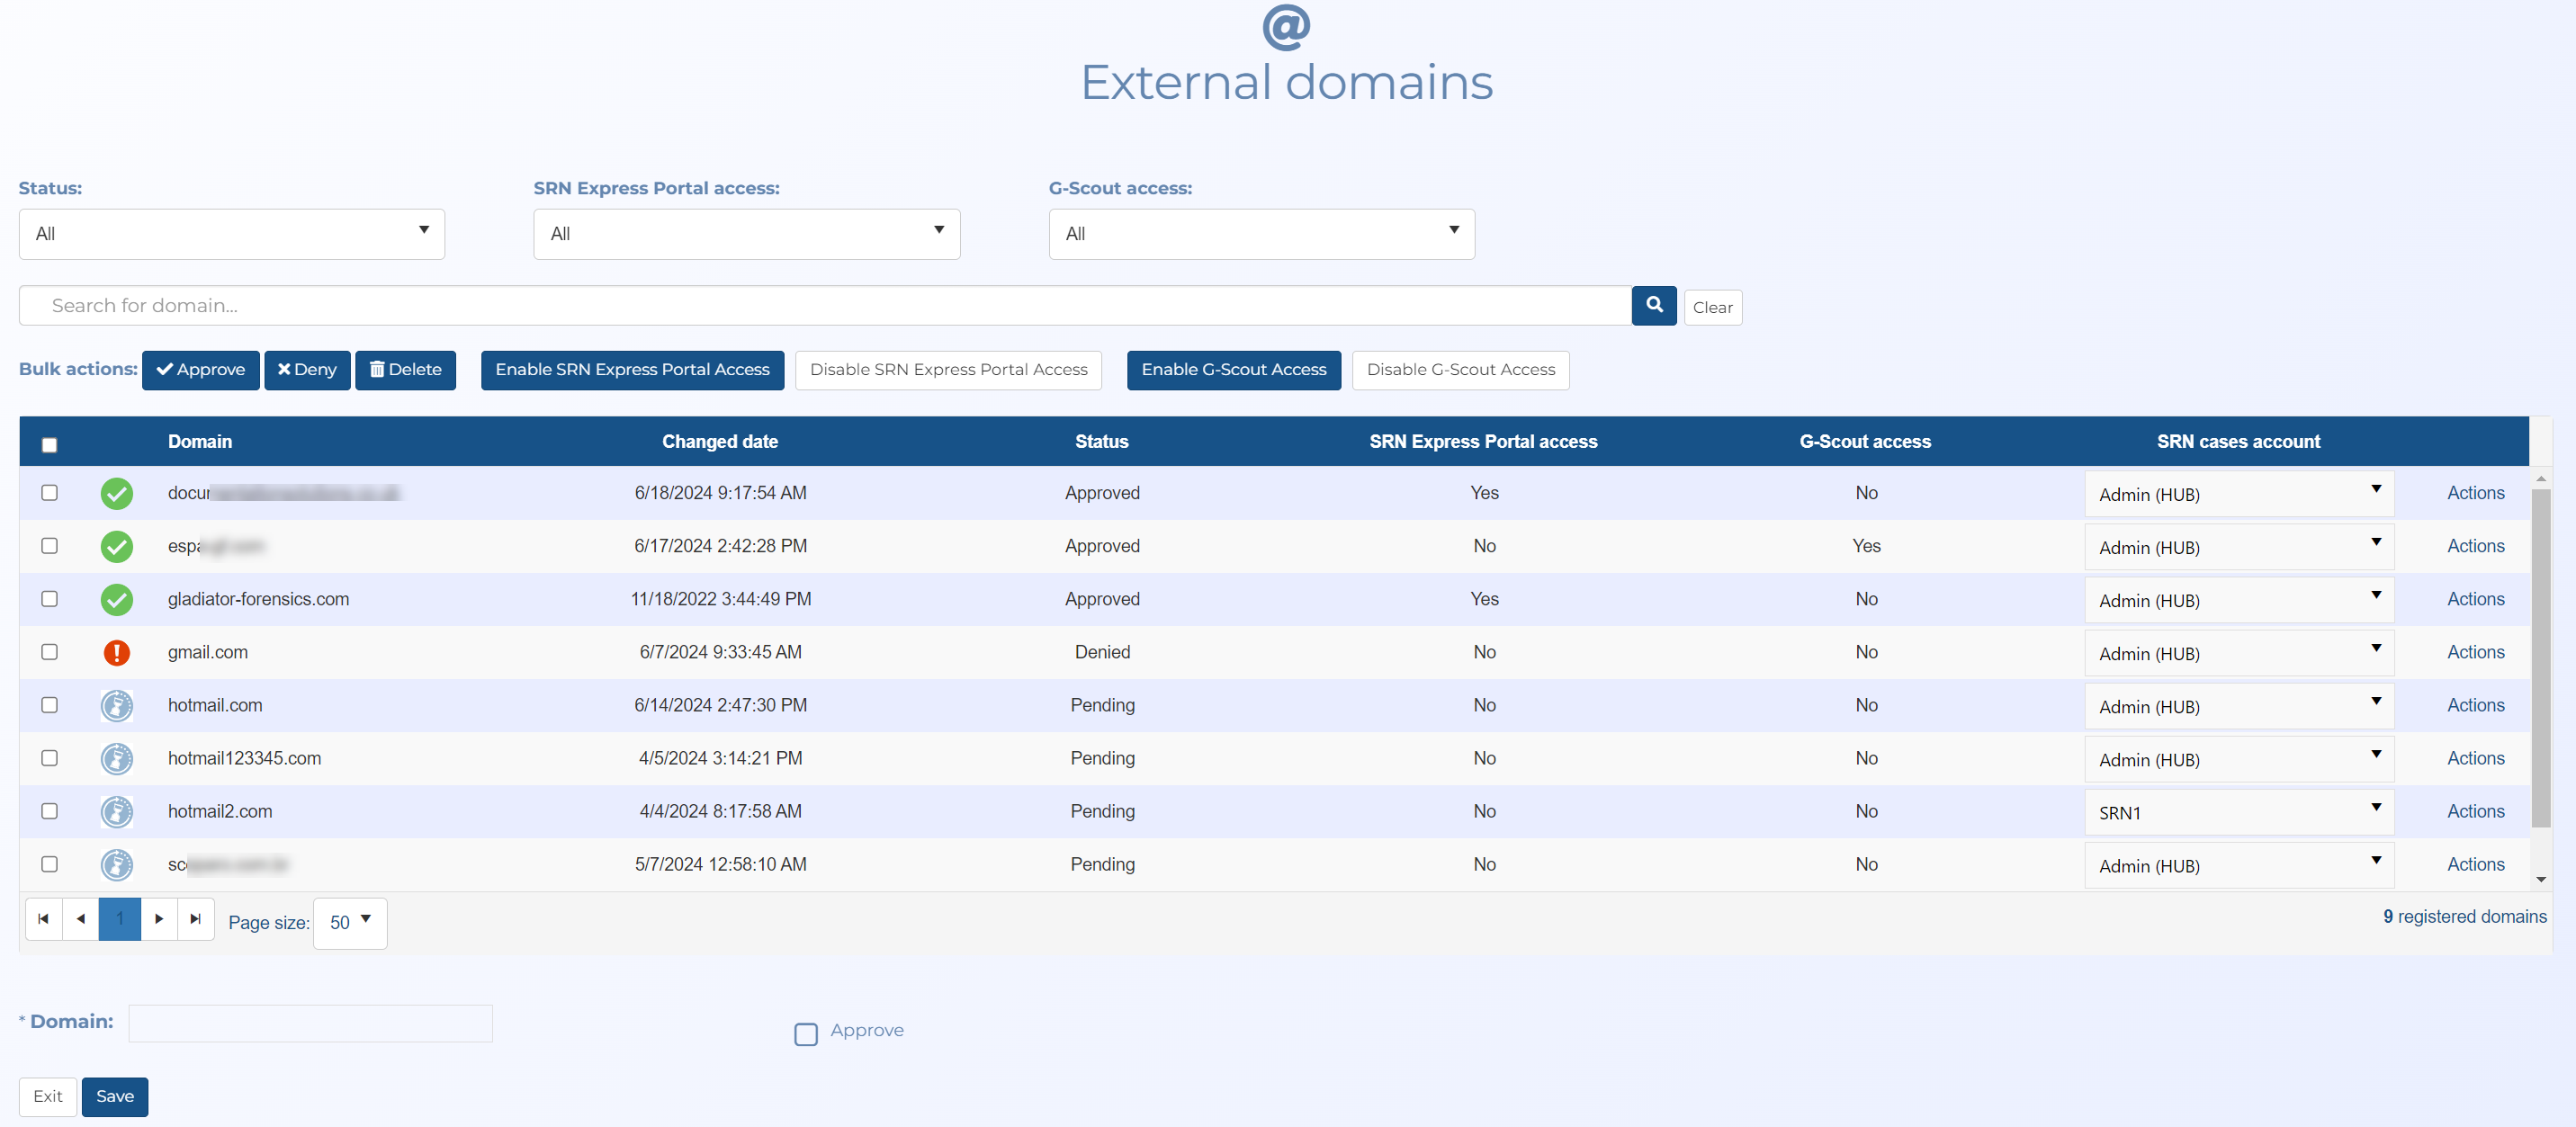
The External domains screen opens.
-
In Domain enter the domain you want to allow access, then select Approve to automatically approve the new domain.
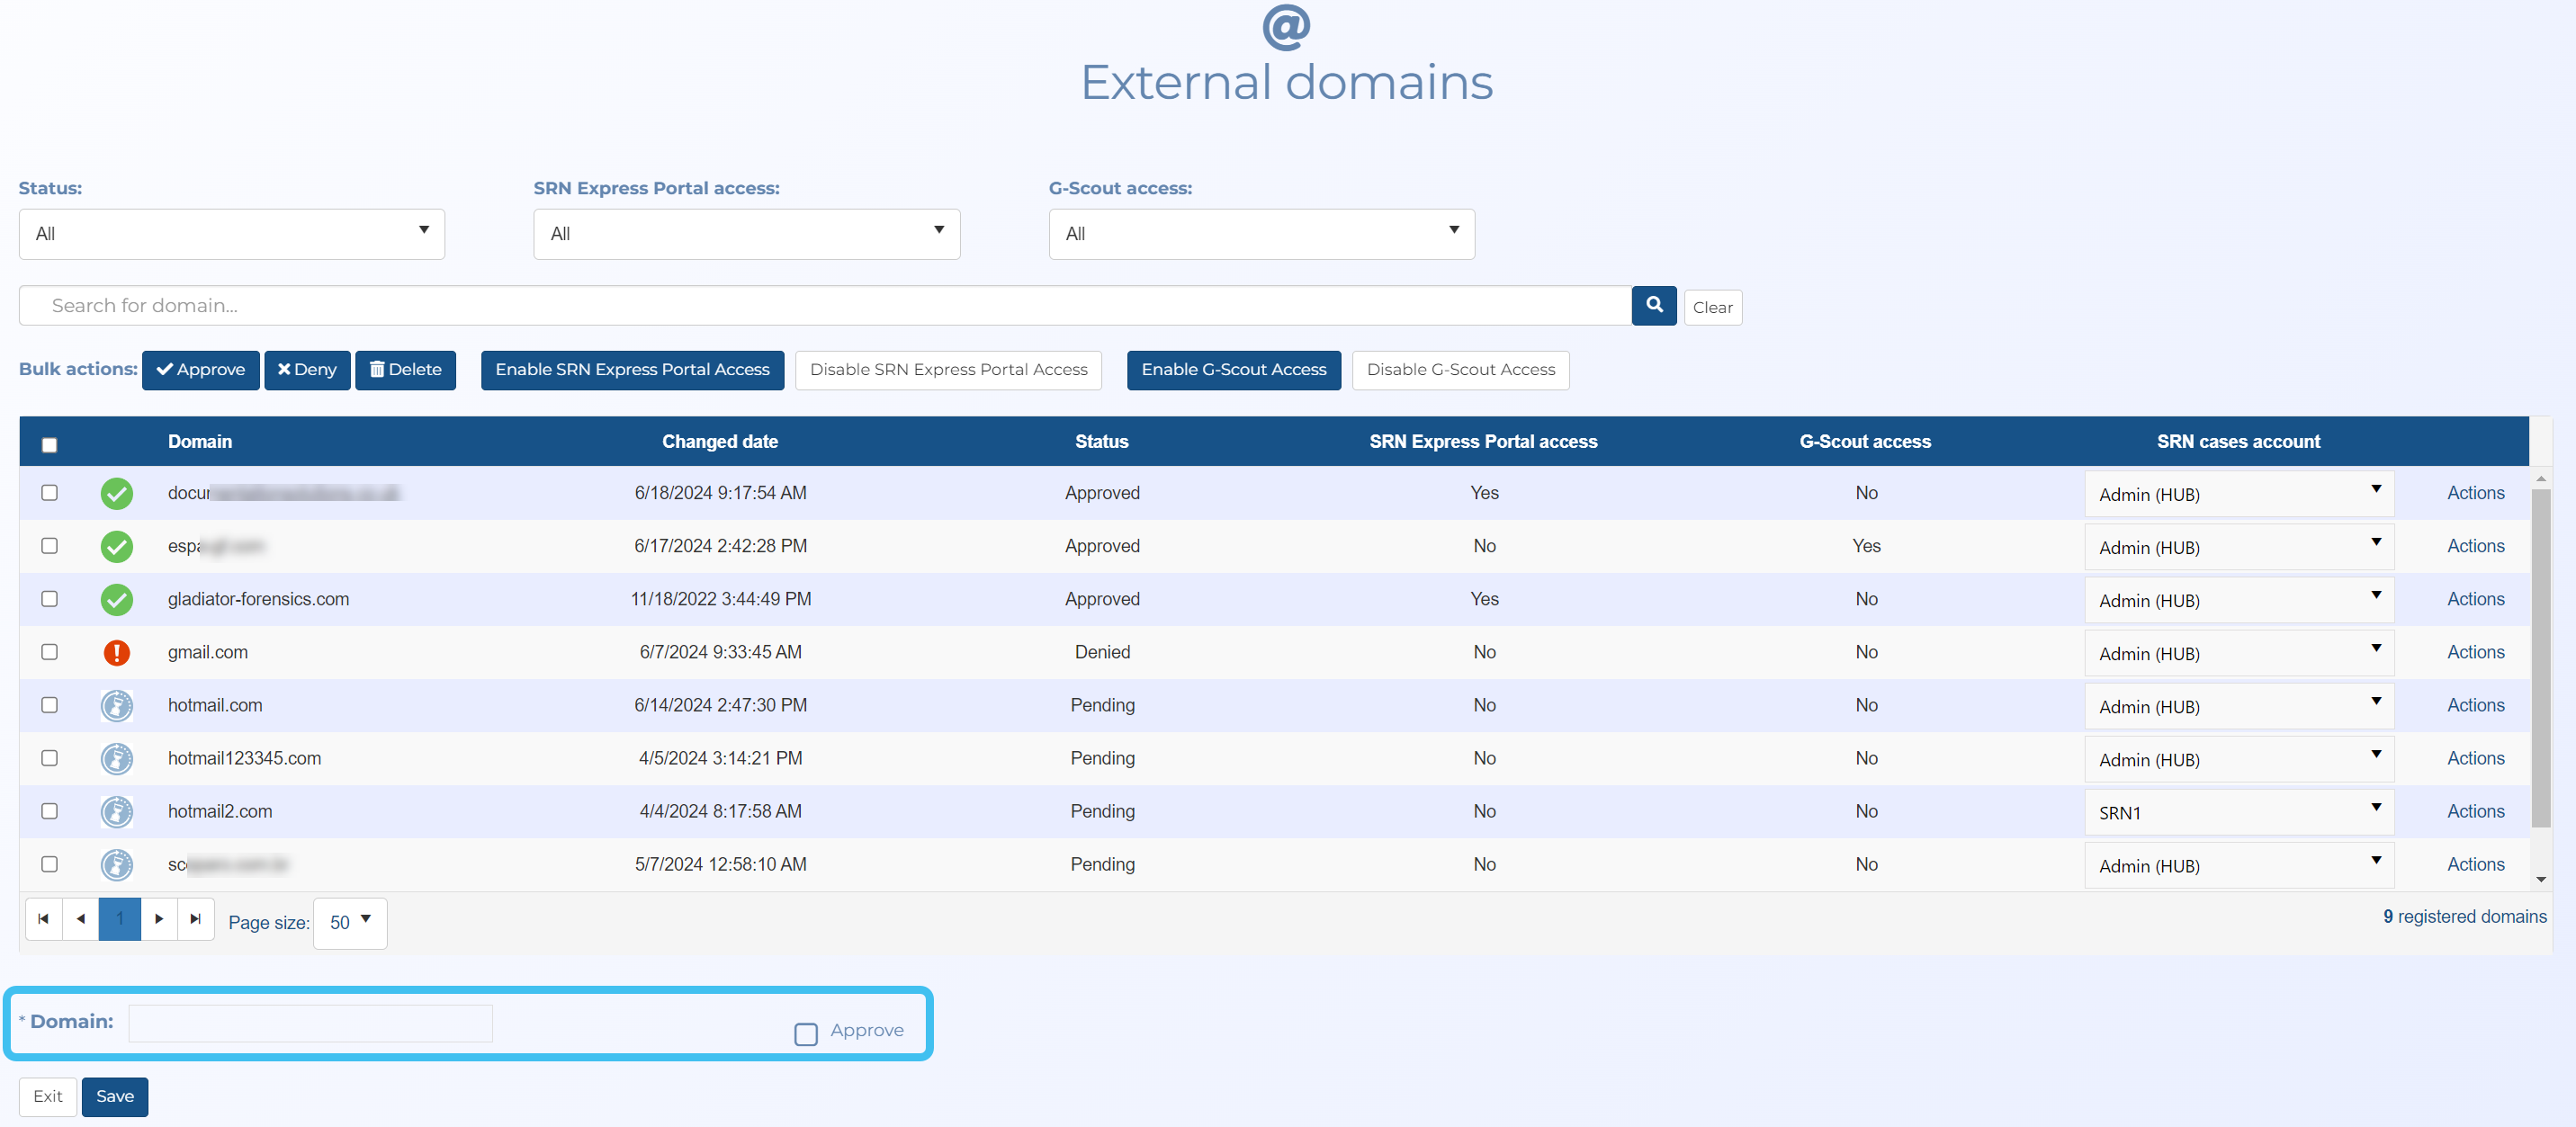
-
Click Save.
NOTE: If a person with an unrecognized domain attempts to sign into OSS-ESPA then you will receive an email with a link to the External domains screen requesting that you approve or deny the domain access. On the External domains screen, click Actions and select the appropriate menu item.
-
On the main menu click Settings, then click Admin settings.
The Admin settings screen opens.
-
In Manage external viewers click Registered viewers.

The Registered viewers screen opens.

-
In Email enter the person's email address you want to allow access, then select Approve to automatically approve the new email.
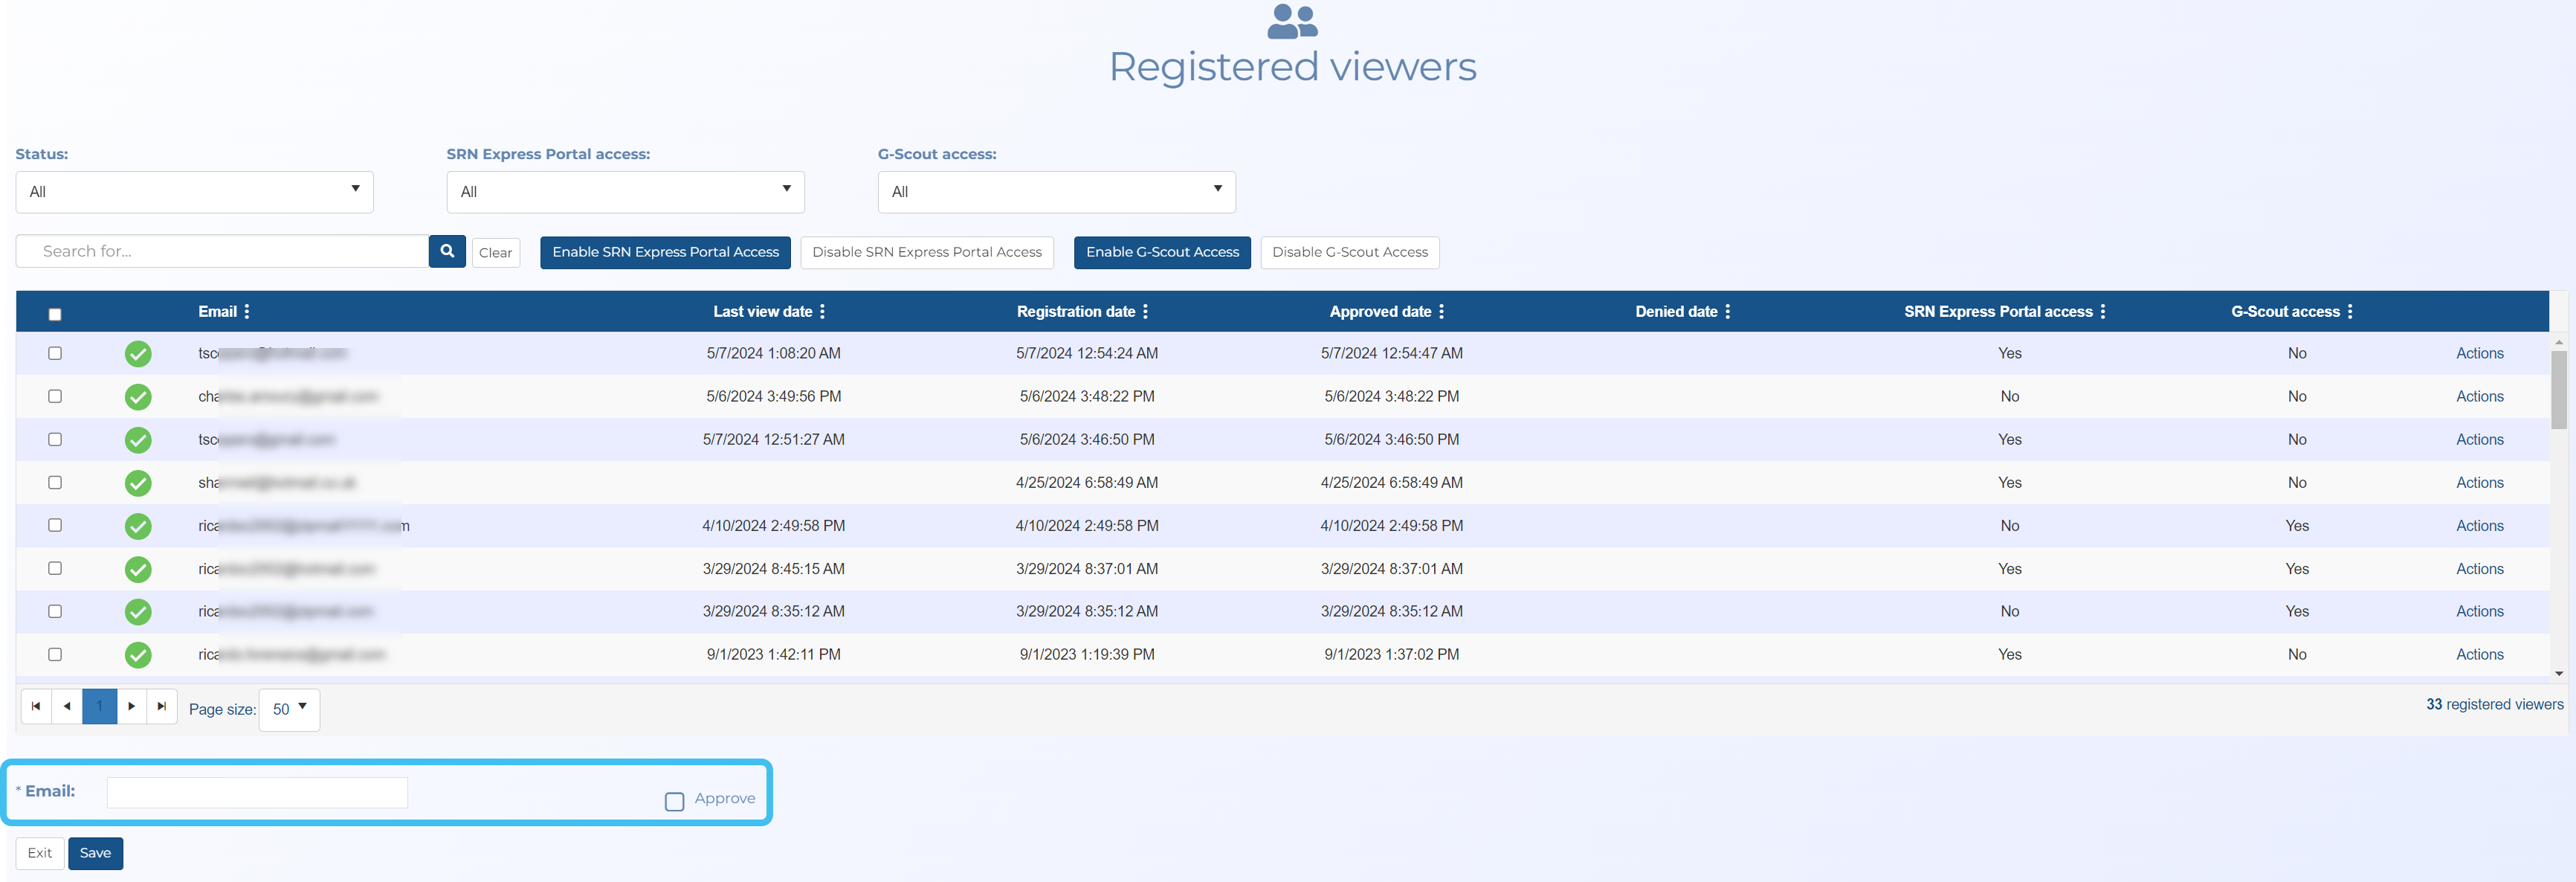
-
Click Save.